Questionnaires
In DefectDojo, a Questionnaire is a reusable set of questions that collects information from developers, teams, and both internal and external stakeholders. They can be used to gather input before work begins, ensure alignment between individuals and teams as work progresses, and enable retrospective analysis once work has been completed.
Questionnaire Templates
A Questionnaire template defines the structure and content of the Questionnaire, including its name, description, and associated Questions. Creating a Questionnaire template does not automatically make it available for responses. To collect responses, a Questionnaire template must be deployed as either a General Questionnaire or a Linked Questionnaire.
General and Linked Questionnaires
General and Linked Questionnaires differ in several ways, including how they are distributed, who can respond, and where responses are stored.
| General Questionnaires | Linked Questionnaires |
|---|---|
| Require publication | Don’t require publication |
| Require an expiration date | Remain active if Engagement is still active |
| Permit anonymous responses | Don’t permit anonymous responses |
| Are shareable internally and externally | Are only shareable internally |
| Do not permit changing responses | Permit changing responses |
| Responses are only visible upon expiration | Responses are visible immediately |
| Responses are visible in “All Questionnaires” | Responses are visible within the Engagement |
| Can be converted into an Engagement | Is already linked to an Engagement |
Questionnaire Deployment Lifecycle
Questionnaire templates follow different lifecycles depending on deployment type:
General Questionnaires Template → Published → Accept Responses → Expire → Optional Conversion to Engagement
Linked Questionnaires Template → Linked to Engagement → Accept Responses → Remain active while Engagement is active
Response Separation
A single Questionnaire template can be deployed multiple times simultaneously, both as a General and Linked Questionnaires. Each deployment creates its own independent set of responses.
If the same Questionnaire template is deployed as a General Questionnaire and is also linked to an Engagement, responses submitted through each deployment are stored independently and are not combined. This allows the same Questionnaire template to be reused across different contexts while separating response sets.
Accessing Questionnaires and Questions
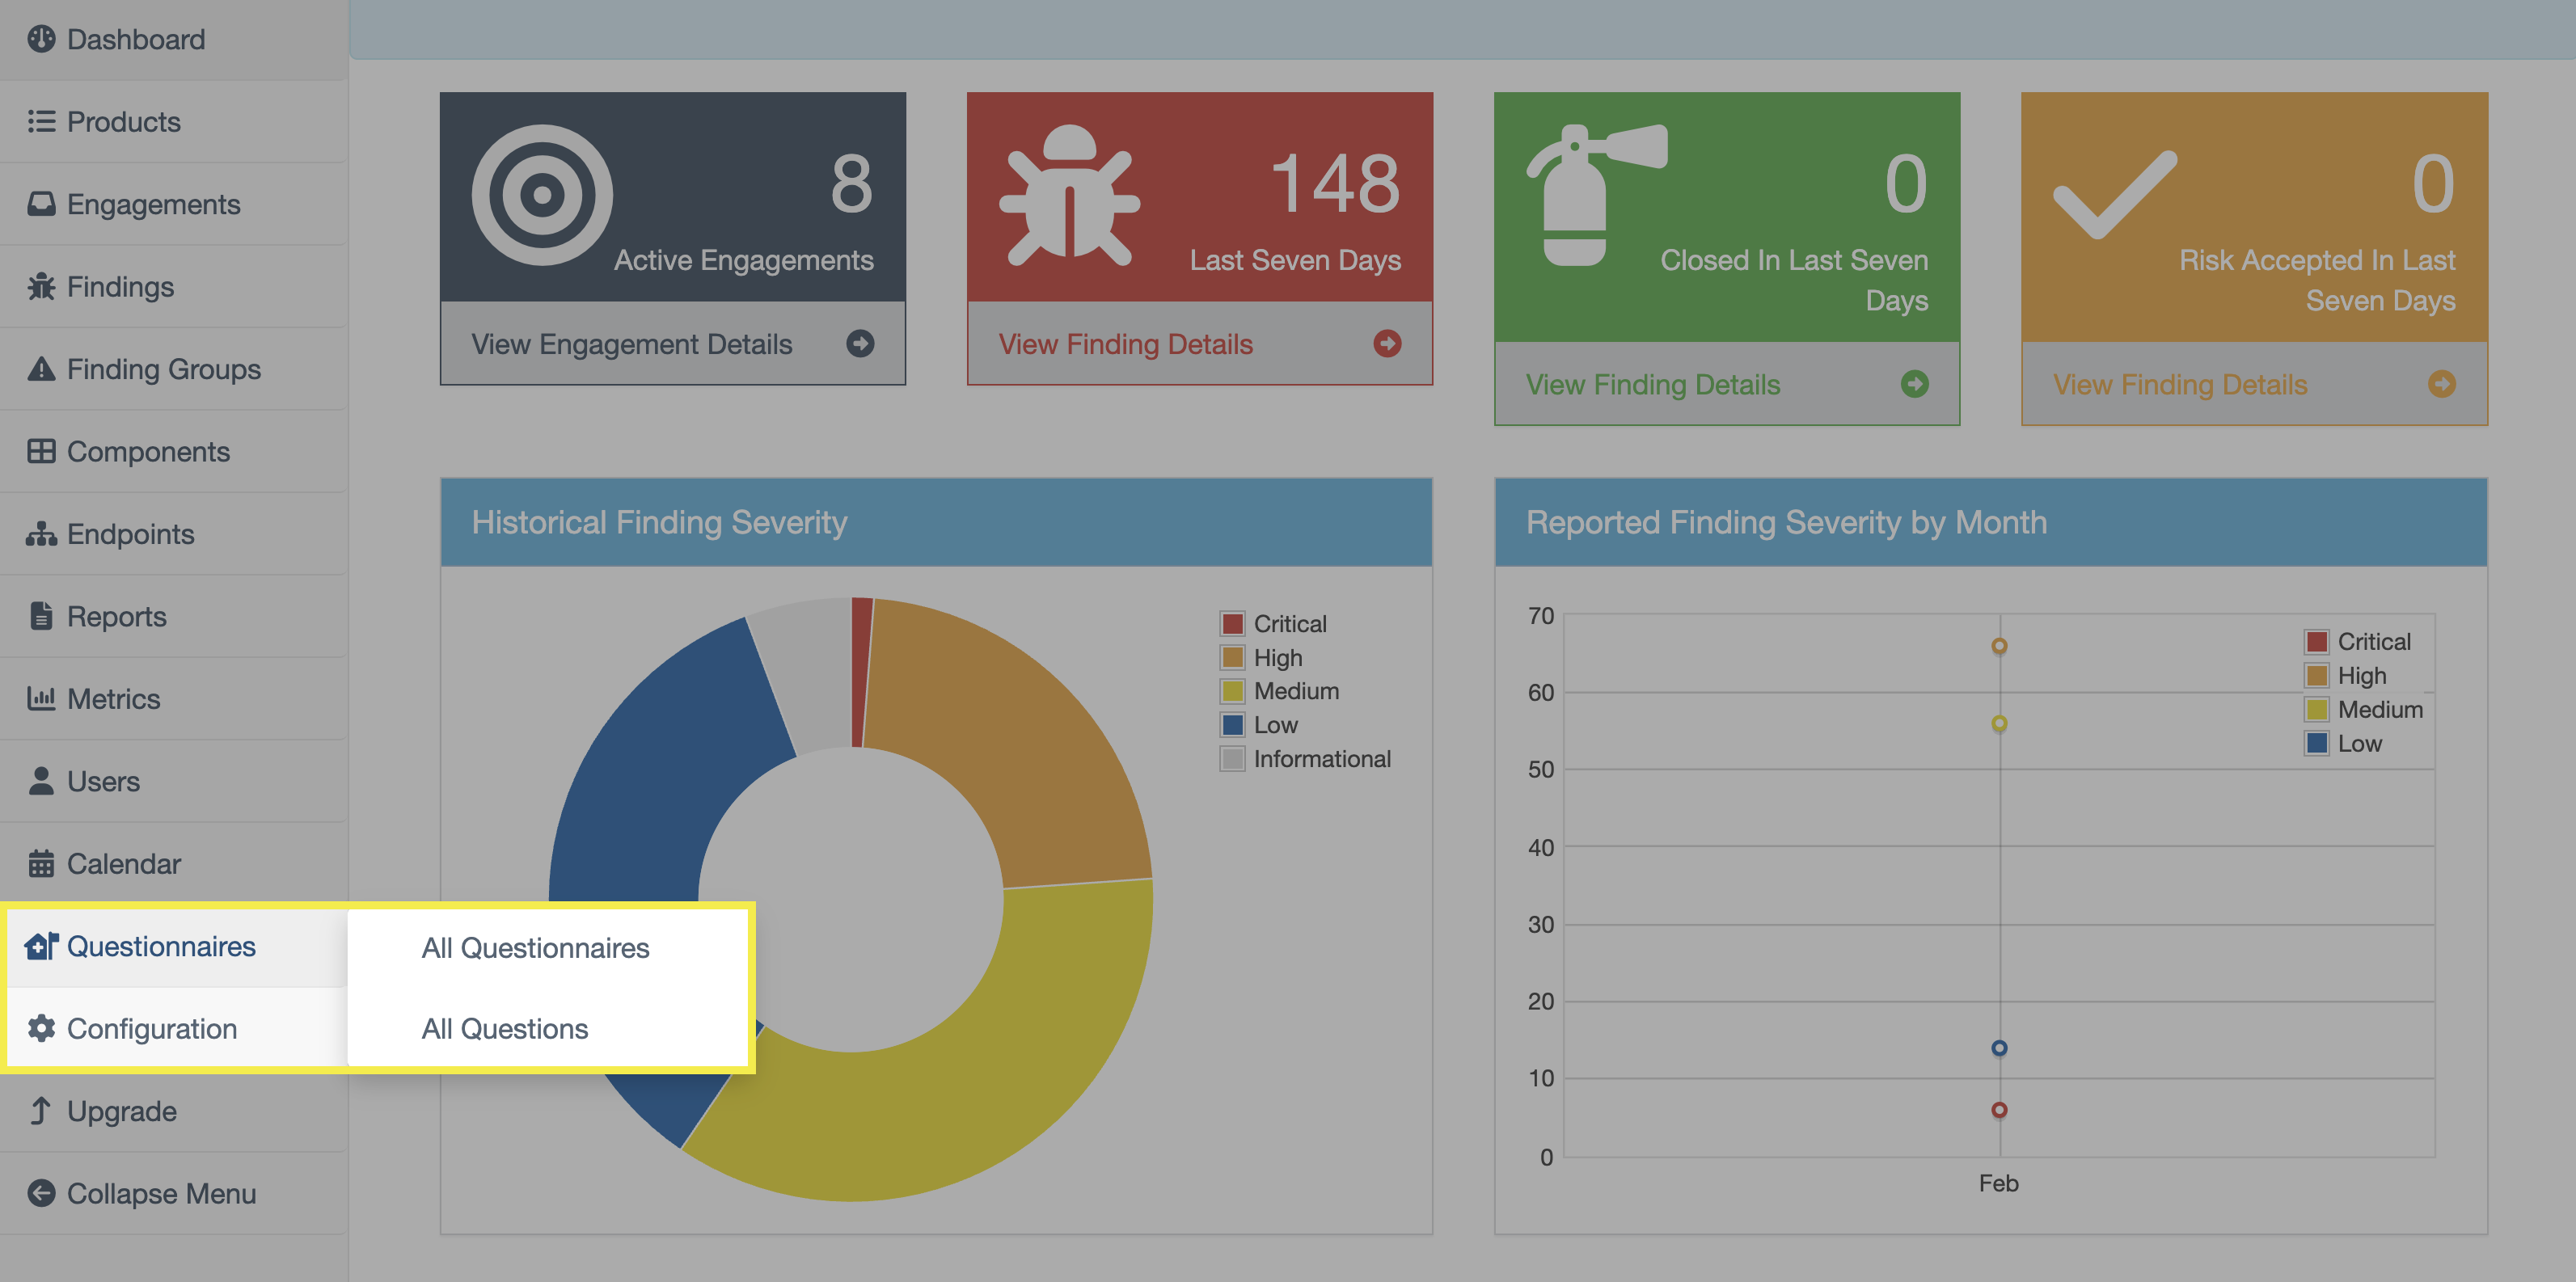
Questionnaires and Questions can be accessed from the sidebar by clicking the Questionnaires option. The submenu provides access to All Questionnaires and All Questions.
Notably, access to the All Questionnaires and All Questions views is restricted to Users with Superuser status. Only Superusers can create Questionnaire templates, create Questions, and deploy Questionnaires. Users without Superuser status can still respond to General Questionnaires that are shared with them and also respond to the Linked Questionnaires of Engagements they have access to, but they cannot create or manage them.
Questionnaires
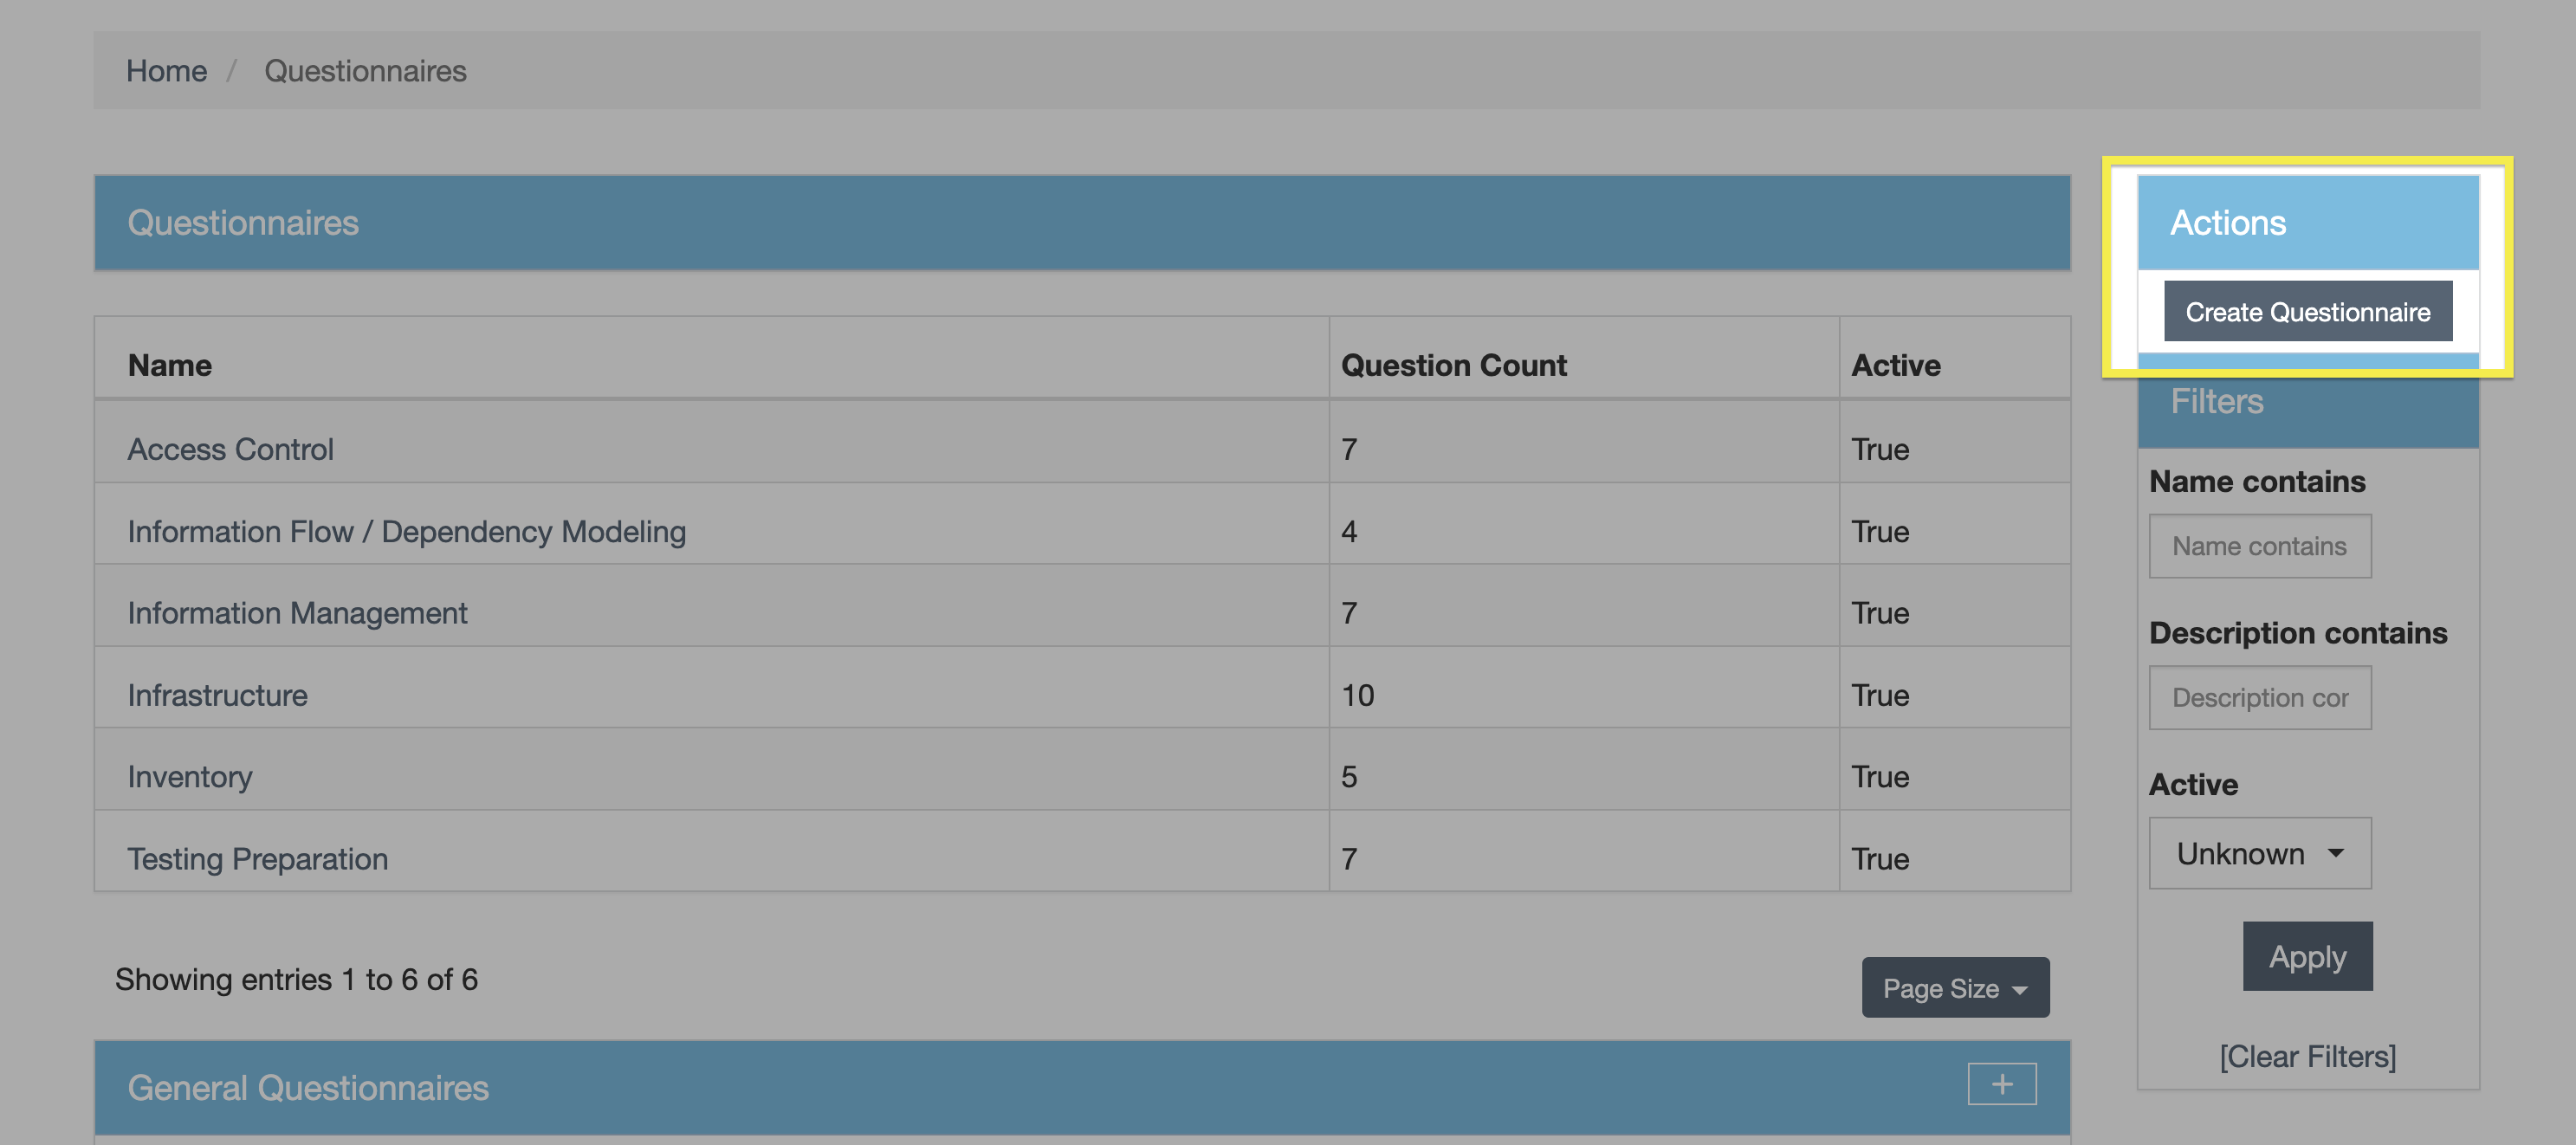
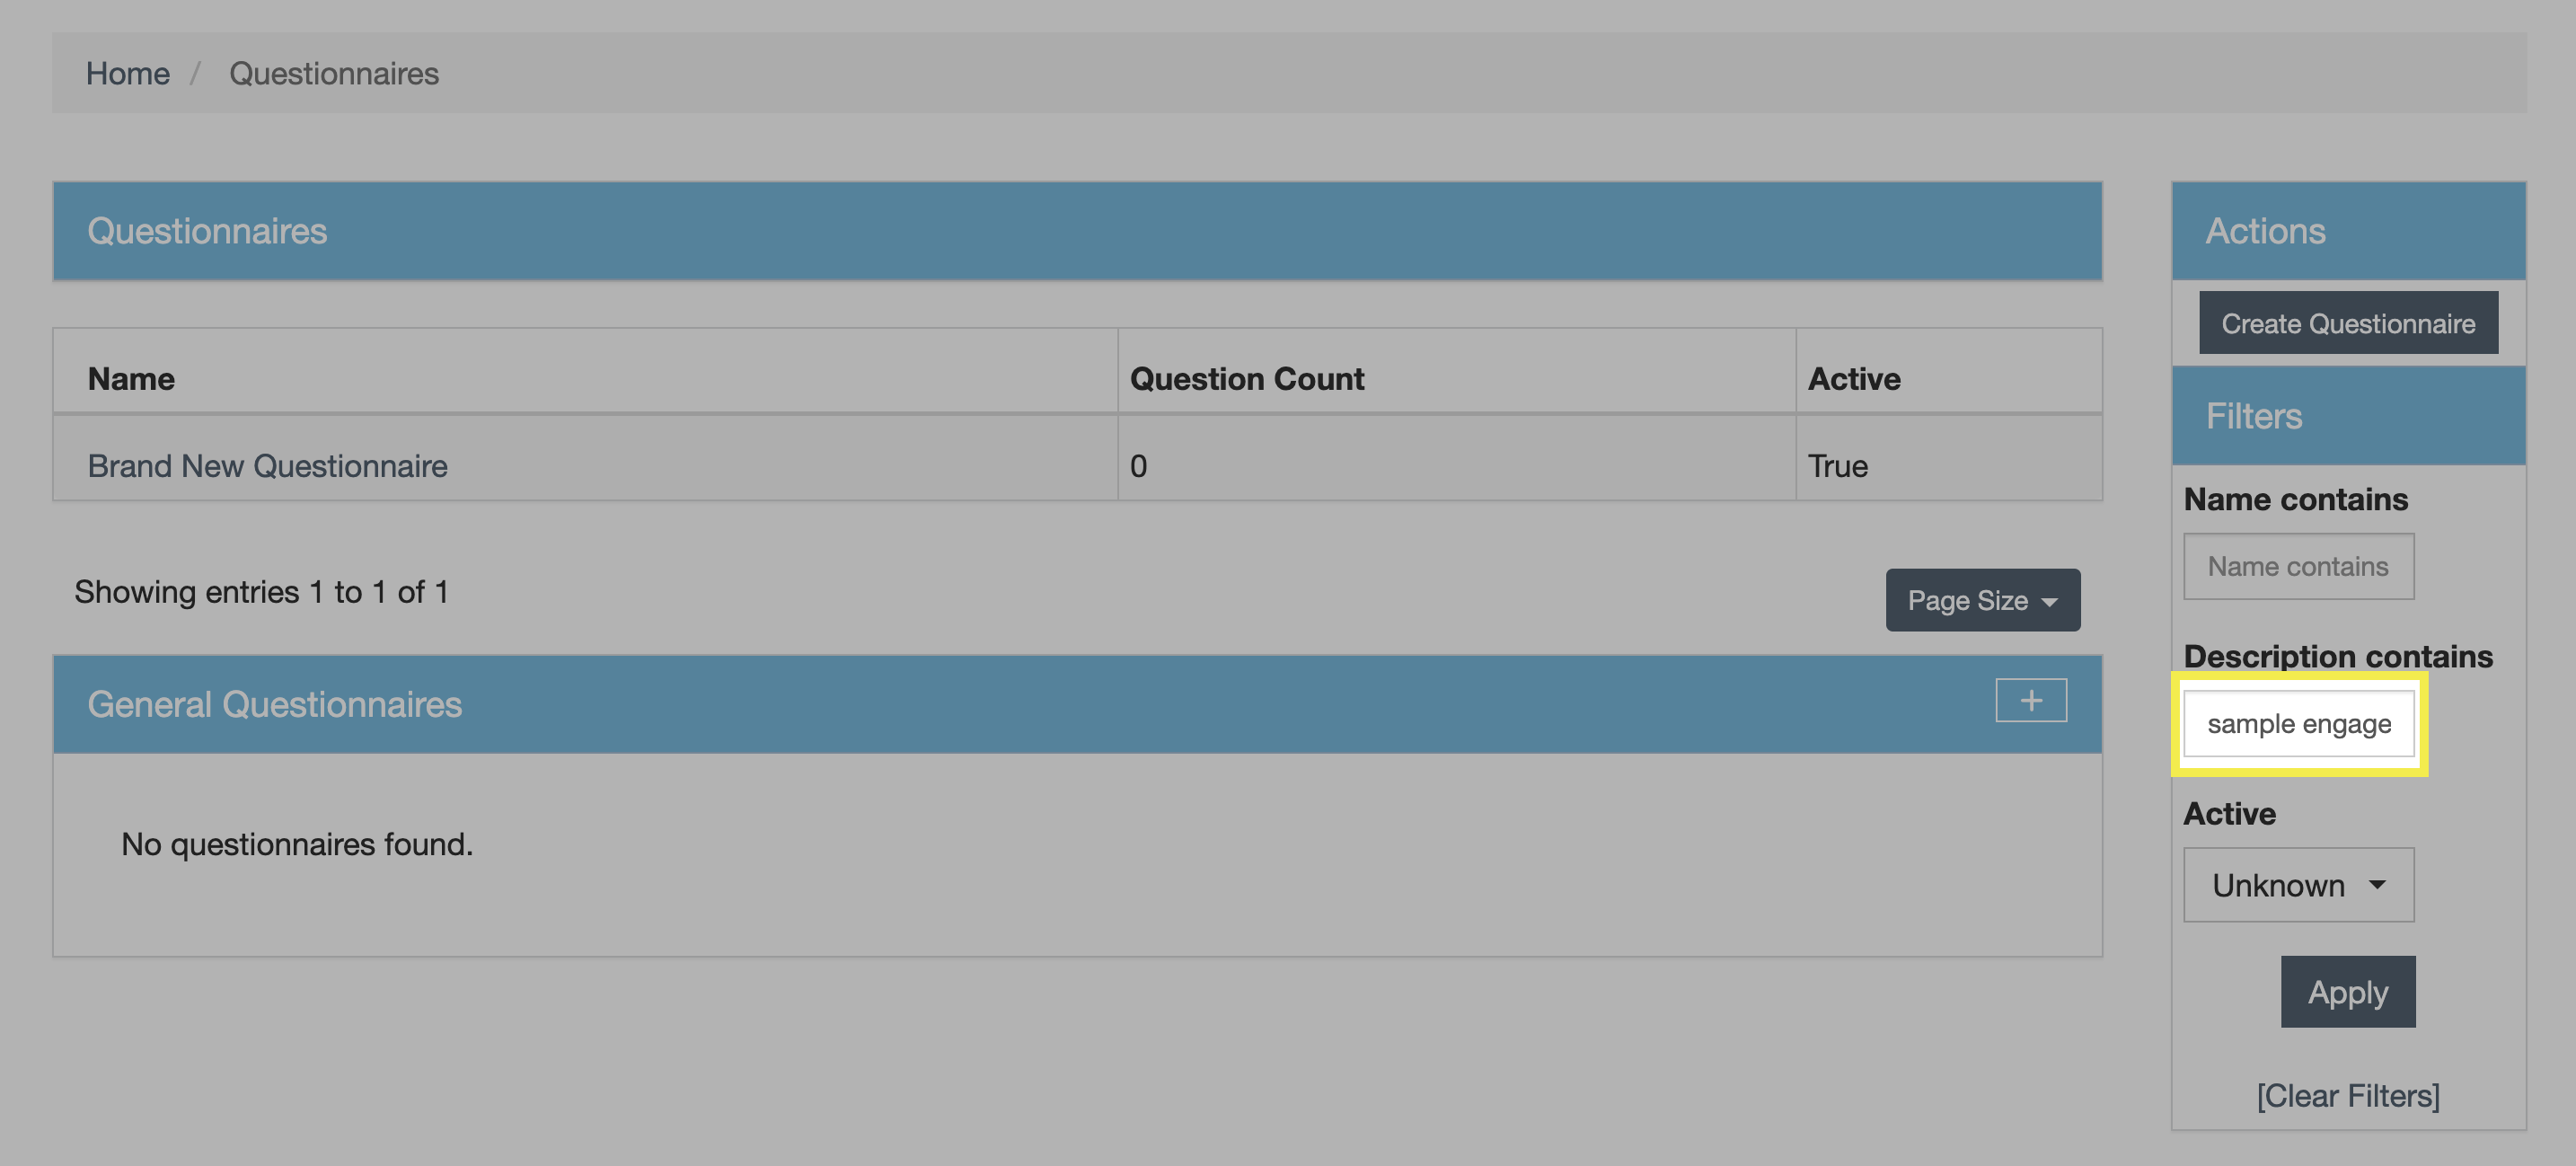
The view for All Questionnaires includes two tables:
- Questionnaires
- This section includes all existing Questionnaire templates.
- General Questionnaires
- This section includes all General Questionnaires that are currently open to responses.
Both sections can be filtered by name, description, or active status.
Questions
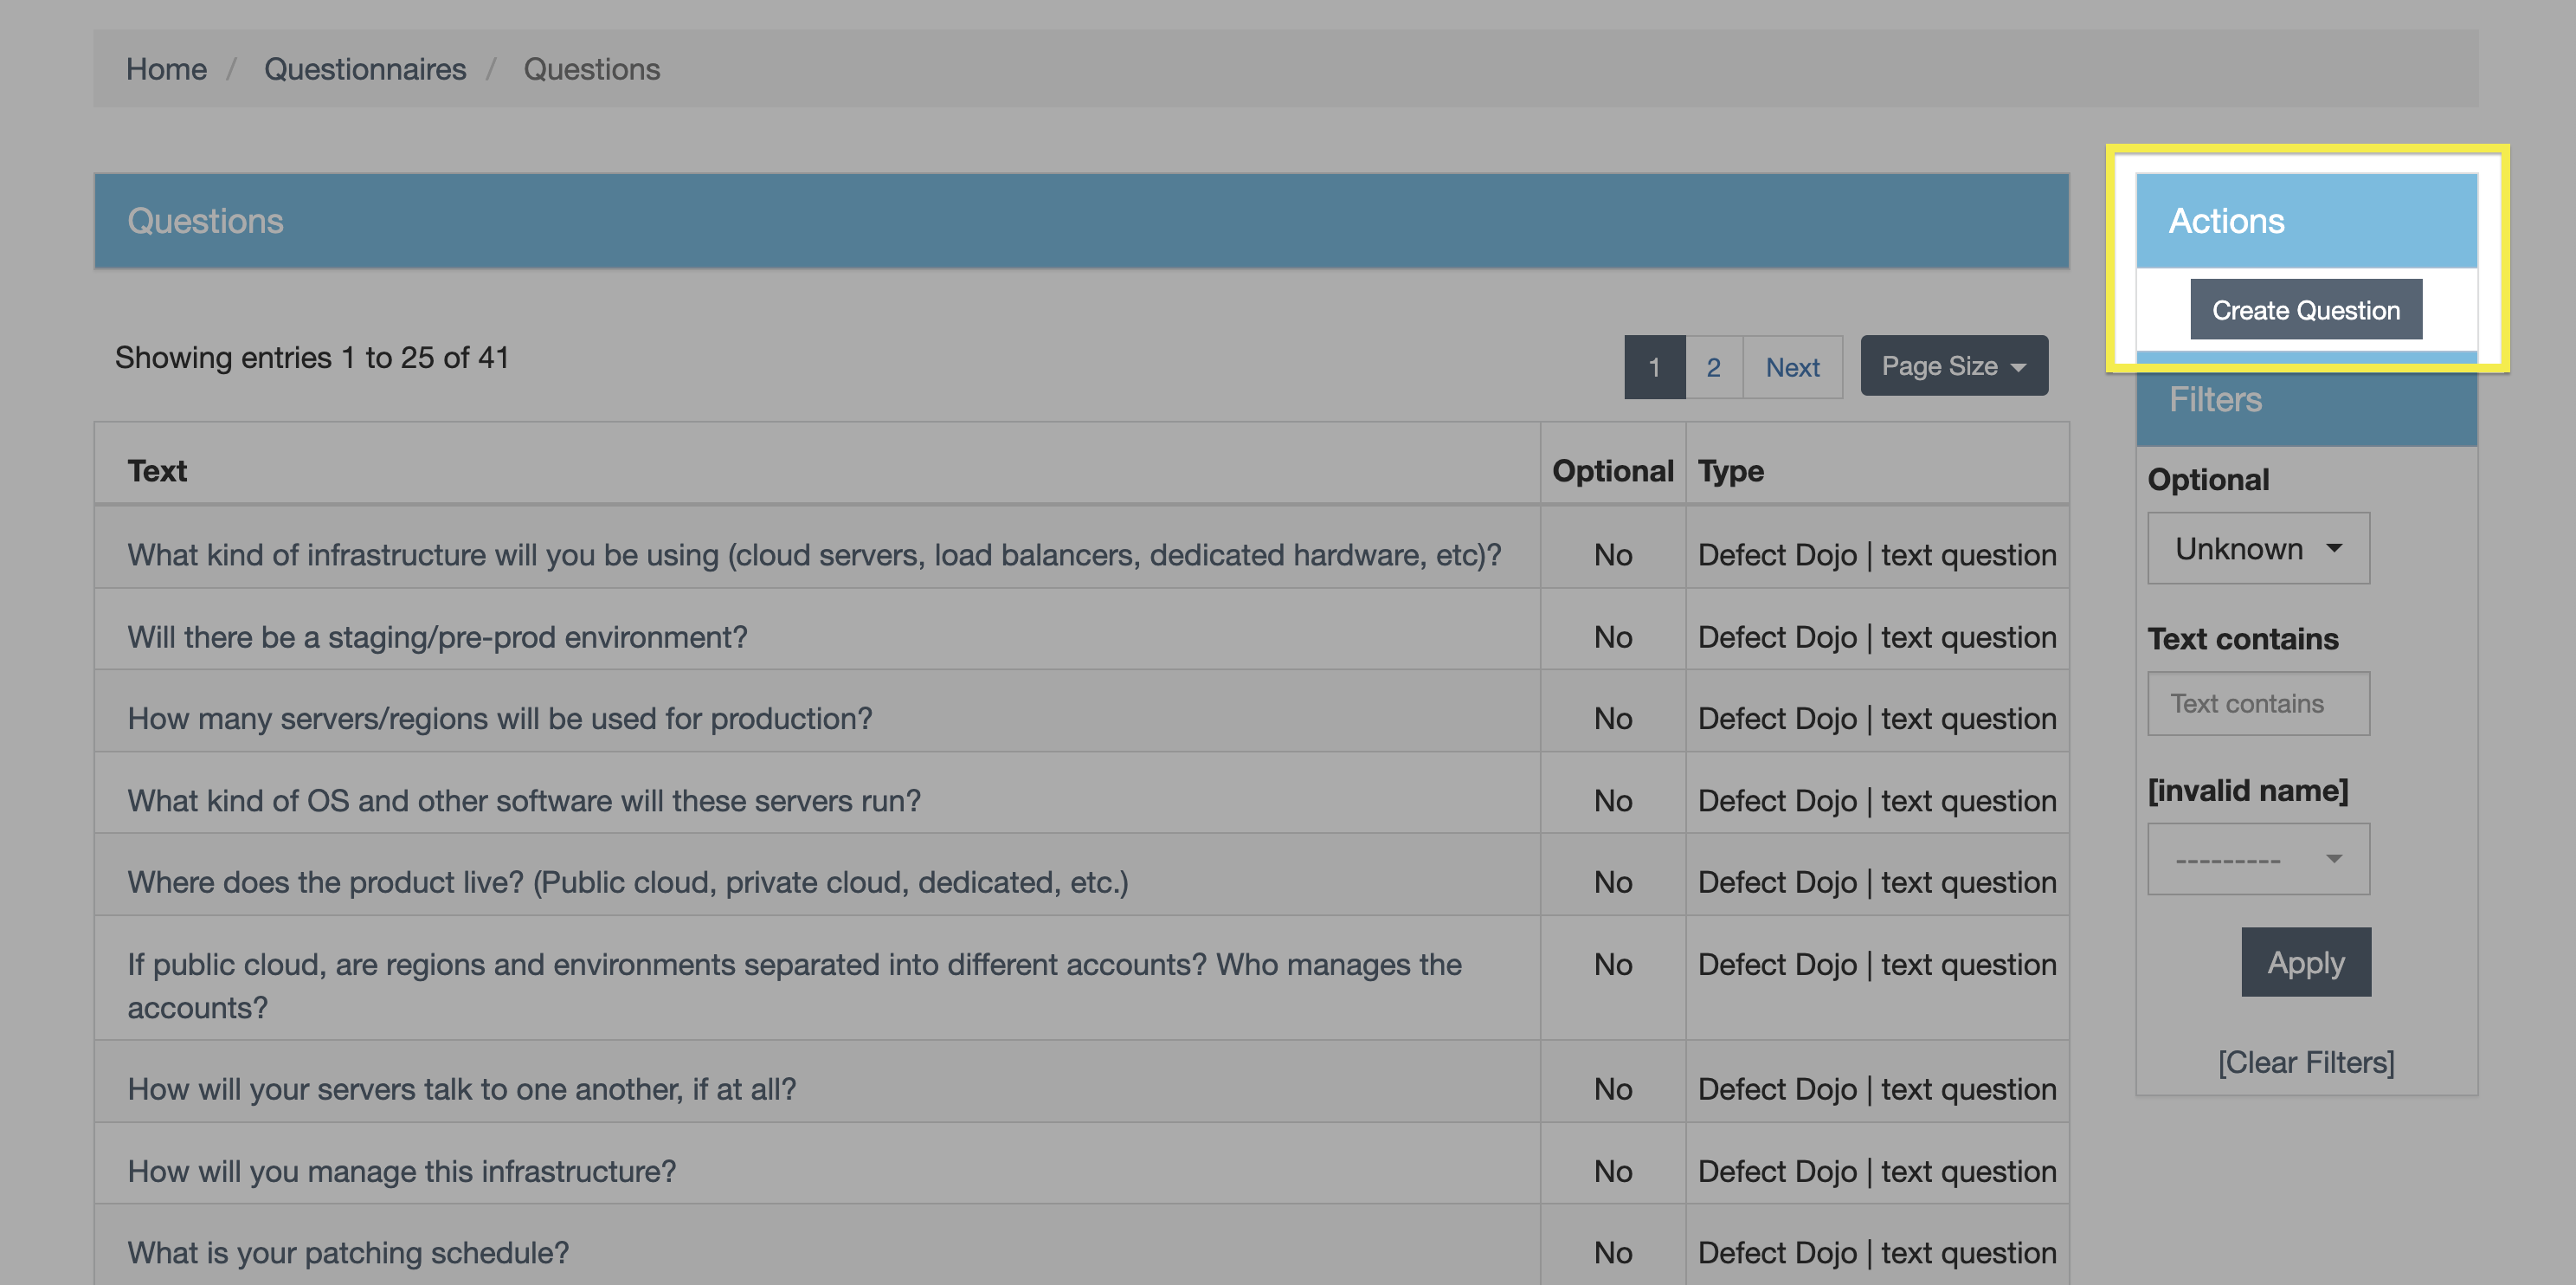
The view of All Questions includes a table of Questions that can currently be added to a Questionnaire. It can also be filtered by each Questions’ optional status, contents, or question type (e.g., text question or multiple-choice question).
Managing Questionnaire Templates
Create Questionnaires
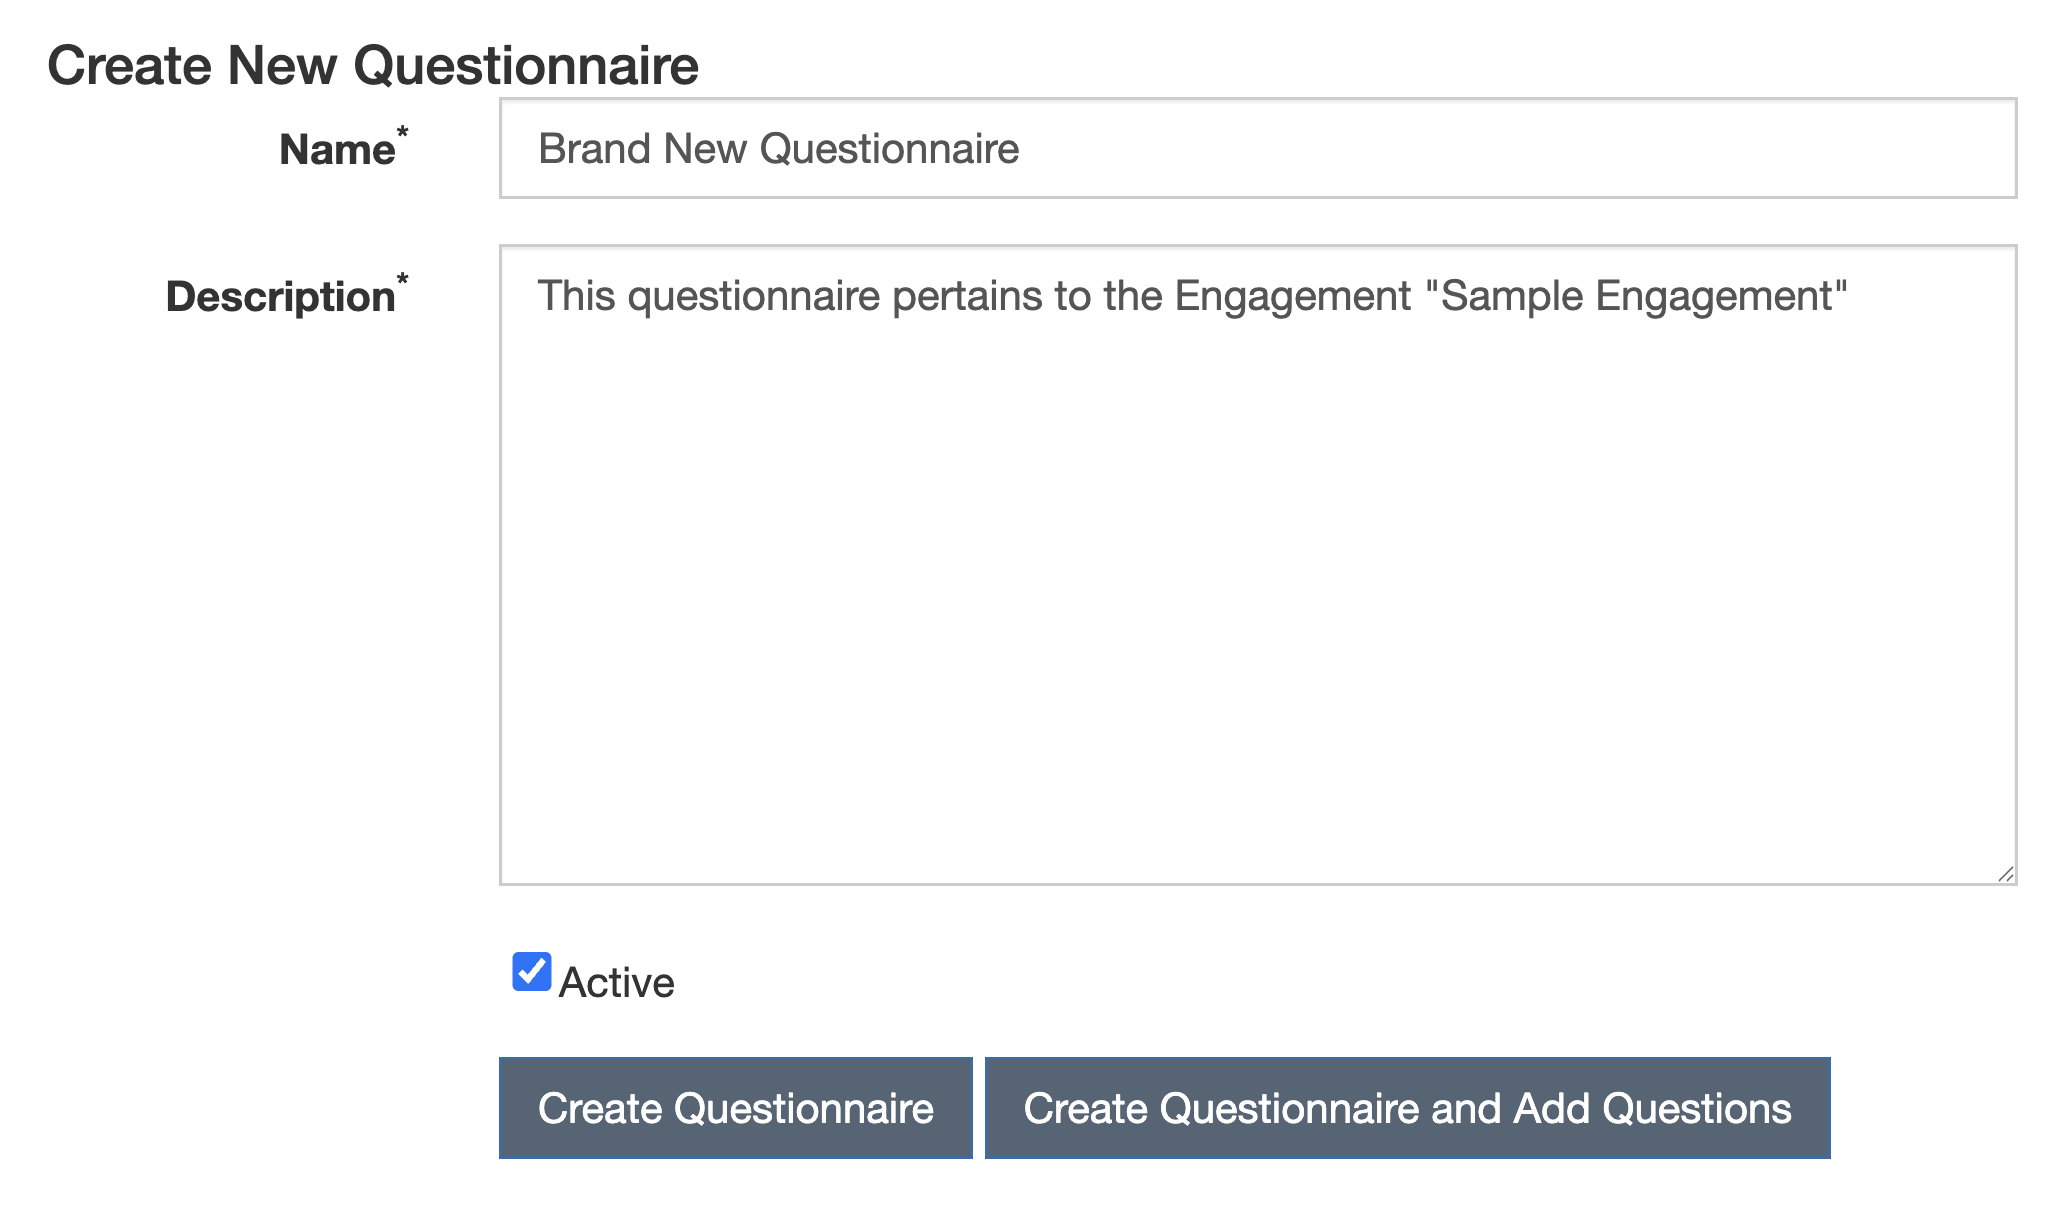
New Questionnaires can be created using the Create Questionnaire button in the All Questionnaires view.
After including a name and description, the Questionnaire can either be created without Questions (which can be added later) or Questions can be added immediately.
Immediately Add Questions to a New Questionnaire
If Questions are being added immediately, select all applicable Questions from the ensuing dropdown menu. You may also create a new Question to add to the Questionnaire by clicking the + sign to the right of the dropdown menu.
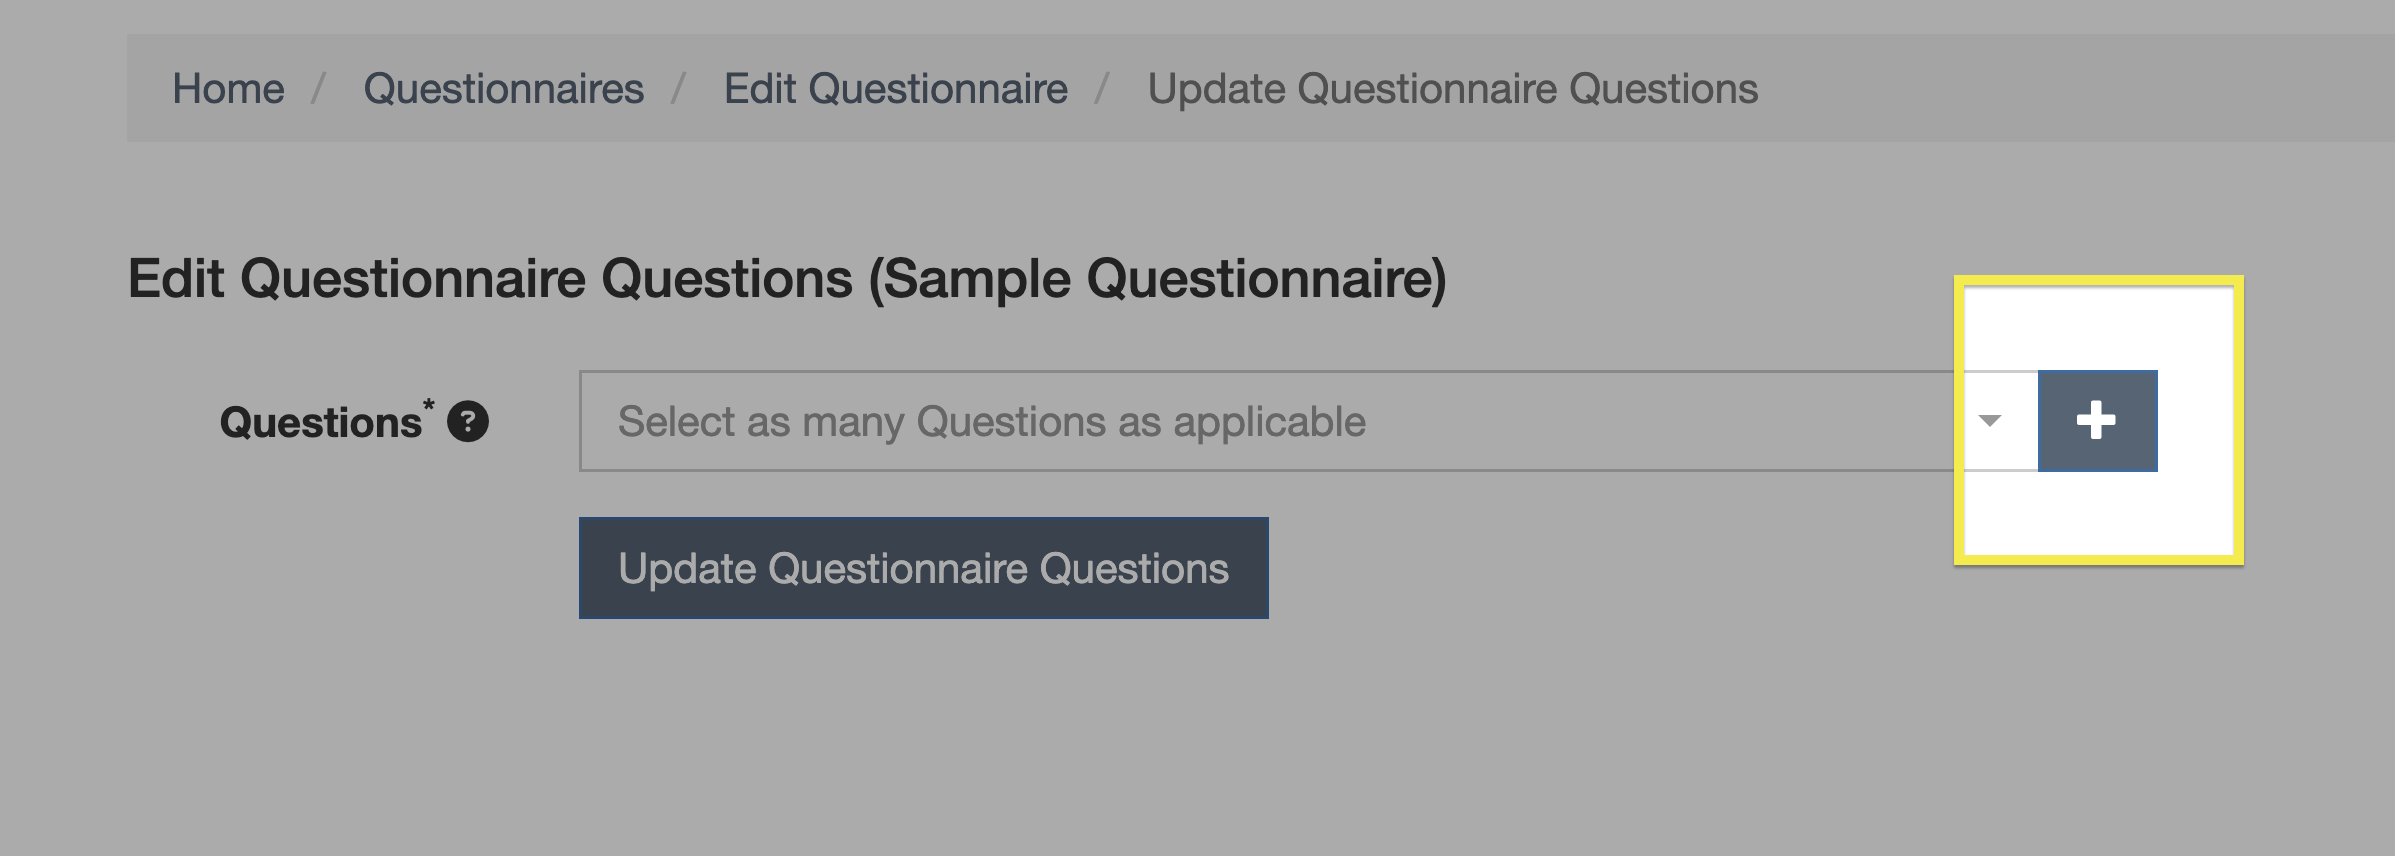
Once all applicable Questions have been selected, click Update Questionnaire Questions to add all selected Questions to the Questionnaire.
Add Questions to a Pre-Existing Questionnaire
To add Questions to a pre-existing Questionnaire, click the Questionnaire name in the Questionnaires table, click Edit Questions, select any new Questions to add to the Questionnaire from the dropdown menu, and then click Update Questionnaire Questions.
Create Questions
New Questions can be created using the Create Question button in the All Questions view.
Additionally, Questions can also be created when deciding which Questions to add to a Questionnaire by clicking the + sign to the right of the dropdown menu.
Question Types
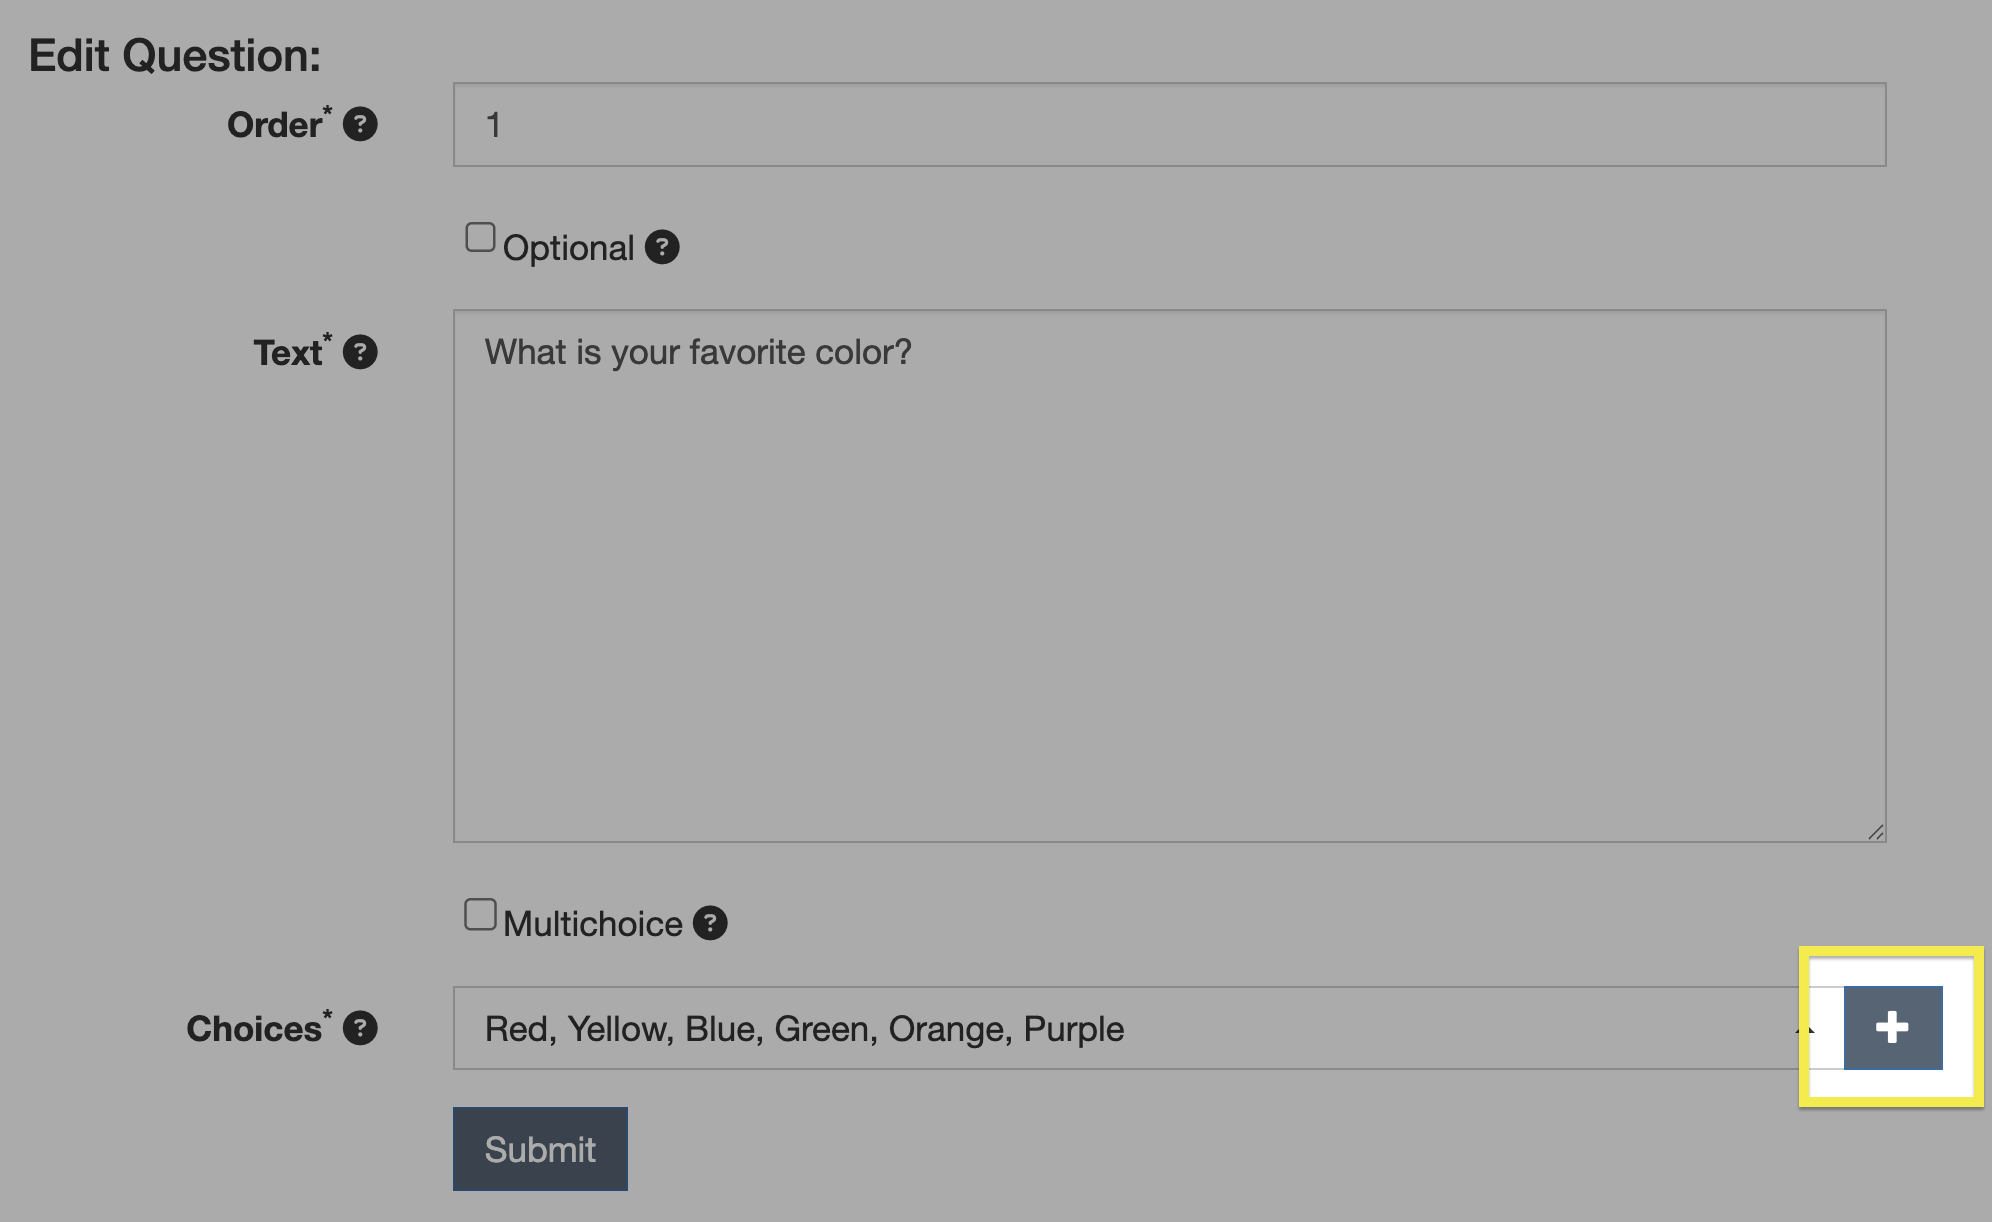
When creating a new Question, it can be formatted as either a text-based question or as a multiple-choice question by selecting either Text or Choice from the dropdown menu.
Allowing Multiple Answers and Optional Answers
The maximum number of allowable answers in a multiple-choice question is six. Clicking the Multichoice checkbox allows multiple answers to be selected (only available for multiple-choice questions). Questions may also be marked as Optional by clicking the corresponding checkbox.
See the Editing Questions section for how to add additional answers to a multiple-choice question.
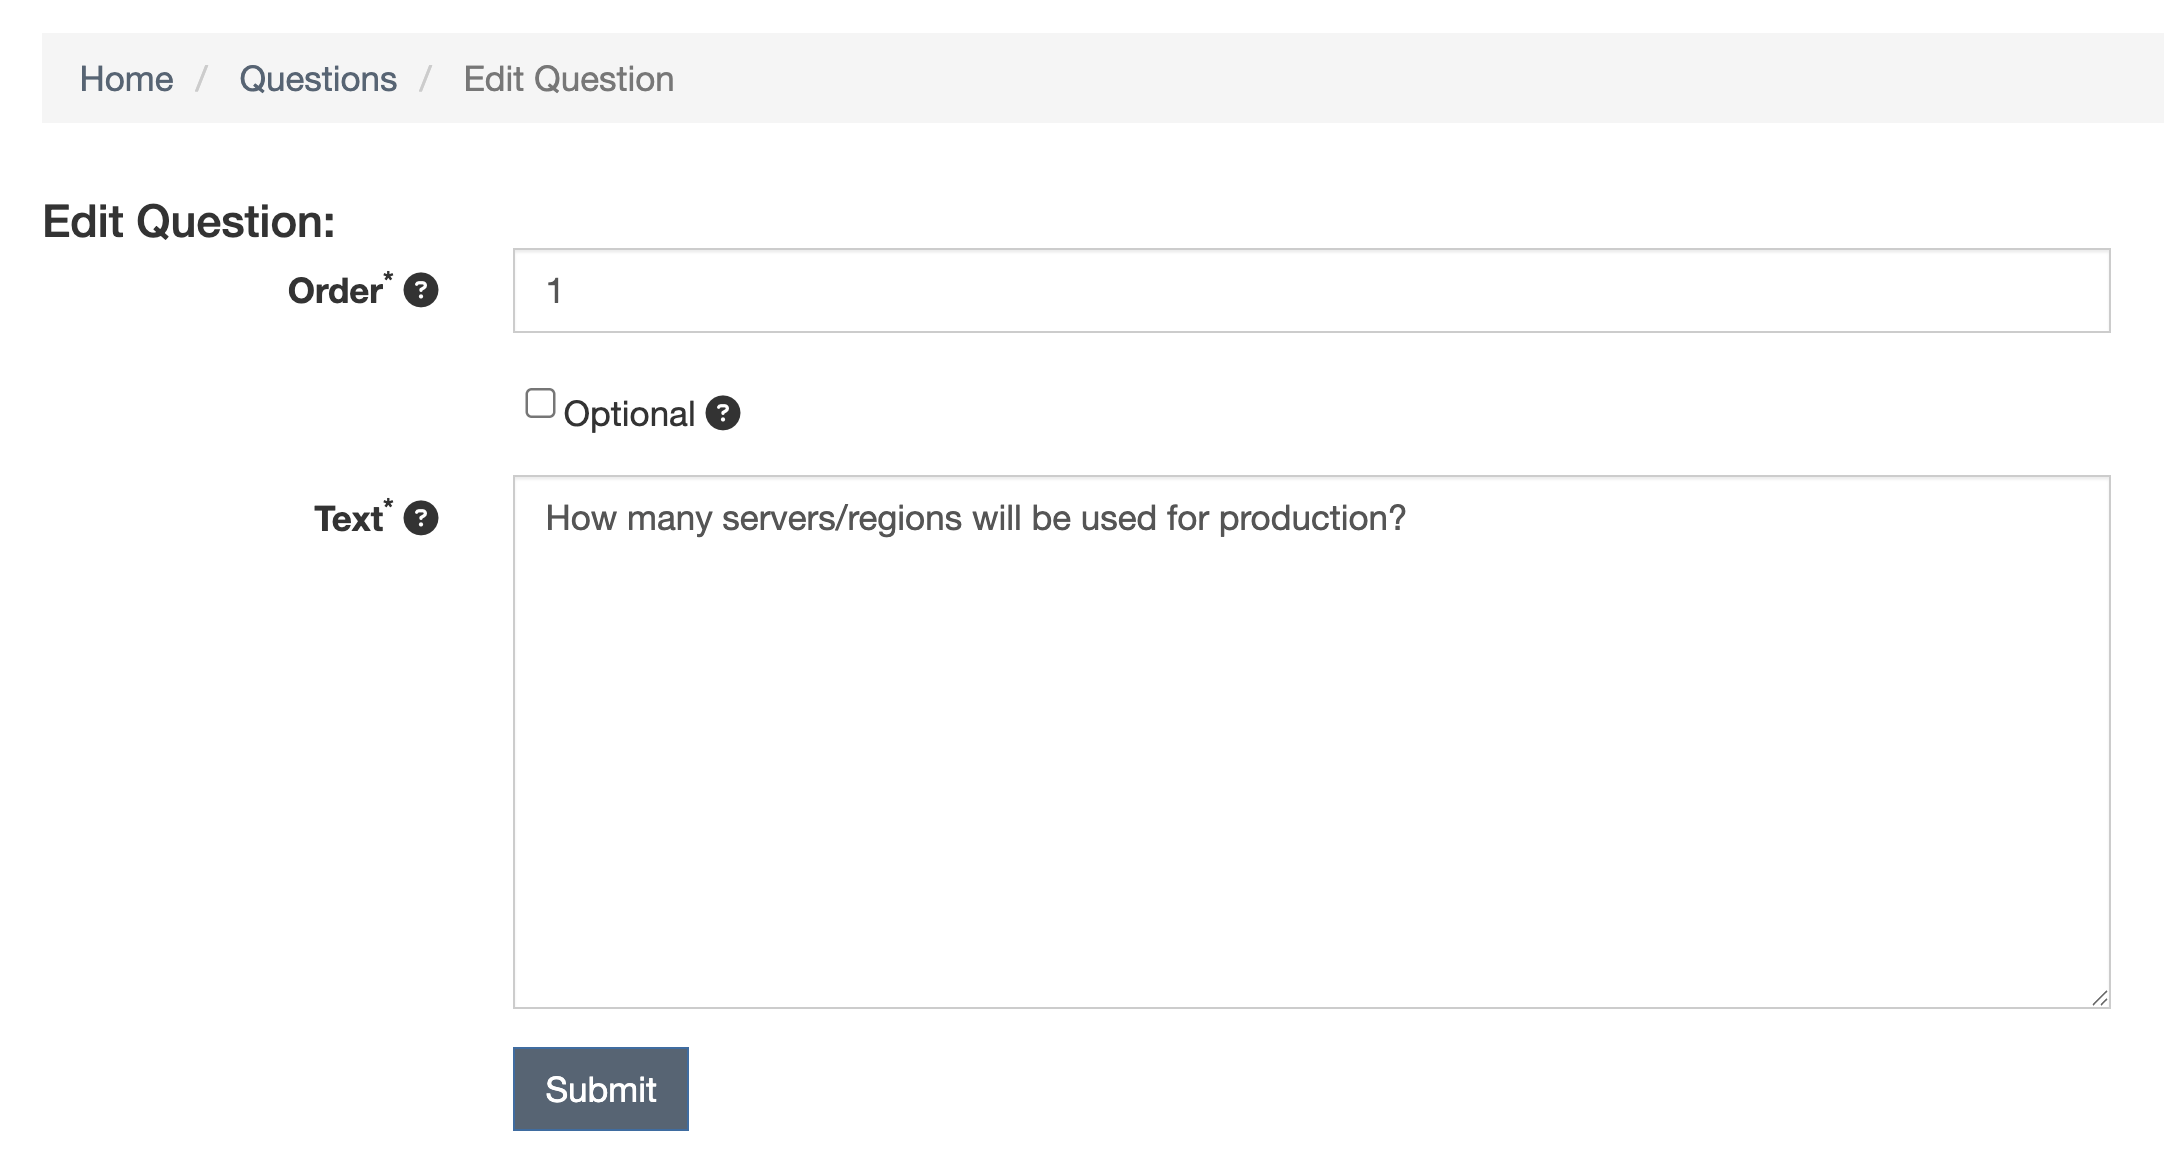
Question Order
Determine the order of a Question by giving it an order number. For example, if a Question has 1 in the Order field, that Question will appear above a Question with 2 in the Order field.
Editing Questions
Once a Question has been created, it can be edited by accessing the All Questions submenu and clicking the Question to be changed. Questions can’t be deleted.
It is important to avoid editing Questions that are a part of active Questionnaires. If any part of a Question is changed (e.g., order, optional status, correcting a typo, adding a possible answer, etc.) and that Question was a part of an active Questionnaire that has already had responses submitted, all previously submitted responses will be invalidated and responses will need to be resubmitted.
Editing Text Questions
After creation, the only changes that can be made to text-based Questions are the order, the optional status, and the phrasing of the question.
Editing Multiple-Choice Questions
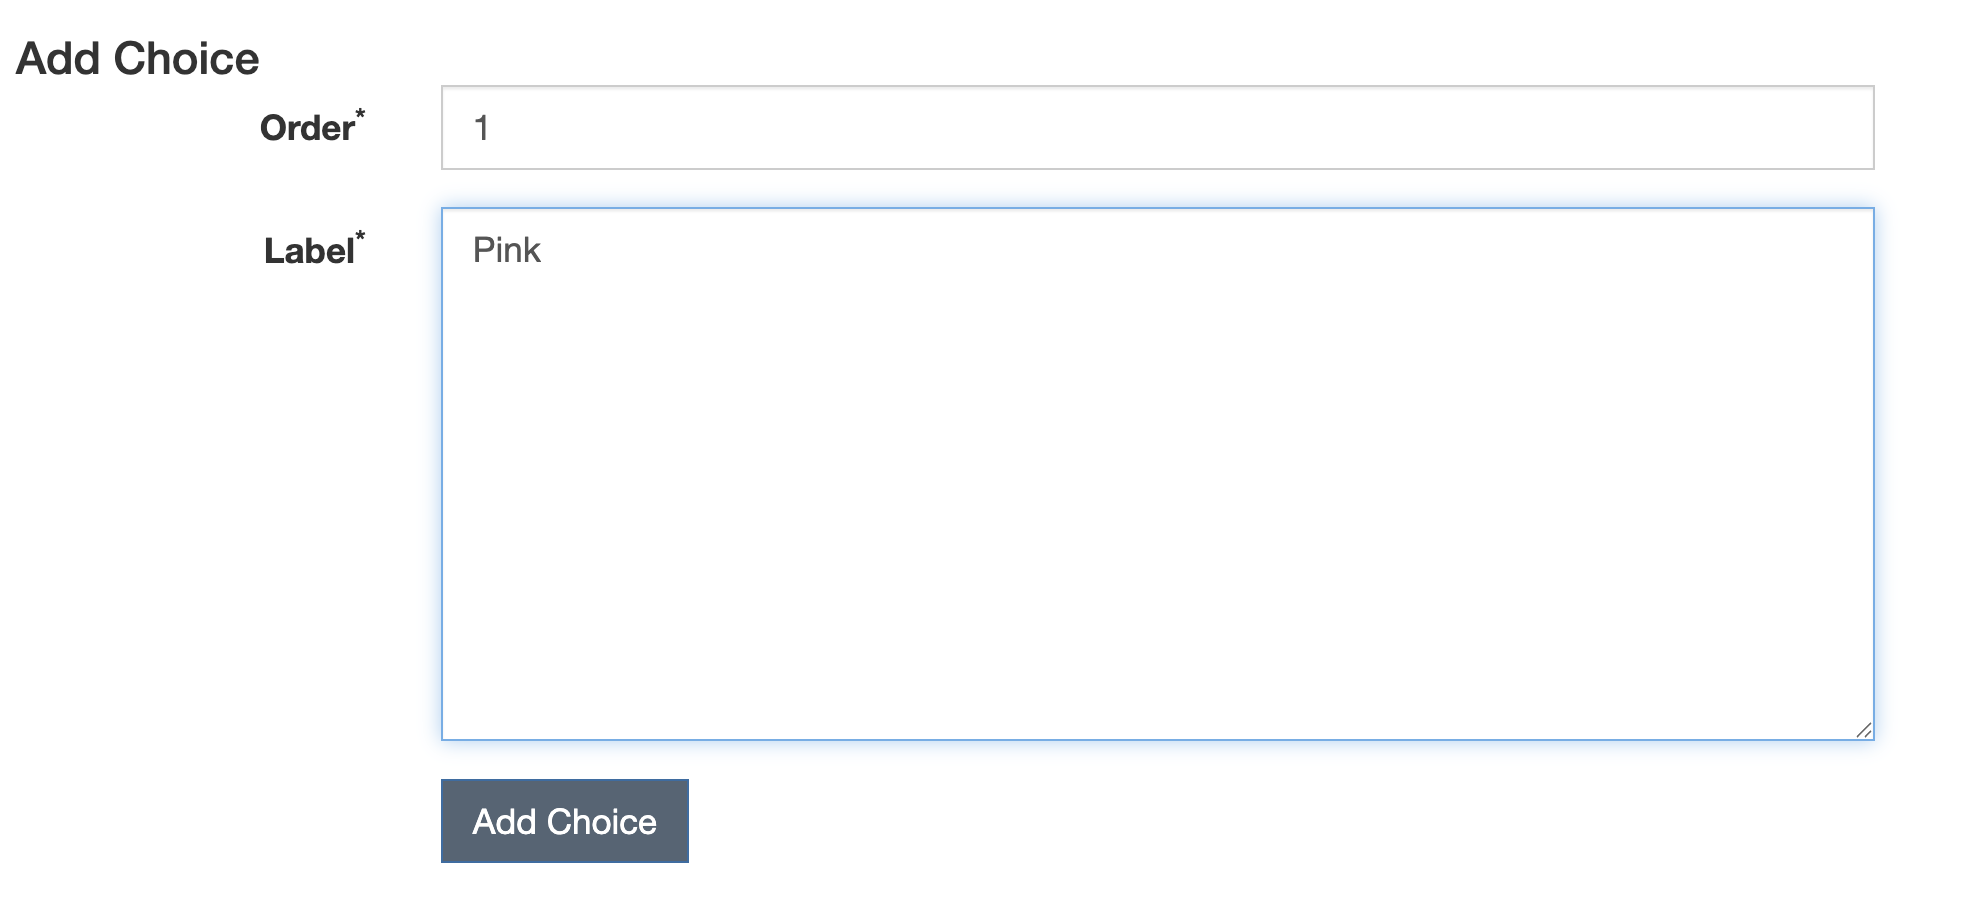
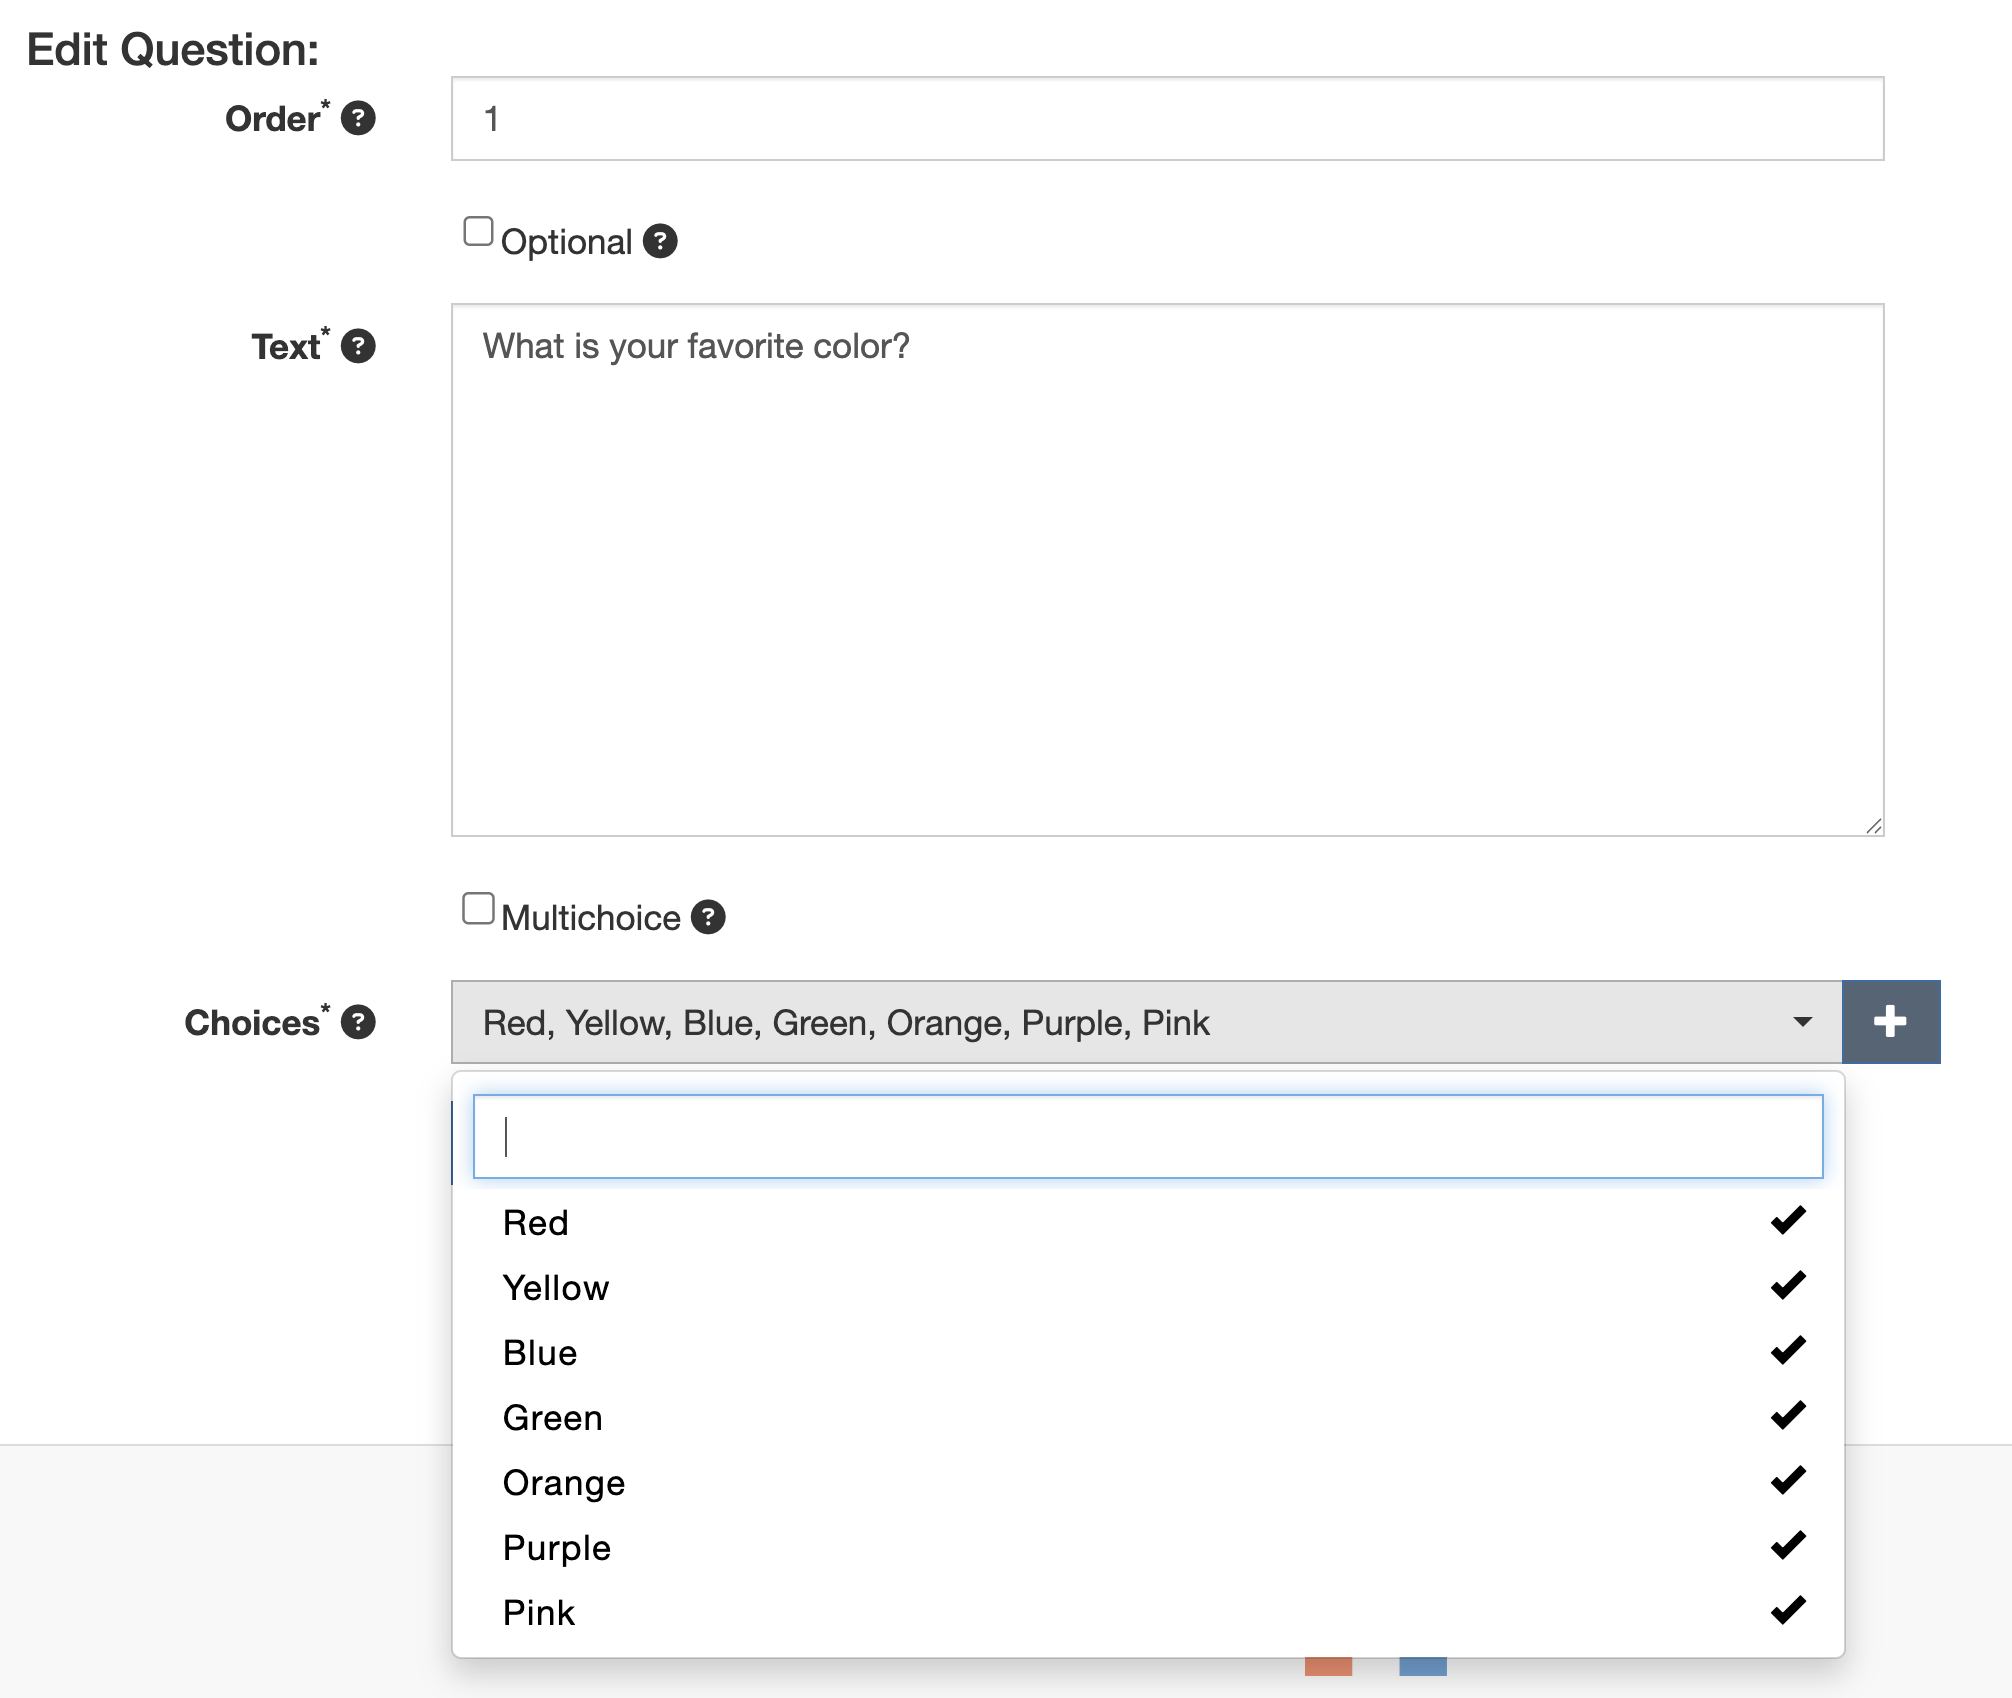
While the default number of possible answers to a multiple-choice question is six, this can be increased after the Questionnaire has been created. To do so, click the Question in the All Questions view, click the + sign to the right of the Choices dropdown menu, add the new answer, and click Submit.
The newly created option will not be added to the Questionnaire automatically. To add it, click the Choices dropdown menu and select the newly added option. A check mark will appear next to it indicating that it is now included as a possible answer in the Questionnaire.
Deploying Questionnaires
Once a Questionnaire template has been successfully created, it can be deployed to accept responses. The deployment process is slightly different depending on the Questionnaire type.
General Questionnaire Deployment
In order to deploy a General Questionnaire:
- Navigate to the All Questionnaires view.
- Click the + on the right side of the General Questionnaires table.
- Select the Questionnaire to be deployed.
- Set the expiration date.
- Click Add Questionnaire.
Sharing a General Questionnaire
Once deployed, a General Questionnaire can be shared by clicking Share Questionnaire from within the Actions column of the General Questionnaires table. This will generate a link that you can share with the intended recipients as well as confirm that the Questionnaire is formatted as intended before doing so.
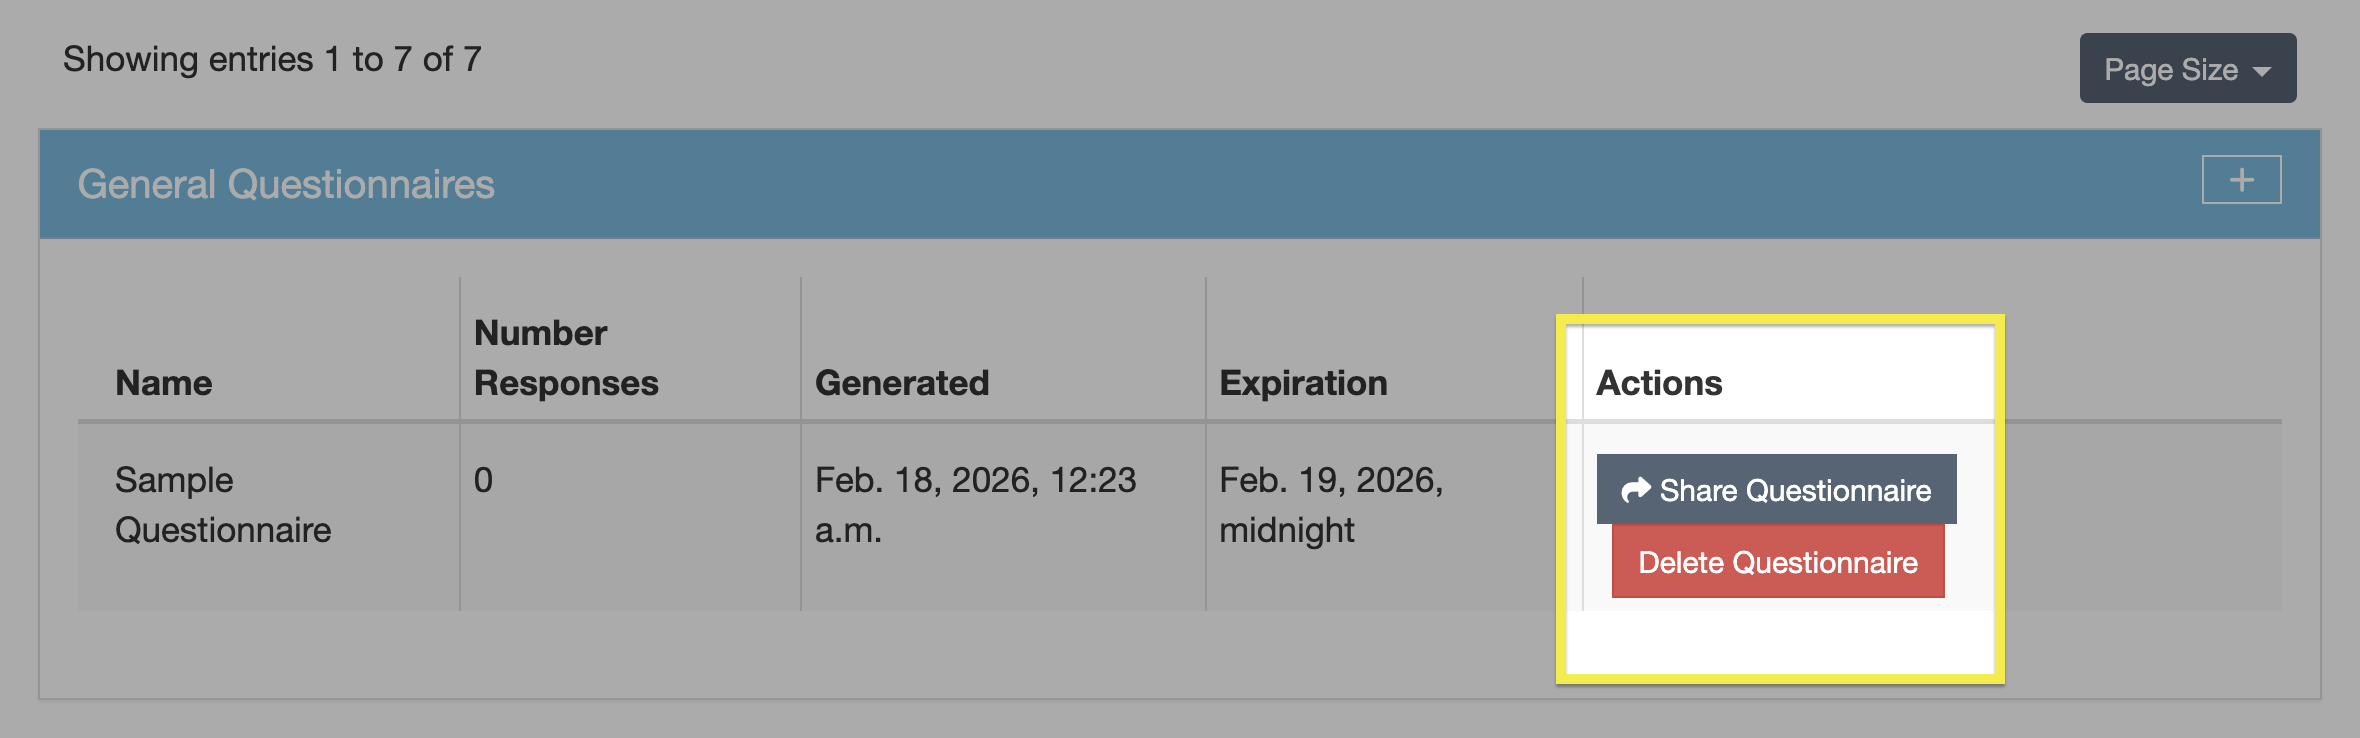
Note the following:
- Any responses to a General Questionnaire will not be viewable until the Questionnaire has expired.
- It is not possible to change the expiration date once the Questionnaire has been published.
- The default time when a Questionnaire will expire is midnight (e.g., Questionnaire with an Expiration of December 31, 2026, will only be viewable until 11:59:59 on that date).
- It is not possible to set a custom expiration time.
See Enabling Anonymous Responses below regarding permitting responses from external Users.
Linked Questionnaire Deployment
In order to deploy a Linked Questionnaire:
- Navigate to the Engagement that will be linked to the Questionnaire.
- Click the down arrow on the Additional Features table.
- Click the + on the right side of the Questionnaires subtable.
- Select the Questionnaire to be linked from the dropdown menu.
- Click Add Questionnaire or Add Questionnaire and Respond.
The Linked Questionnaire will now be active for any Users with access to the Engagement.
Sharing a Linked Questionnaire
To share the Linked Questionnaire directly with internal DefectDojo Users, click the ⋮ kebab menu and select Share Questionnaire from the dropdown. A link will appear which can be copied and forwarded to the intended recipient.
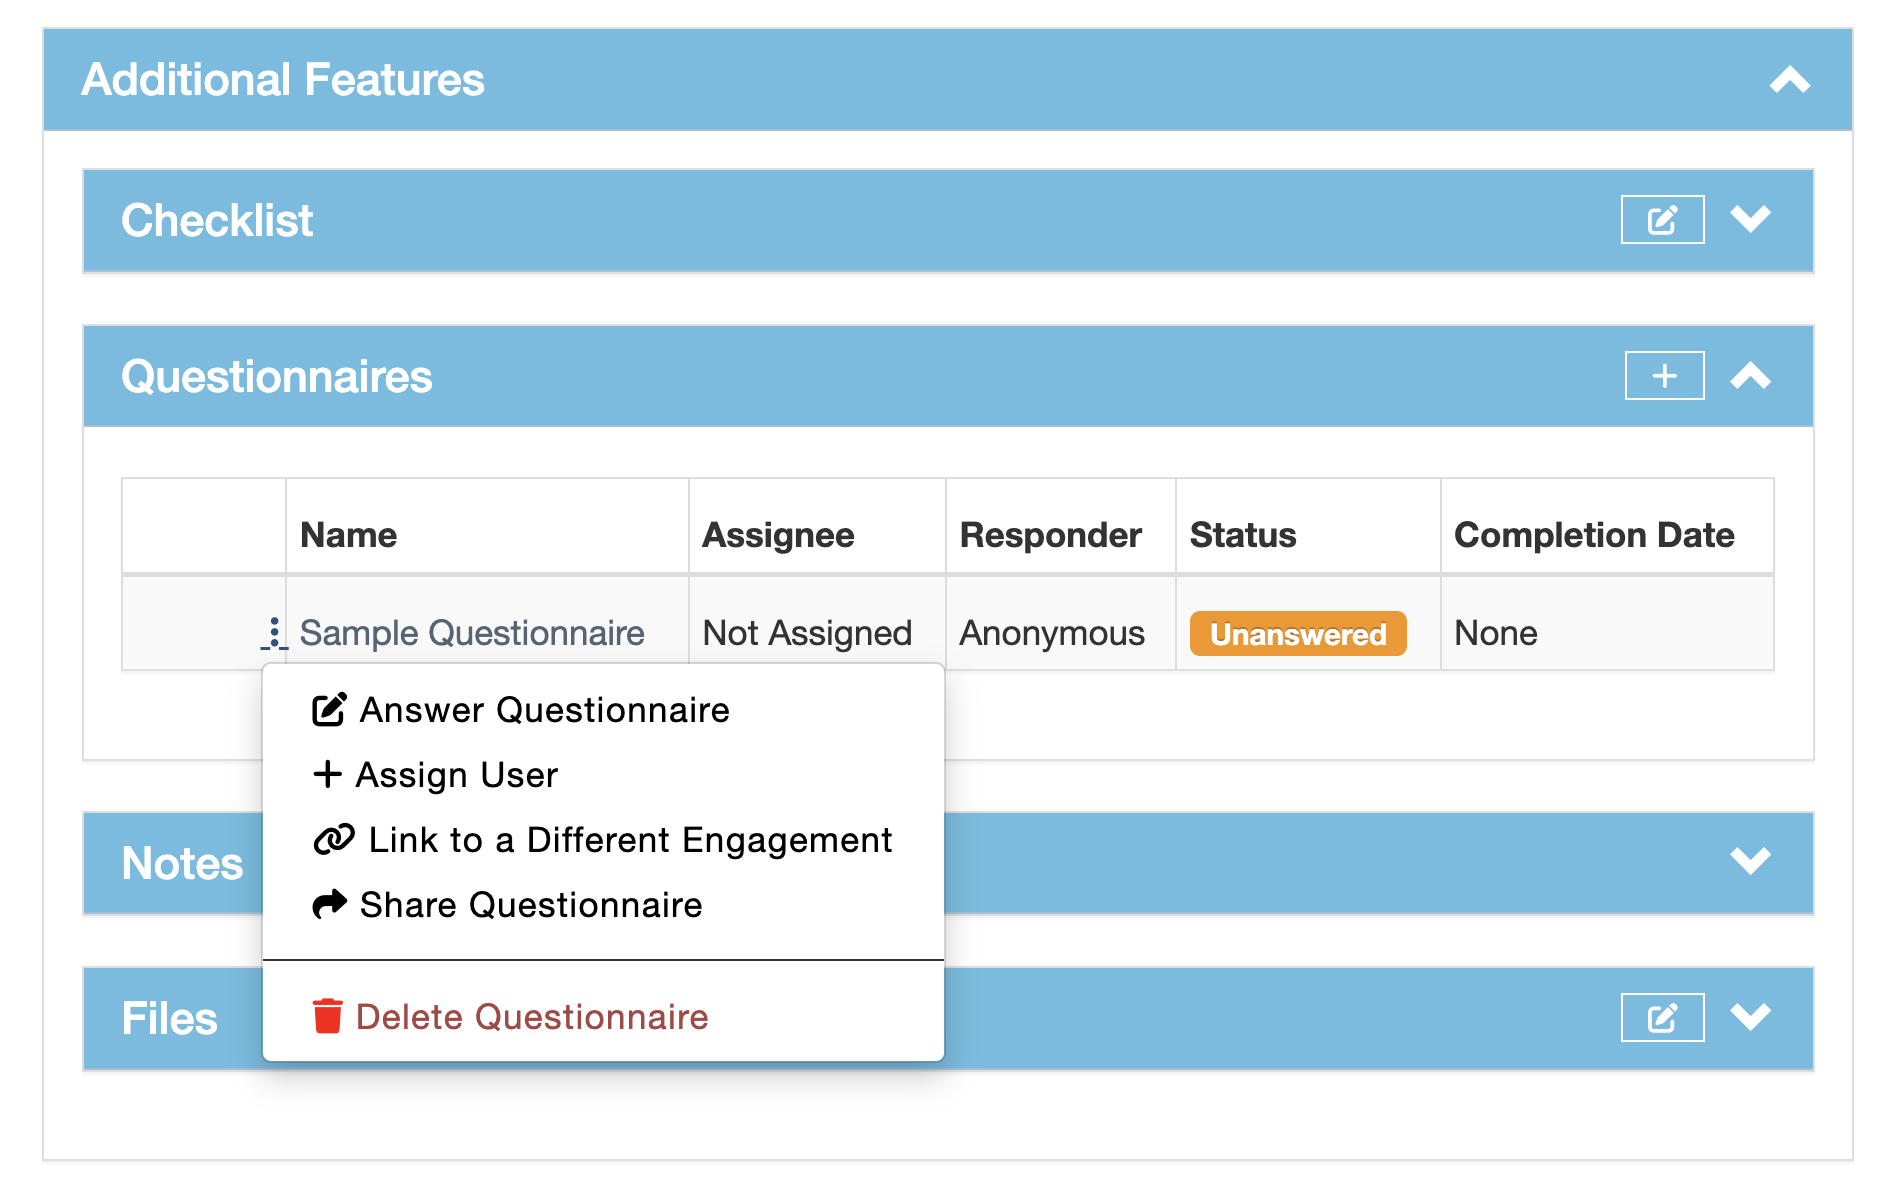
As mentioned, Linked Questionnaires can only be shared with DefectDojo Users.
Responding to Questionnaires
The response workflow differs slightly depending on whether the Questionnaire is a General or Linked Questionnaire.
Responding to a General Questionnaire
To respond to a General Questionnaire, non-Superusers must have the link shared with them directly by a Superuser, as outlined here.
Enabling Anonymous Responses
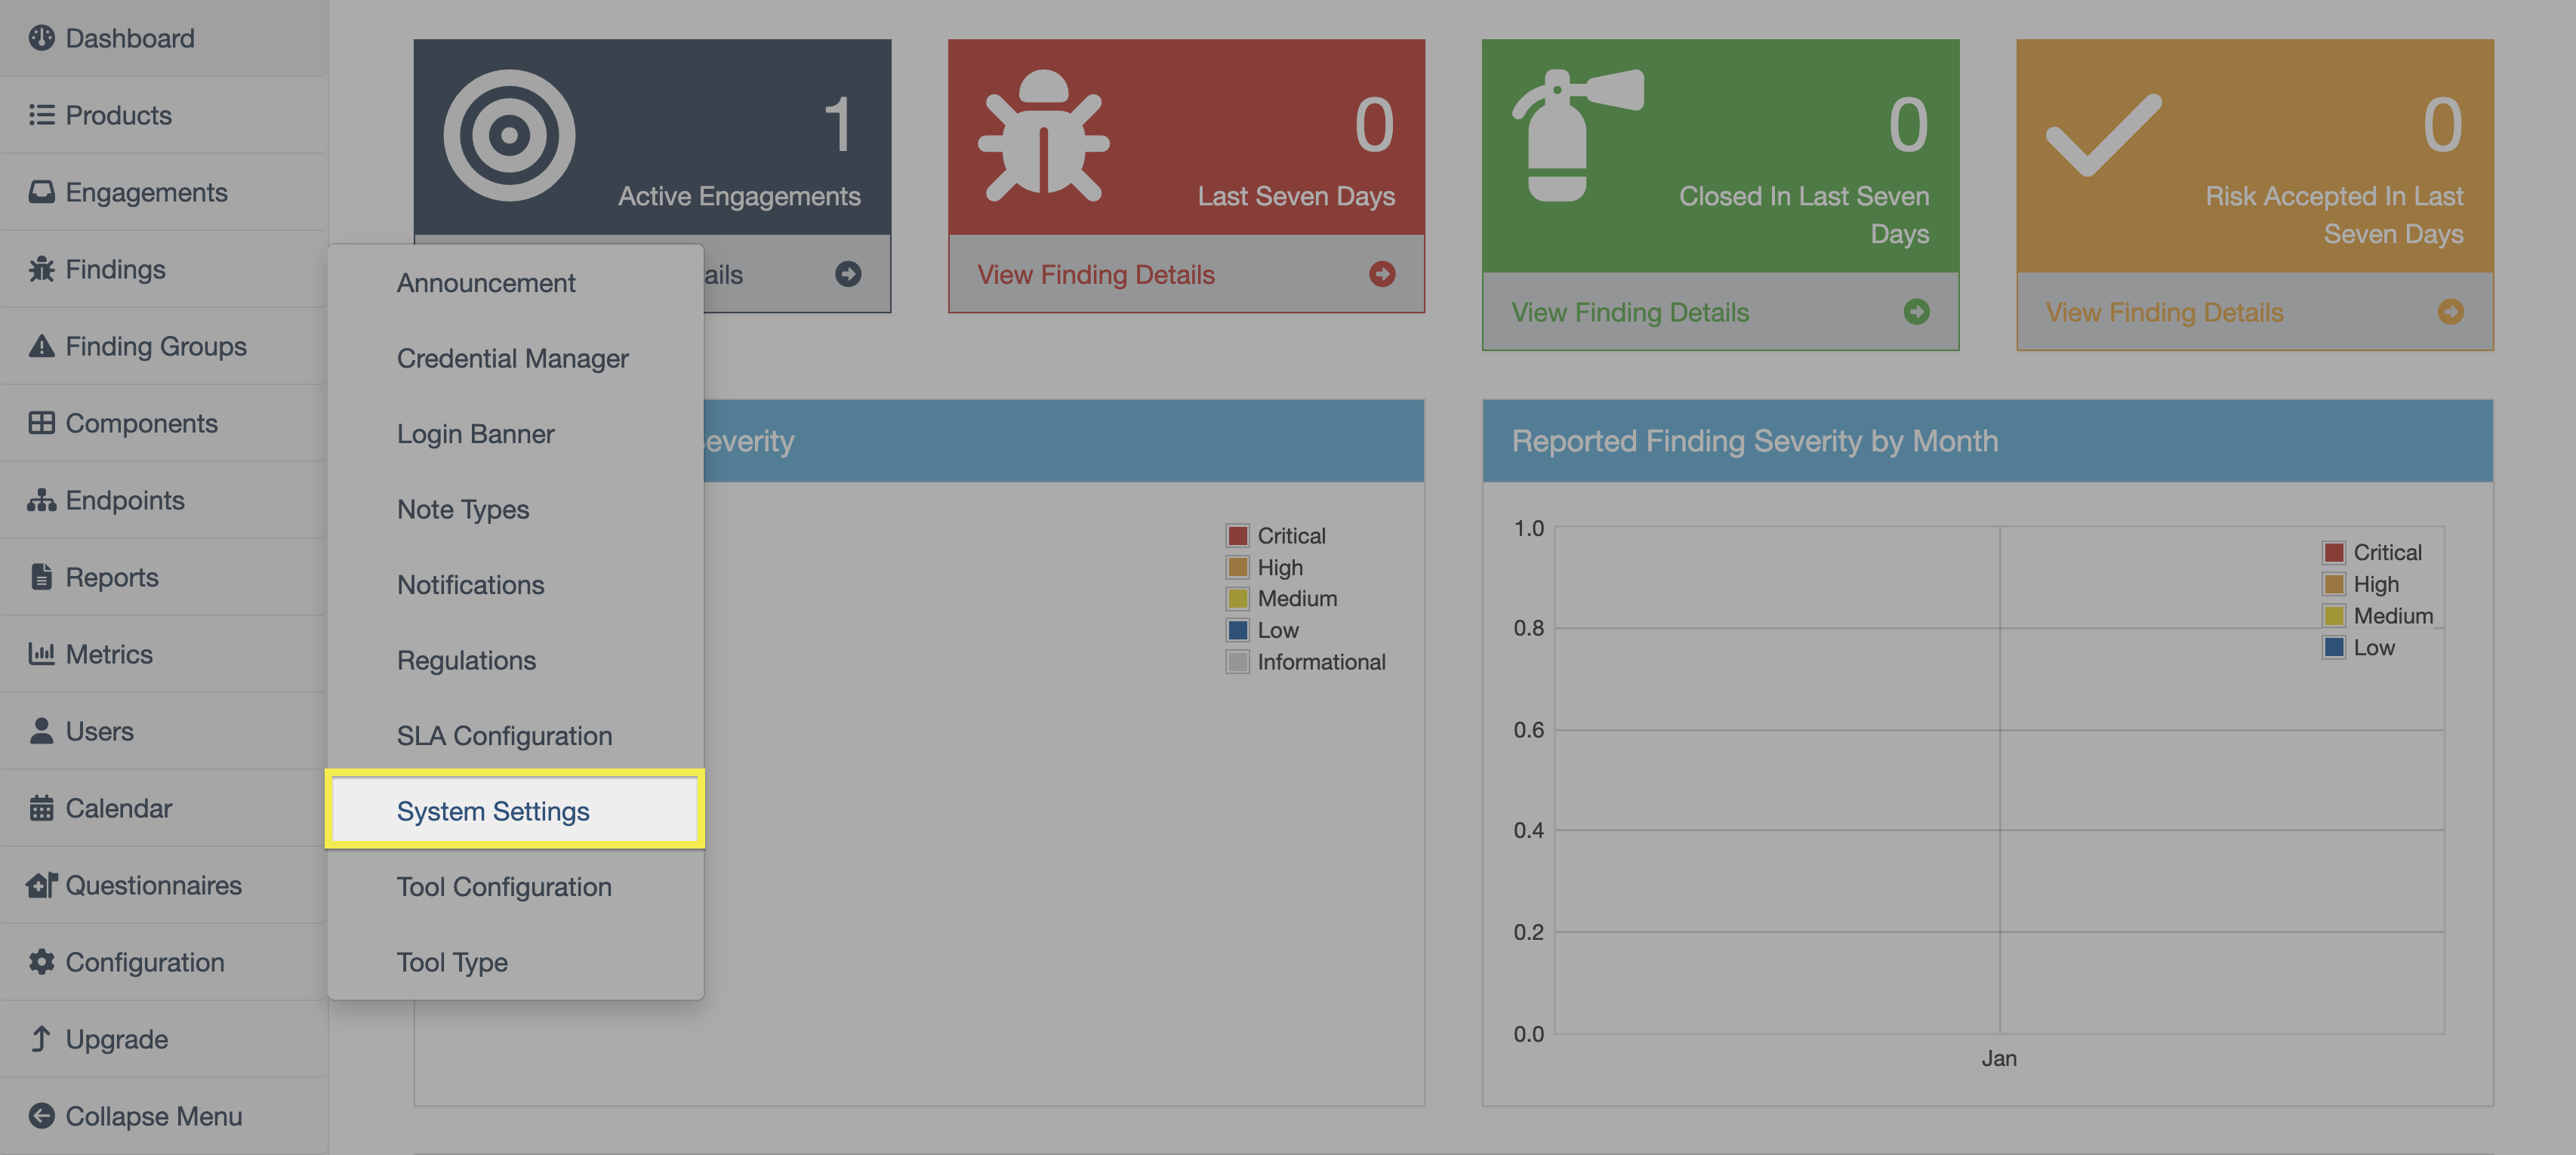
By default, General Questionnaires are only accessible by DefectDojo Users. To allow external parties to respond to DefectDojo Questionnaires, ensure the Allow Anonymous Survey Responses option has been toggled in the System Settings, which is found within the Configurations section of the sidebar.
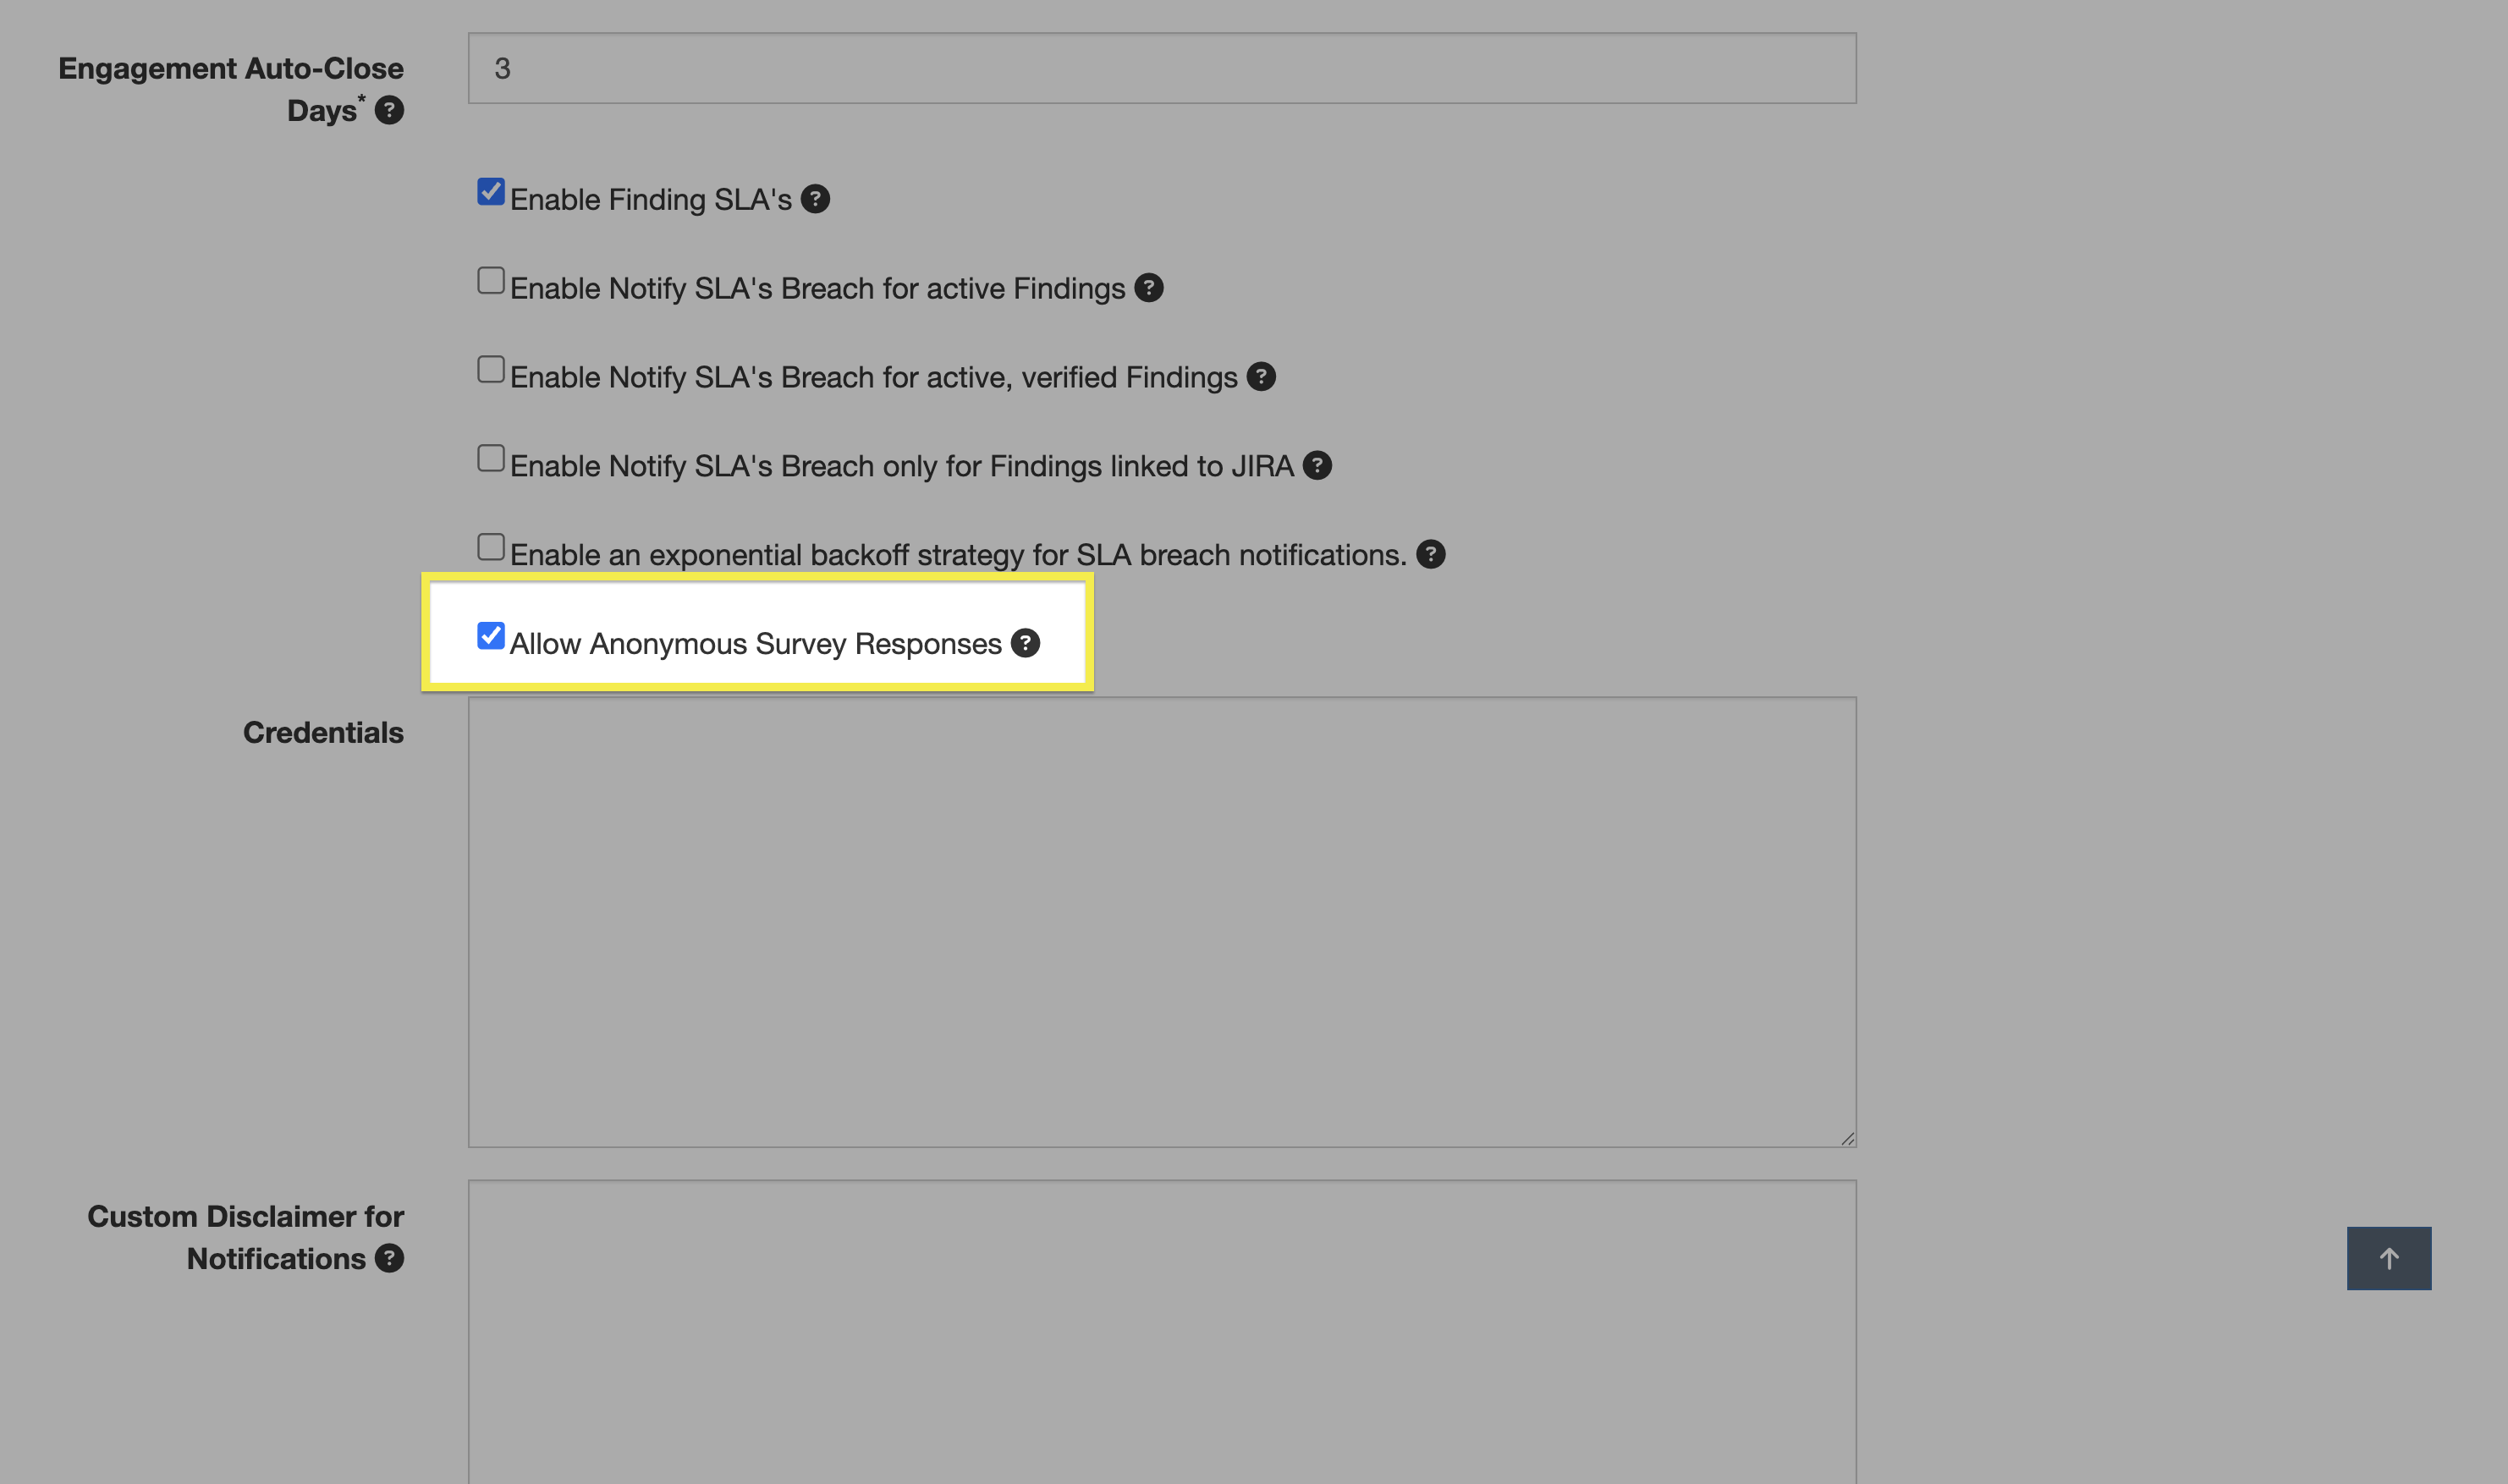
External responses will appear as anonymous because there is no DefectDojo user ID associated with the response.
If the scope of a Questionnaire includes both internal and external Users, create a General Questionnaire and specify the Engagement name in the description upon creation, which will permit filtering of the results.
Responding to Linked Questionnaires
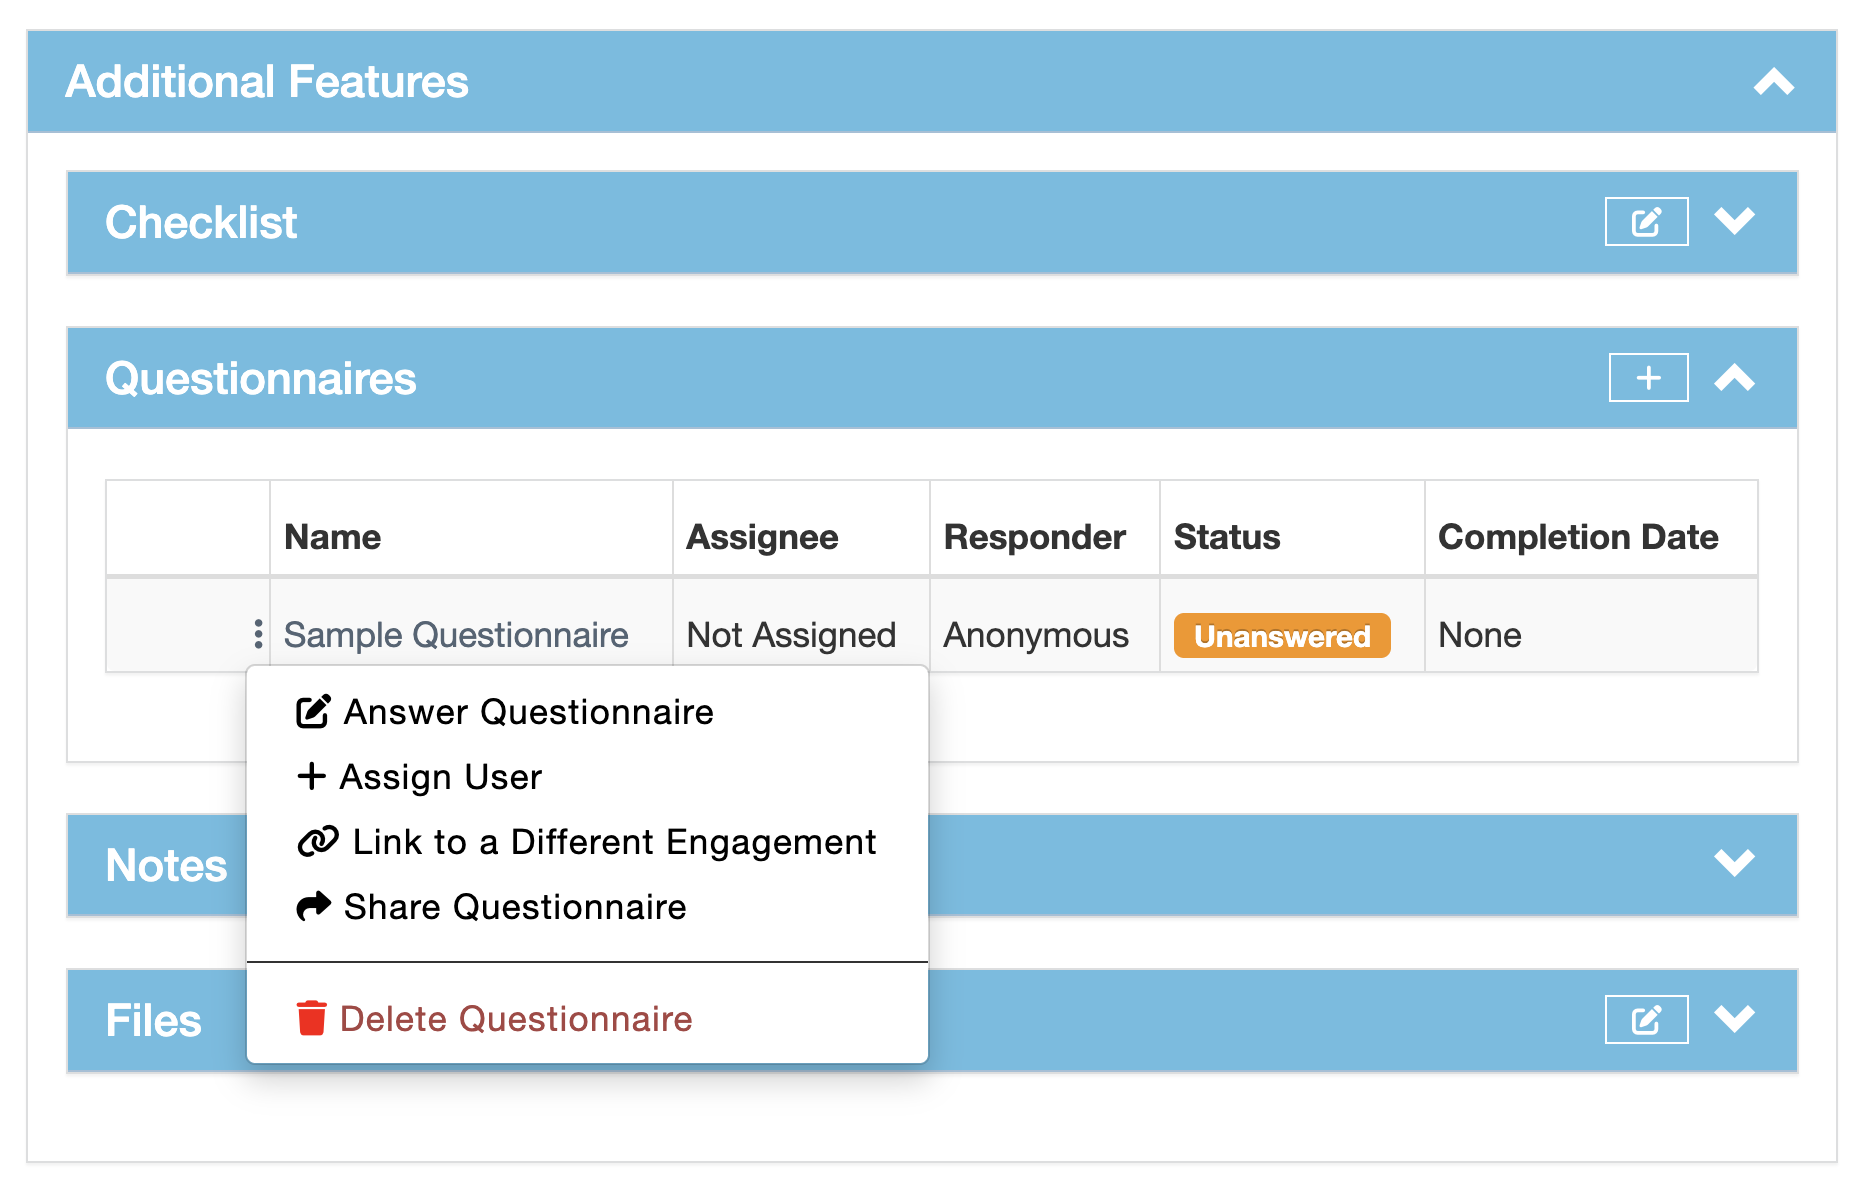
To respond to a Linked Questionnaire:
- Navigate to the Engagement view.
- Expand the Additional Features table.
- Expand the Questionnaires subtable.
- Click the ⋮ kebab menu of the Linked Questionnaire.
- Click Answer Questionnaire.
Linked Questionnaires do not permit external/anonymous responses because DefectDojo access is required in order to access the Engagement.
Responses
As mentioned, each deployment of a Questionnaire template creates its own response container. Linking the same Questionnaire template to multiple Engagements results in separate response sets, and publishing a General Questionnaire does not affect response sets of Linked Questionnaires.
General Questionnaire Responses
Once a General Questionnaire’s expiration has passed:
- It will no longer be possible to submit additional responses.
- All prior responses will be saved and will become viewable.
- The Questionnaire will be listed as an Unassigned Answered Engagement Questionnaire on the DefectDojo dashboard.
There are three actions that can be taken when a Questionnaire’s response window has closed: View Responses, Create Engagement, and Assign User.
Viewing Questionnaire Responses
Selecting View Responses will display all responses from the Questionnaire.
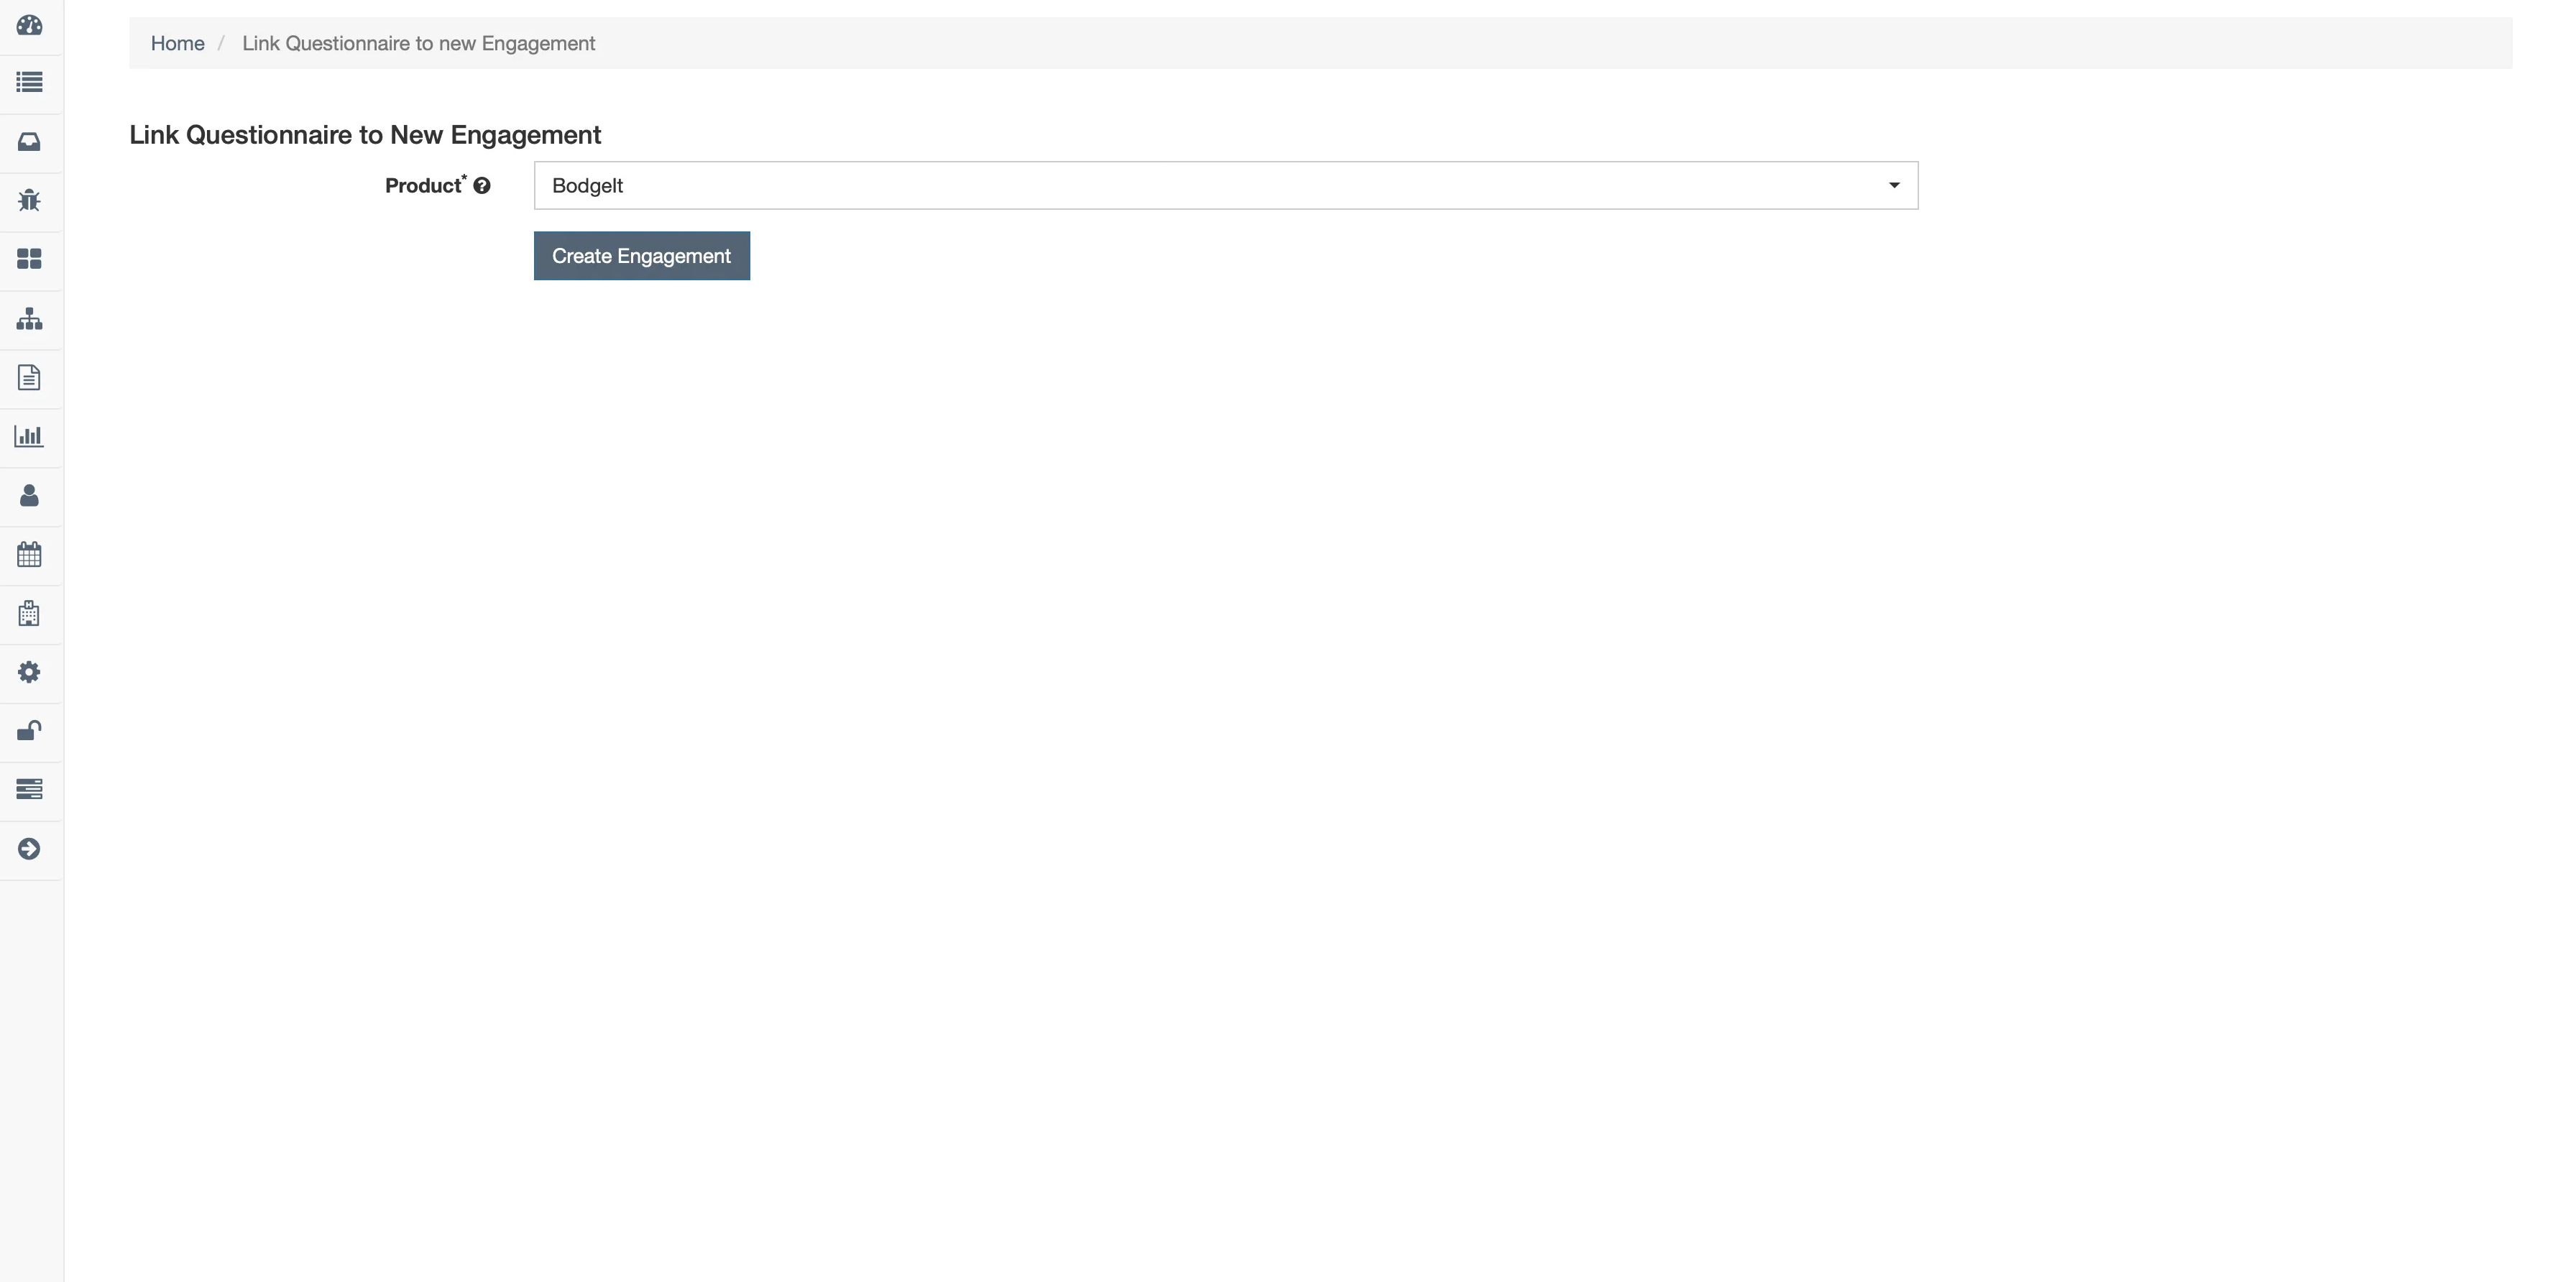
Creating an Engagement from a Questionnaire
Upon expiration, a General Questionnaire can be connected to an Asset via an Engagement by selecting the Create Engagement action. Select an Asset from the ensuing dropdown list and click Create Engagement. A new Engagement can then be created and given specific details similar to other Engagements in DefectDojo, such as Description, Version, Status, Tags, etc.
Assign User
The Assign User action will prompt for a User to be selected from the dropdown of available Users. Select a User from the dropdown menu and click Assign Questionnaire, which will make them the owner of that Questionnaire.
Linked Questionnaire Responses
Linked Questionnaires remain available while the associated Engagement is active. As such, responses are viewable at any time.
The ⋮ kebab menu of a Linked Questionnaire includes several functions to manage the Questionnaire and any responses:
- Answer Questionnaire: This option will appear if a User has not yet answered the Linked Questionnaire. Once answered, View Responses and Edit Responses will appear.
- View responses: Permits Users to see all responses for the Questionnaire to date.
- Edit Responses: Allows individual Users to edit their prior Responses.
- Assign User: Assigns the questionnaire to a User.
- Link to a Different Engagement: Opens a dropdown menu of other Engagements to assign the Questionnaire to.
- Share Questionnaire: Generates a link to share the Questionnaire with internal Users.
- Delete Questionnaire: Will unlink the Questionnaire from the Engagement and delete any previously gathered responses.
Deleting Questionnaires
Deleting General and Linked Questionnaires has different downstream effects depending on the intended outcome of the deletion.
Deleting General Questionaires
Deleting a General Questionnaire from the General Questionnaires table in the All Questionnaires section will delete all responses that were collected from that deployment prior to deletion. Any Linked Questionnaires that used the same Questionnaire template will not be deleted.
Deleting Linked Questionnaires
Deleting a Linked Questionnaire will unlink the Questionnaire from the Engagement. All responses that were collected from within the Engagement prior to deletion will be lost. General Questionnaires that had been deployed previously using the same Questionnaire template will not be affected.
Deleting Questionnaire Templates
In order to fully delete a Questionnaire template, select it from the Questionnaires table in the All Questionnaires view and click Delete Questionnaire. This permanently deletes the Questionnaire template and all associated responses from all deployments. This action cannot be undone.