

Environments (Pro)
Environments define the operational or deployment context associated with a Test, providing additional details about where the underlying security testing was performed or where its scan data originated.
While Environment names are fully customizable, common examples of Environments include:
- Development
- QA
- Staging
- Production
Environments are associated with individual Tests rather than directly with Assets or Engagements. This allows different Tests within the same Engagement to represent testing efforts performed in different Environments, and also helps to filter Testing efforts accordingly.
Notably, Environments do not affect Priority scoring or otherwise influence DefectDojo’s core data model.
Accessing Environments
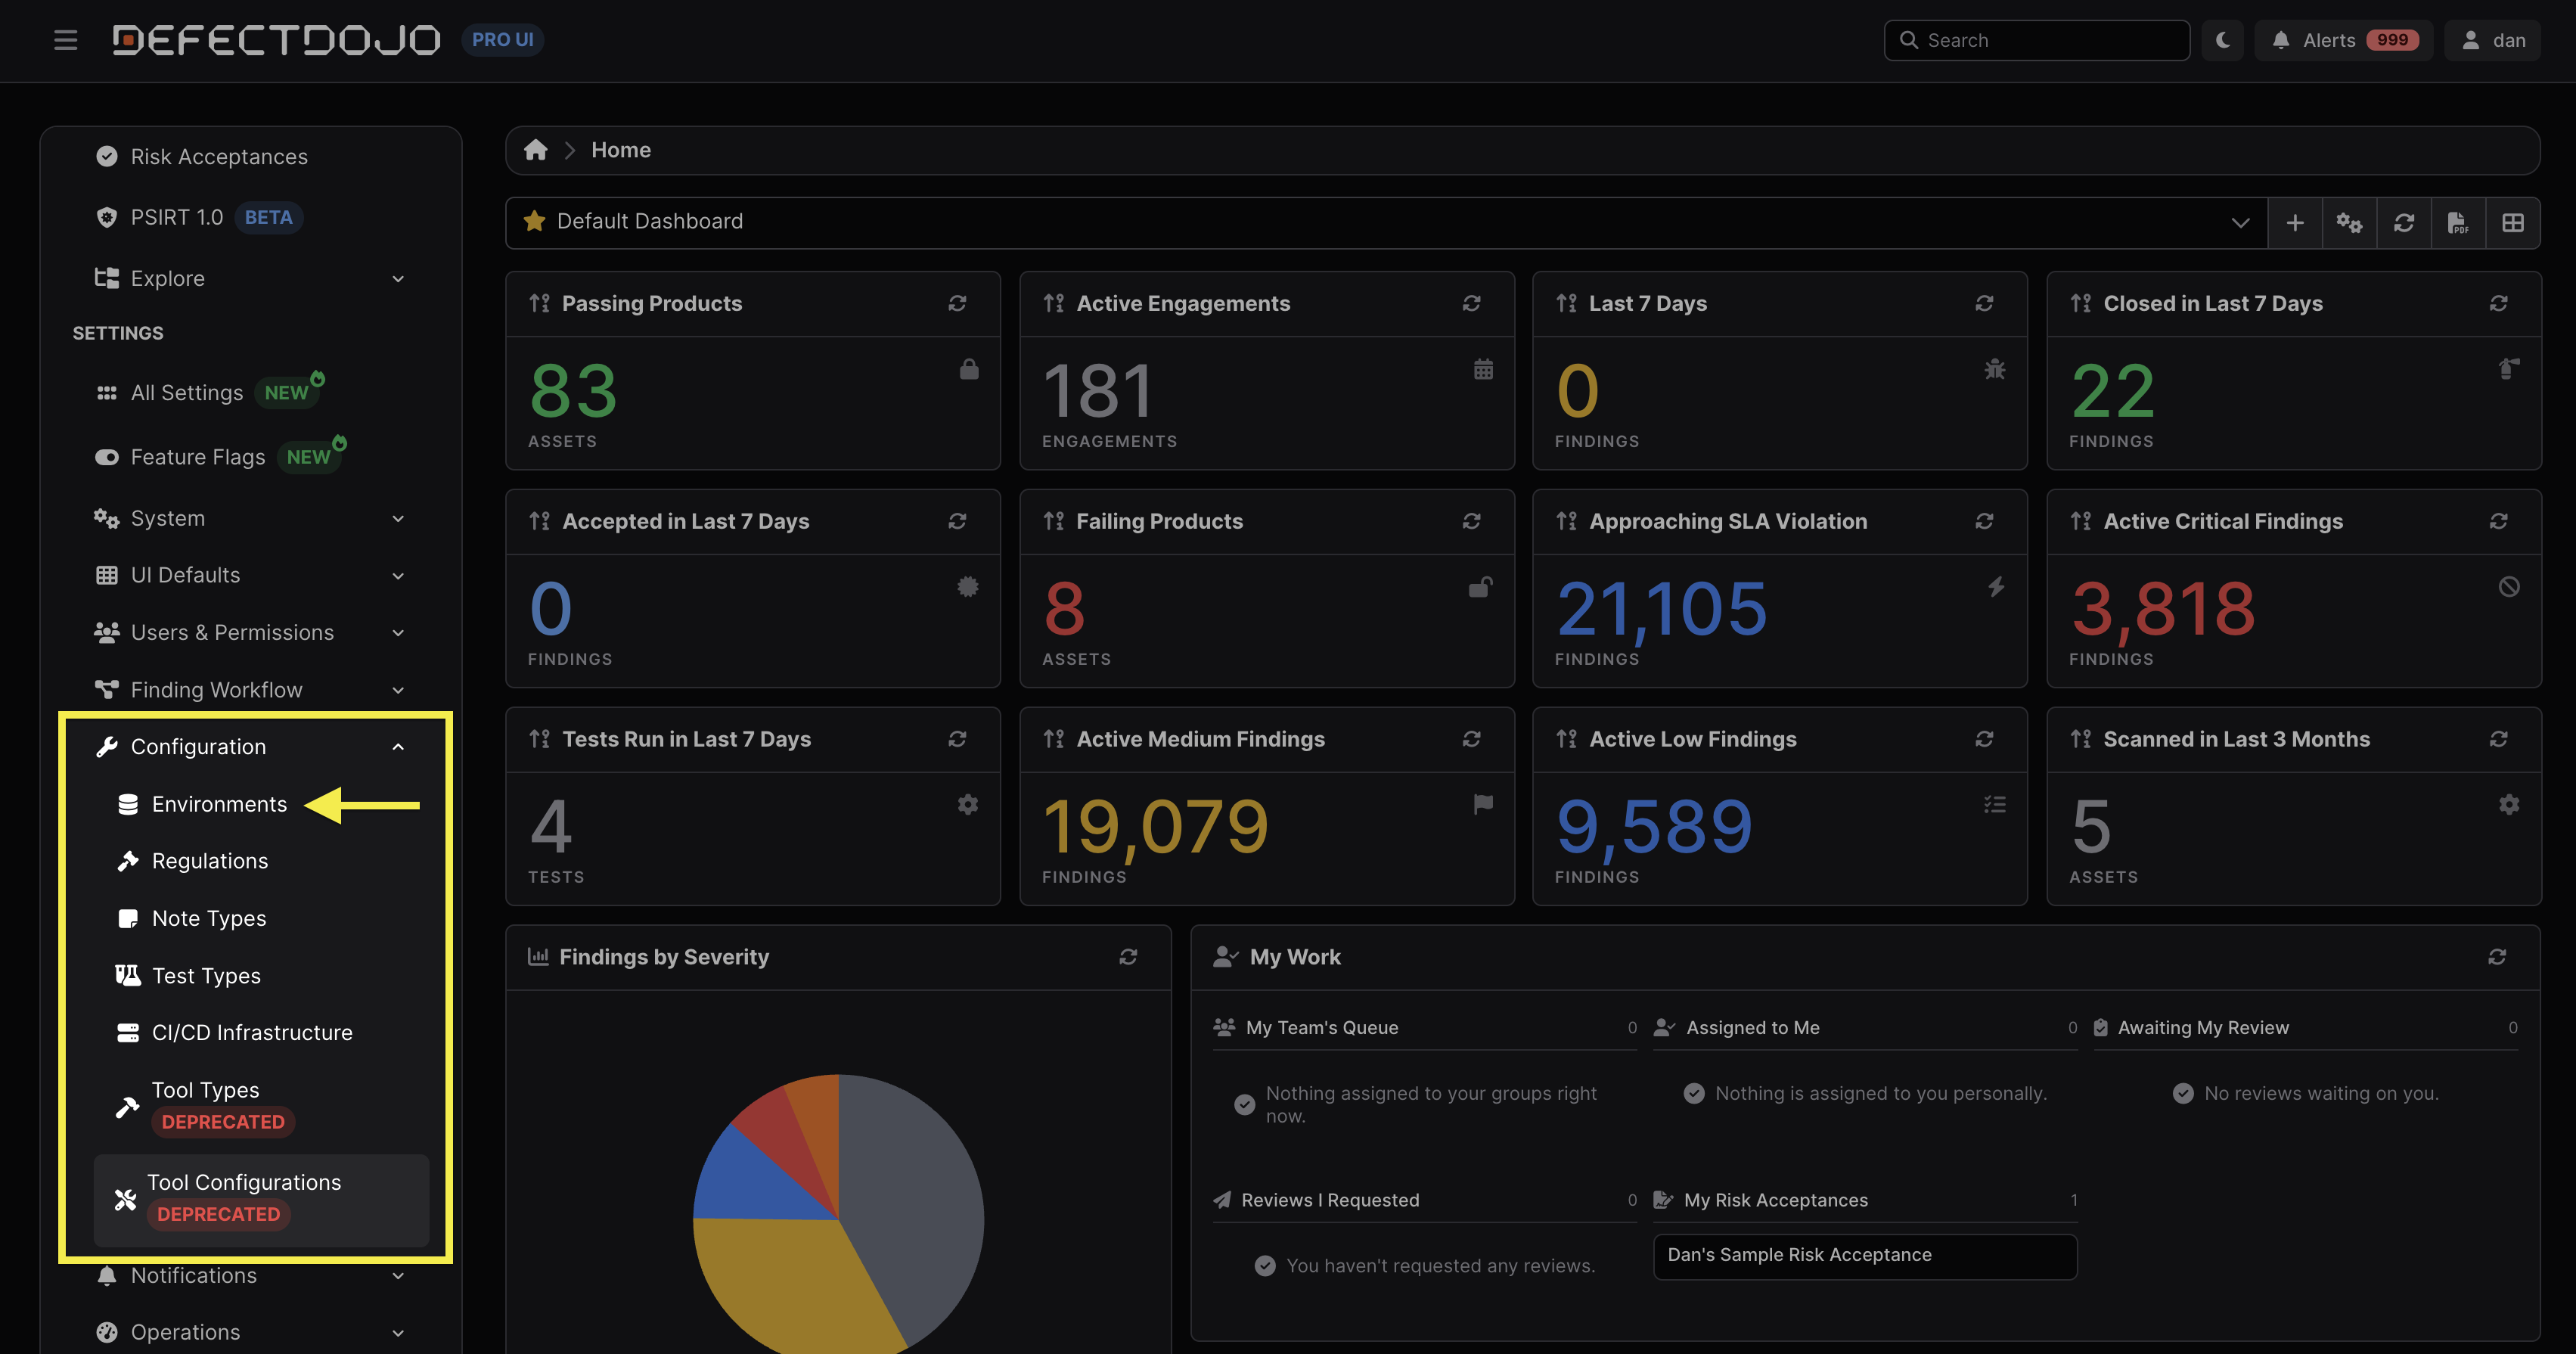
Environments are accessible from Settings > Configuration > Environments in the sidebar.
Permissions
All Users can view the list of existing Environments, regardless of their global role.
However, creating, editing, and deleting Environments is limited to Superusers and Users who have been granted the appropriate Configuration Permission.
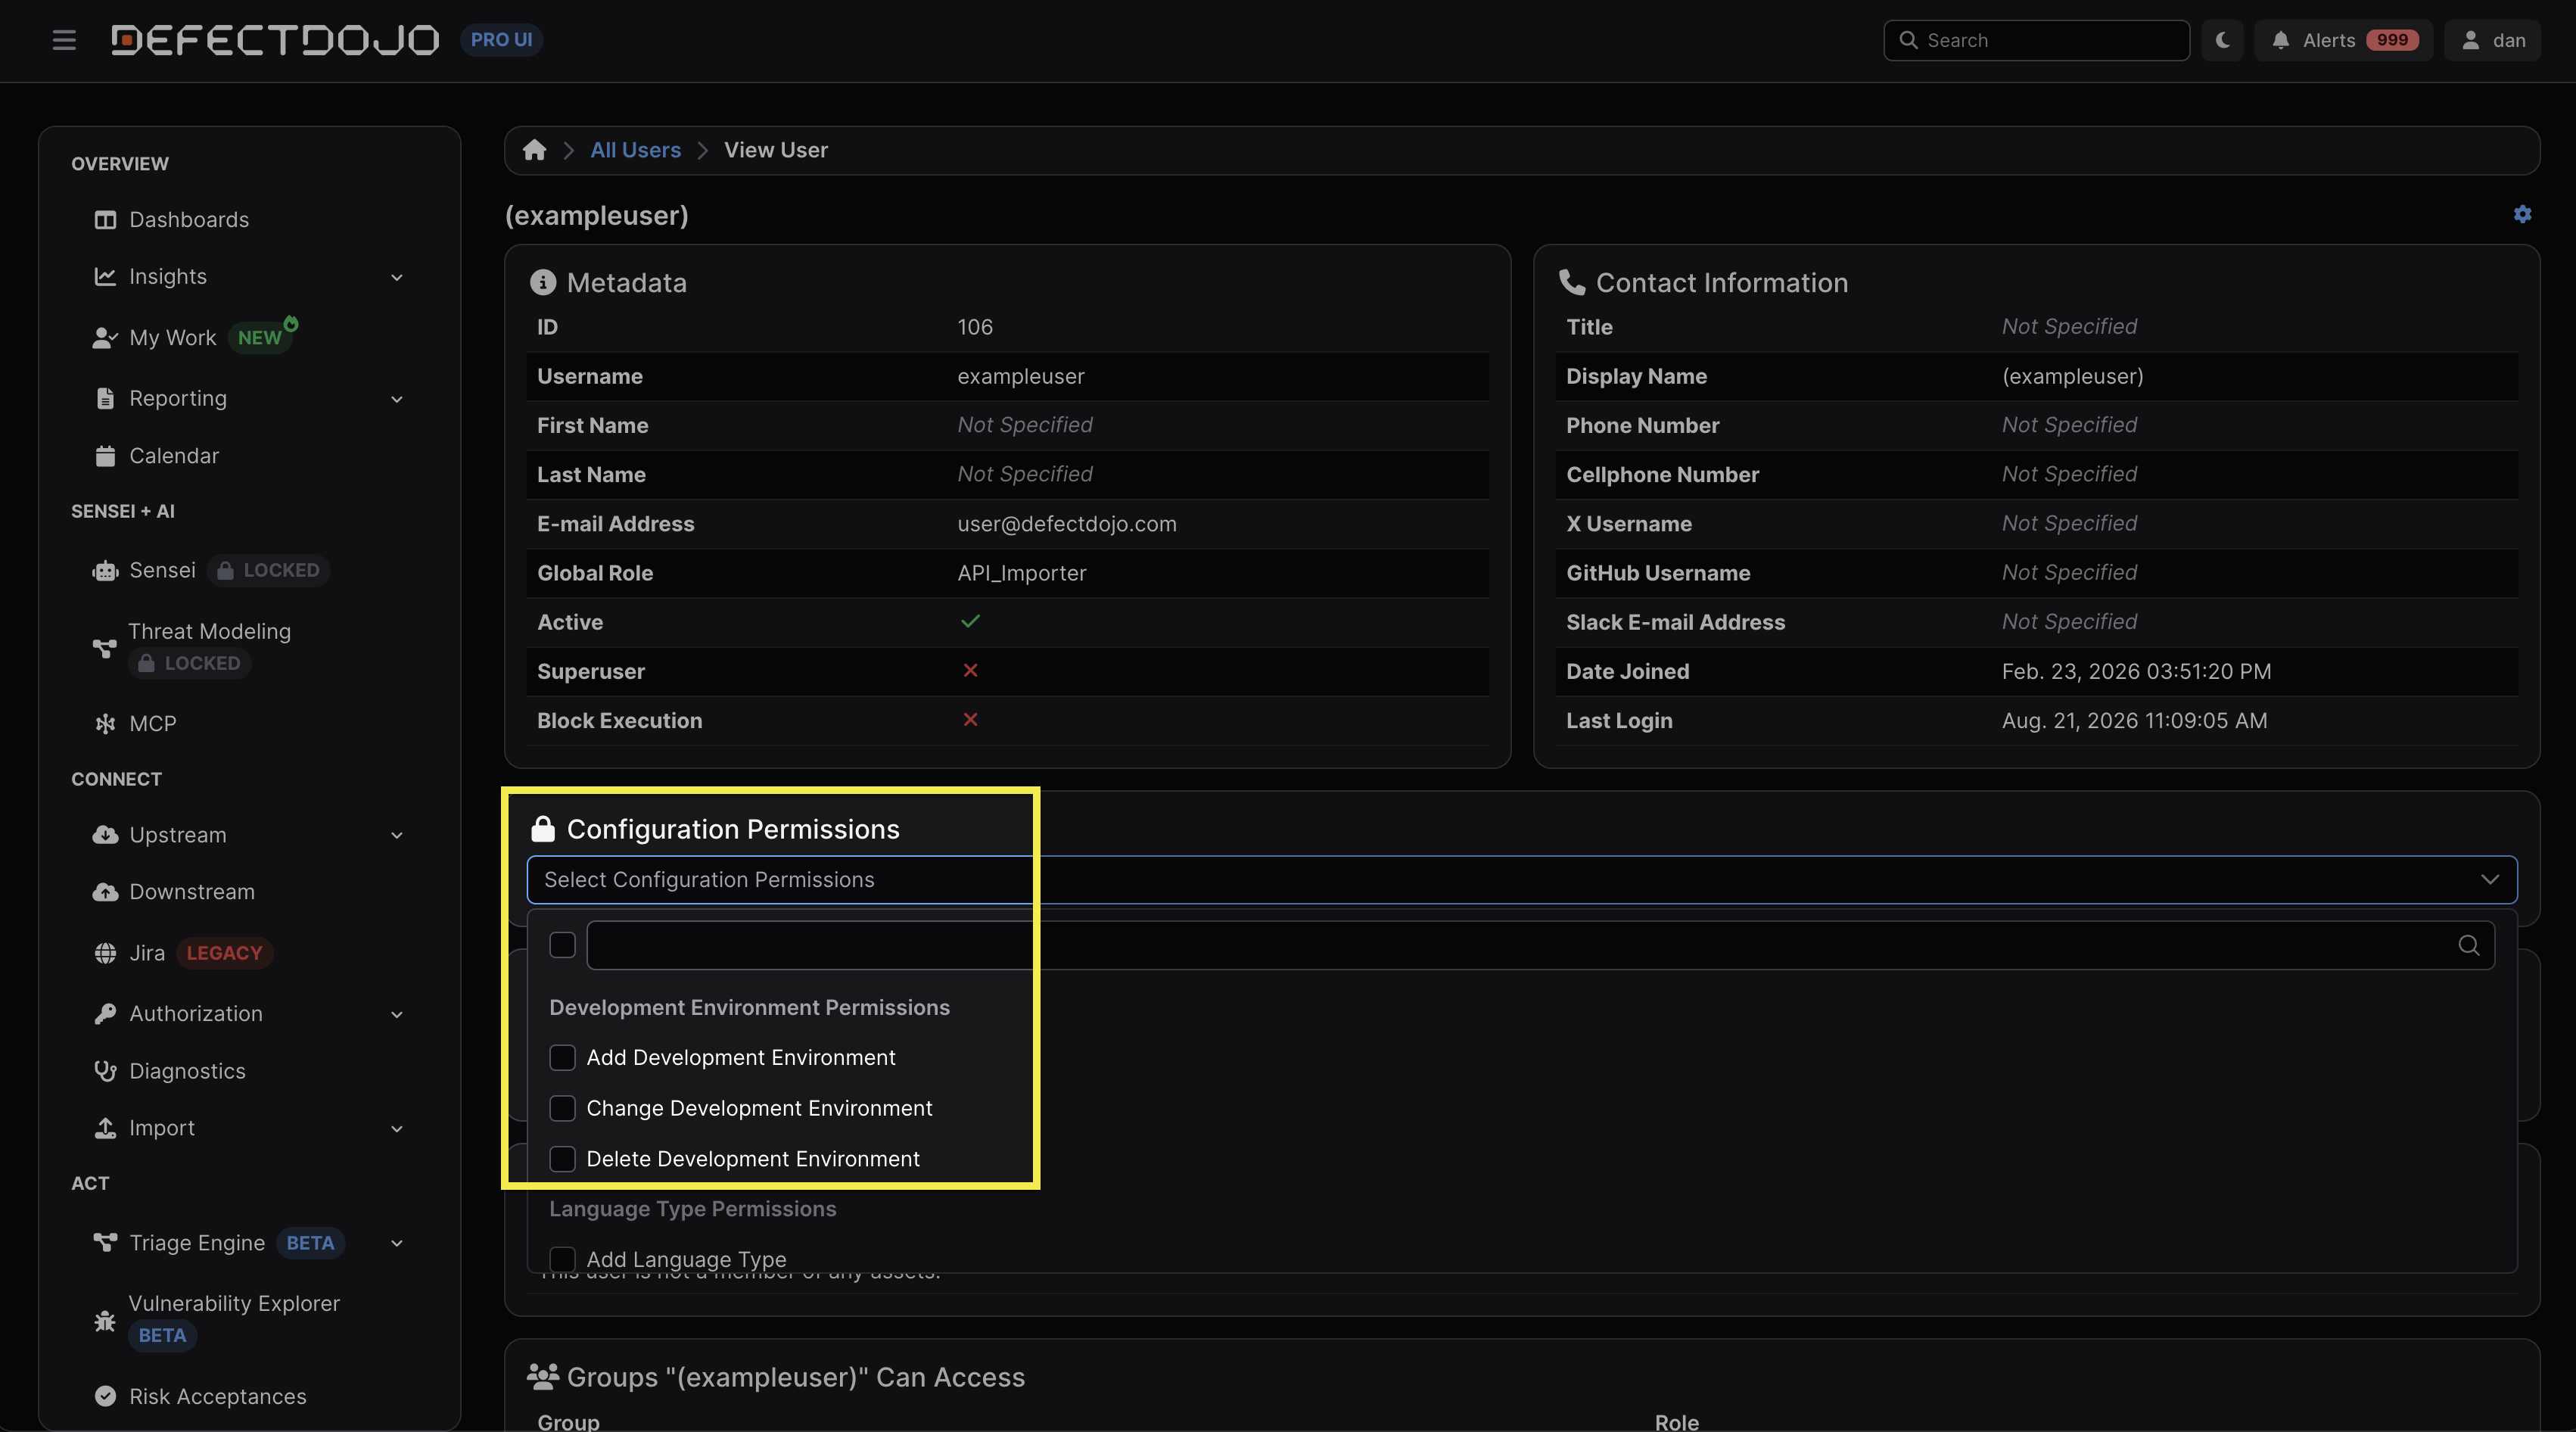
Configuration Permissions are separate from permissions associated with Assets and Organizations. As a result, access to manage Environments can be granted independently of a user’s role within a specific Asset or Organization.
Working with Environments
Creating Environments
Environments can be created by clicking the New Environment button. From there, enter a name for the Environment and click Submit.
Once created, the Environment becomes available for selection when creating or importing Tests.
Editing Environments
Environments can be edited by clicking the ⋮ kebab icon to the left of the desired Environment and selecting Edit Environment from the dropdown menu.
Renaming an Environment updates the name displayed for all Tests associated with that Environment. For example, if an Environment named Production is renamed to Prod, associated Tests will display Prod as their Environment.
Deleting Environments
Environments can be deleted by clicking the ⋮ kebab icon to the left of the desired Environment and selecting Delete Environment from the dropdown menu.
Importantly, an Environment cannot be deleted while it is associated with one or more Tests. Environments must be unlinked from all Tests before being deleted.
Associating Environments with Tests
Environments are associated with individual Tests rather than directly with Assets or Engagements. This allows different Tests within the same Engagement to represent testing efforts performed in different Environments.
Environments can be associated with Tests either manually or via DefectDojo’s API.
Manual
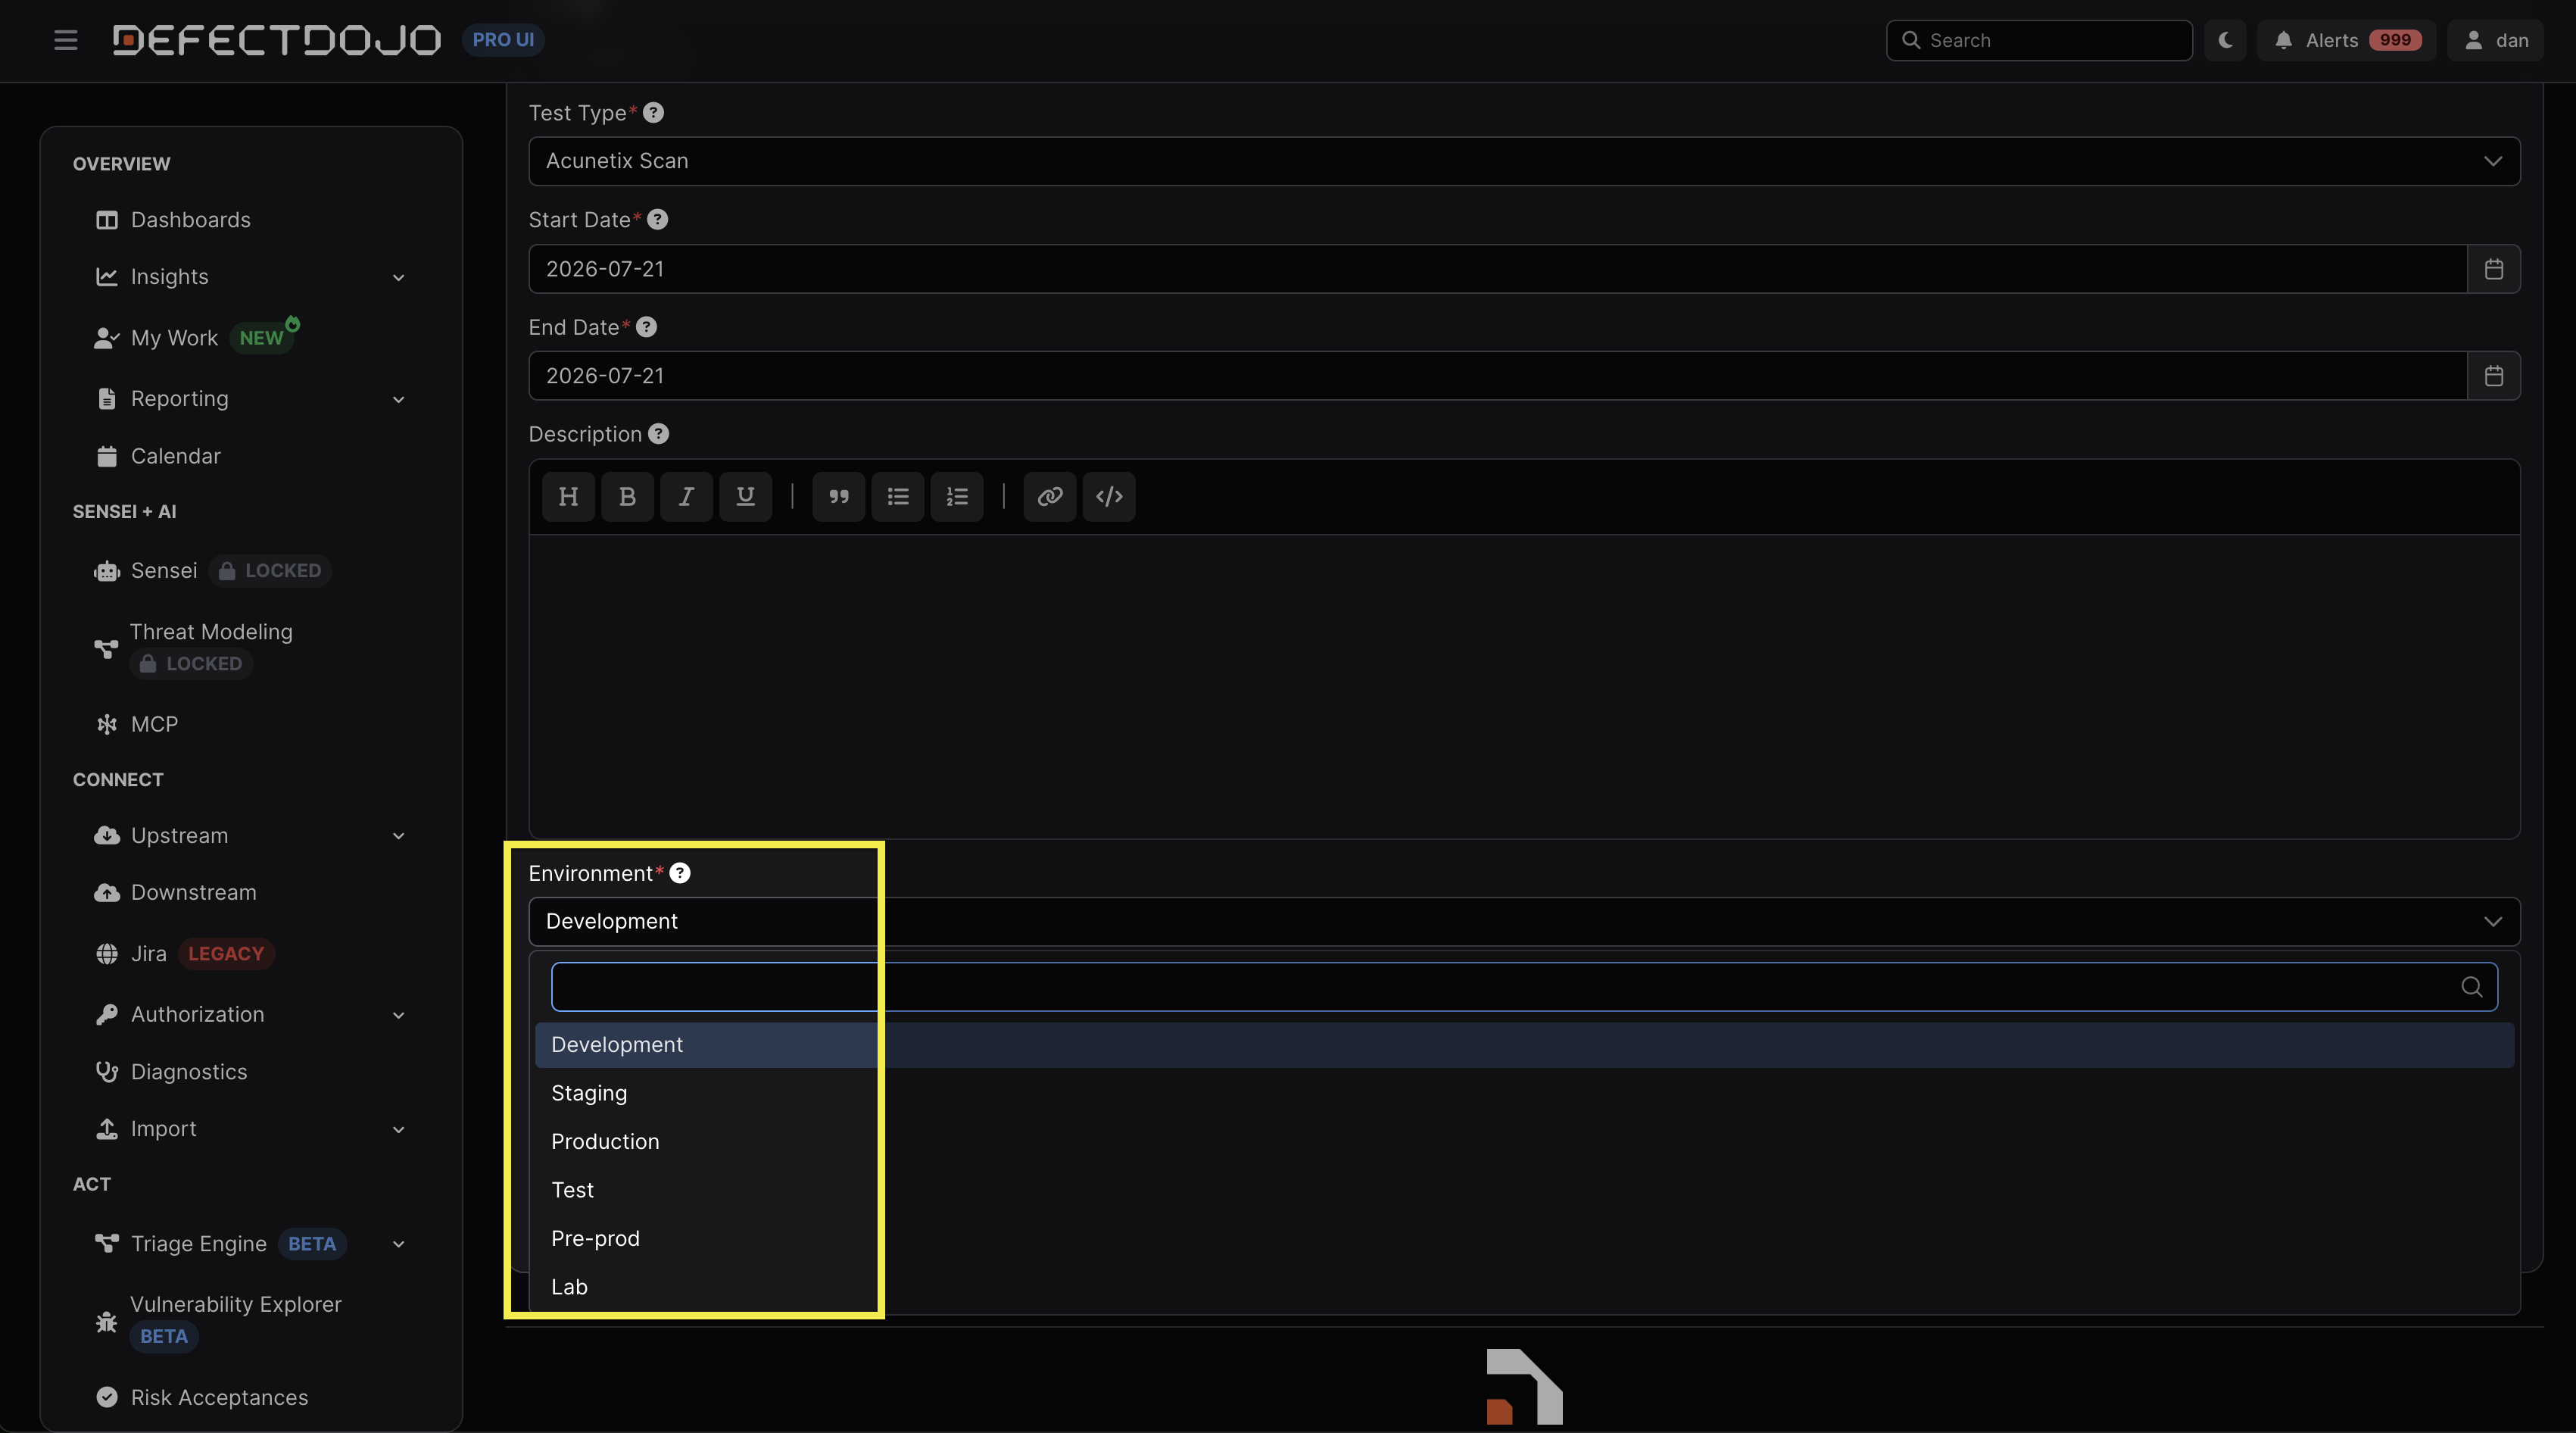
To associate an Environment with a Test, edit the Test and select the desired Environment from the dropdown menu.
API
When creating Tests through the DefectDojo API, you can include Environment information in the request and apply it as the Test is created. This allows automated workflows to capture the context in which testing was performed (e.g., whether scan results originated from a Development, Staging, or Production environment) and store the results in DefectDojo.
By default, the specified Environment must already exist in DefectDojo. However, you can add auto_create_context: true to the API payload to automatically create an Environment if it does not already exist. If auto_create_context is set to false (or unspecified) and the specified Environment does not exist, the request will be rejected.
For example, an automation pipeline can specify Staging as the Environment when creating a Test. If the Environment already exists, it will be associated with the Test. If it does not exist, it can be created automatically when auto_create_context is enabled.