Engagements (Pro)
Organizations → Assets → ENGAGEMENTS → Tests → Findings
Overview
In DefectDojo’s Asset Hierarchy, Engagements are time- or pipeline-bound containers that represent groups of related Tests within a specific Asset. If you have a planned testing effort scheduled, whether on a routine or one-time basis, an Engagement offers you a place to store all of the related results.
Examples of Engagements include:
- One-off penetration tests
- Recurring monthly or quarterly scans
- Bug bounty review periods
- CI/CD pipeline runs (for teams who treat each pipeline as its own Engagement)
- Code release cycles (e.g., “v4.2 release security review”)
Engagement Types
DefectDojo supports two Engagement types: Interactive and CI/CD. These types determine how Tests are typically created and how scan results are imported.
An Interactive Engagement is typically run by an engineer. Interactive Engagements are focused on testing an application while it’s running, using an automated test, human tester, or any activity “interacting” with the application functionality.
A CI/CD Engagement is for automated integration with a CI/CD pipeline. CI/CD Engagements are meant to import data as an automated action, triggered by a step in the release process.
| Category | Interactive Engagements | CI/CD Engagements |
|---|---|---|
| Primary Use Case | Manual or ad-hoc security testing | Automated, recurring security testing within pipelines |
| Duration | Time-bound and finite | Potentially infinite duration |
| Frequency | Periodic or one-off | Continuous or per-commit |
| Workflow | Human tester runs tool → manually imports results | Pipeline runs tool → automatically pushes results to DefectDojo |
| Result Import Method | Manual upload via UI or CLI | API-driven import via automation (e.g., CLI, connectors, cron jobs, pipeline scripts) |
| Typical Testing Type | Penetration tests, red team exercises, manual assessments | Static analysis, dependency scanning, container scanning |
Engagement Data
As the containers that organize testing activity, Engagements can store or track a variety of data:
- Target start and end dates
- Description and scope notes
- Status (ongoing, planned, completed, etc.)
- Assignee / Lead
- Associated Tests (e.g., scans, pen tests, manual tests, etc.)
- Findings and Finding Types (e.g., active, mitigated, risk accepted, duplicate, etc.)
- Threat models or risk acceptance info
- Tags
- Files and notes
- Jira project settings
- Environment details (e.g., staging vs. production)
- Build IDs (if linked to CI/CD)
- Historical data from past Tests within the Engagement
Accessing Engagements
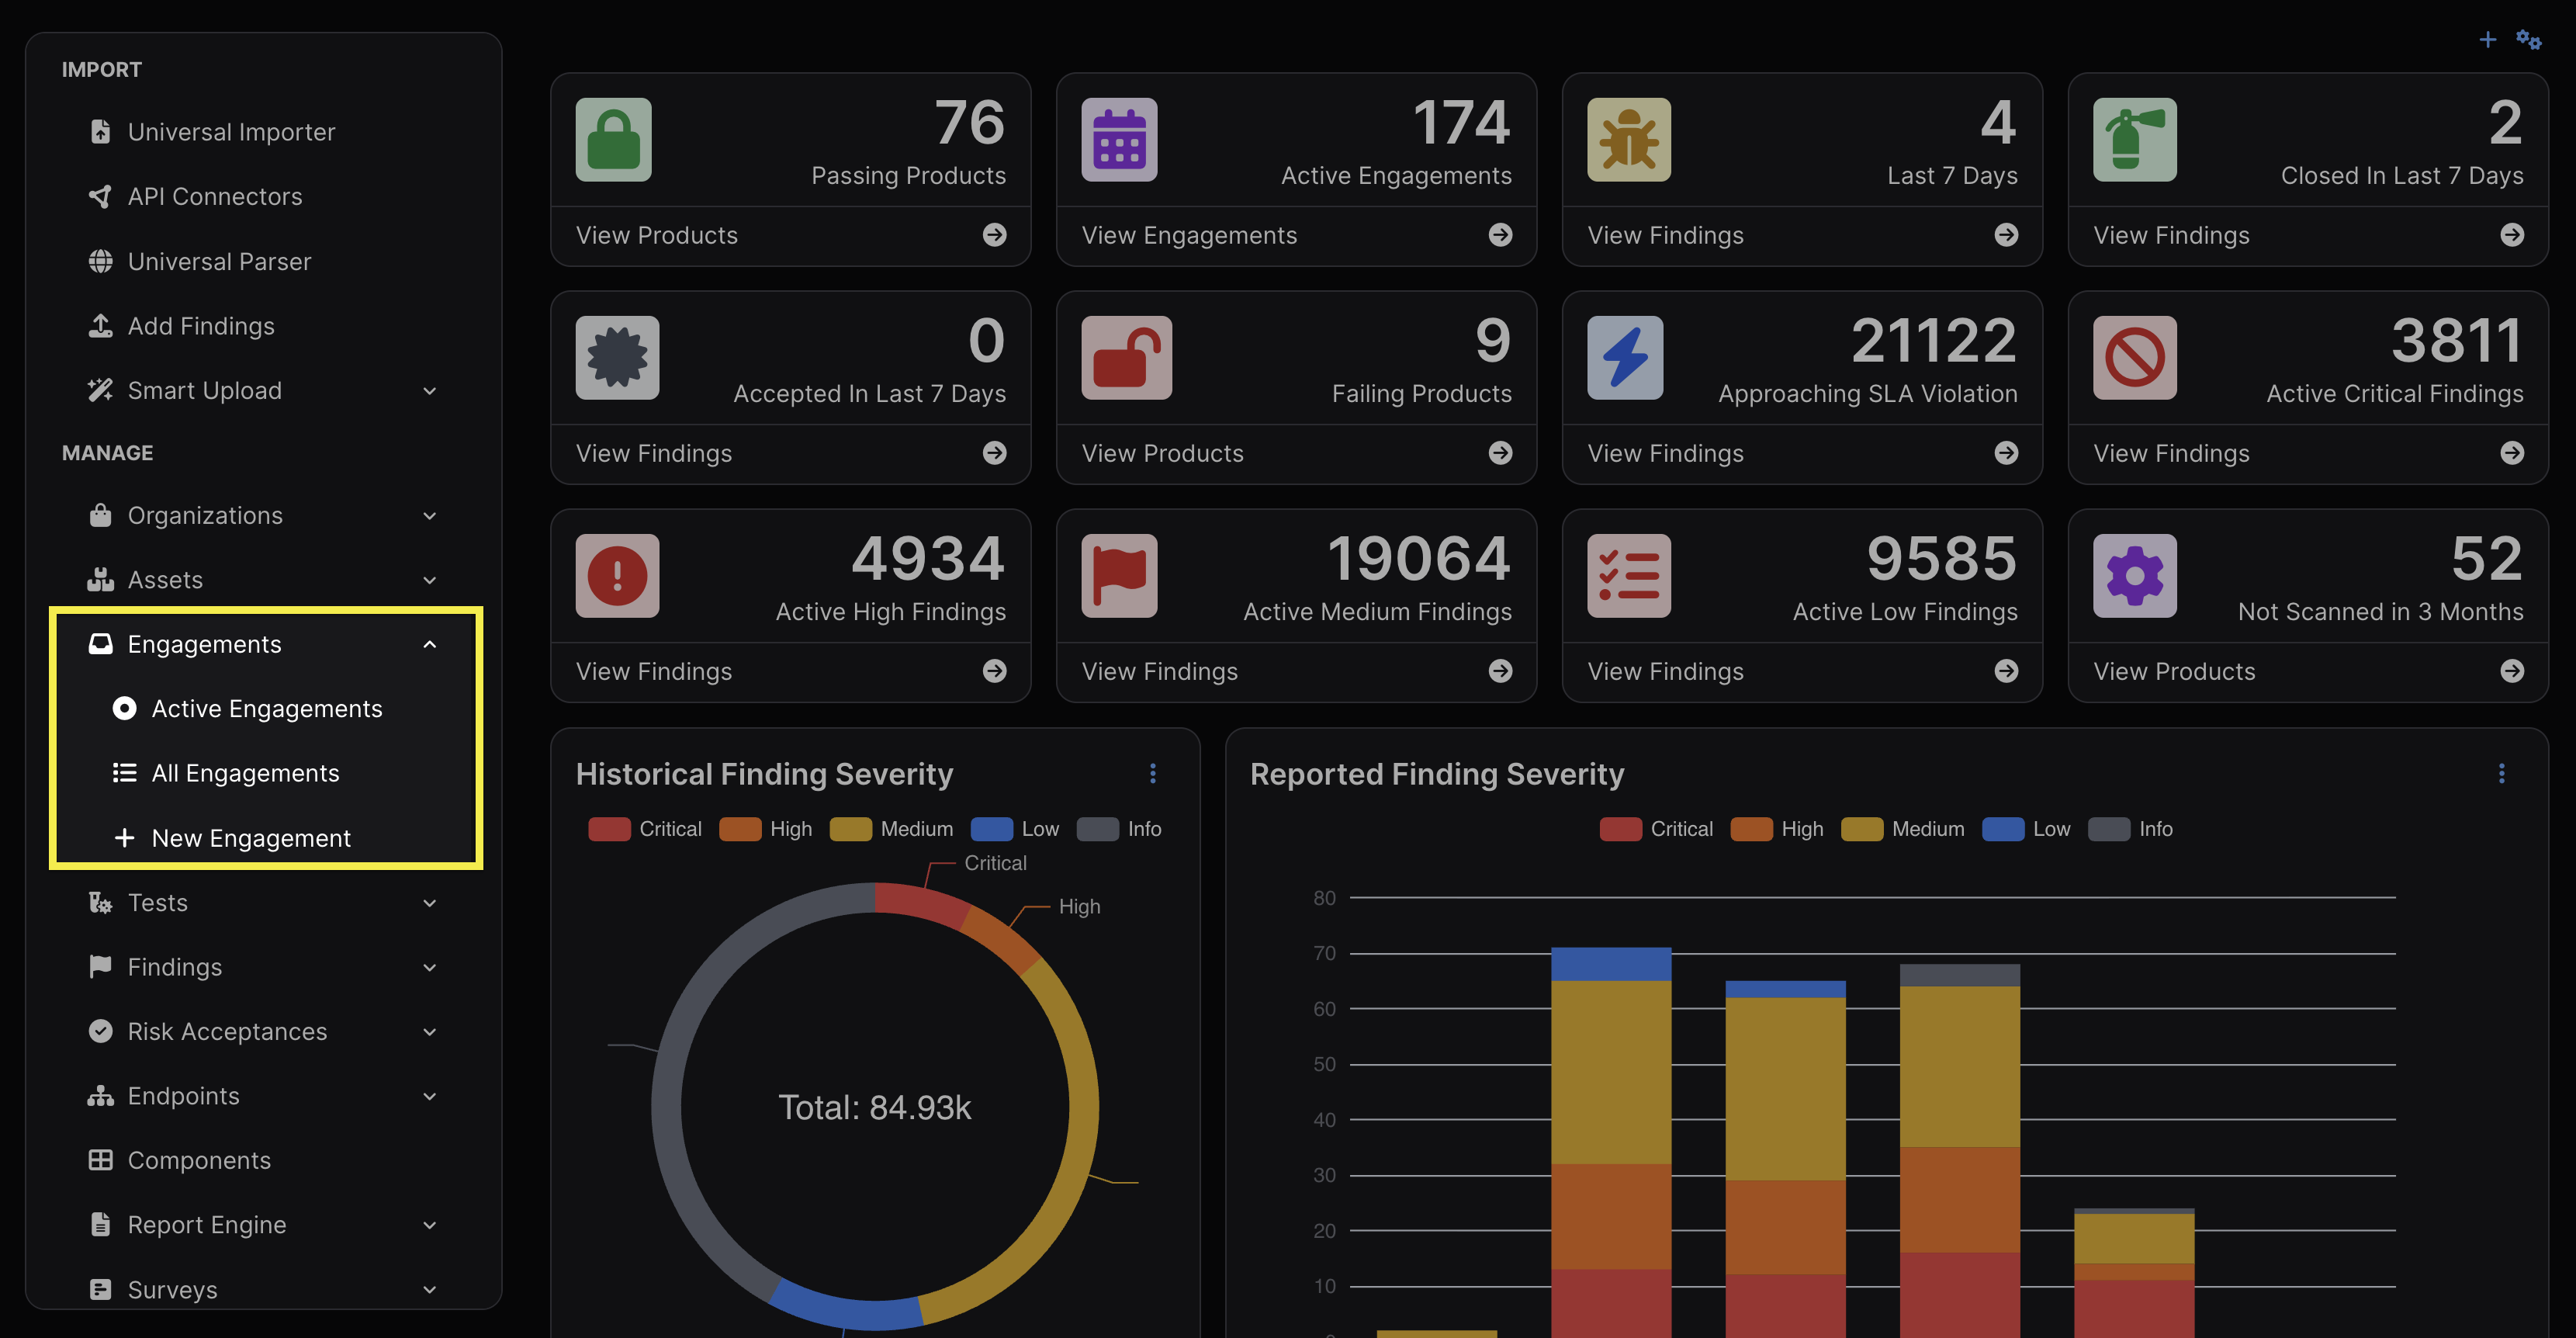
Engagements are accessible via the sidebar. The submenu provides access to Active Engagements and All Engagements, as well as the option to create new Engagements.
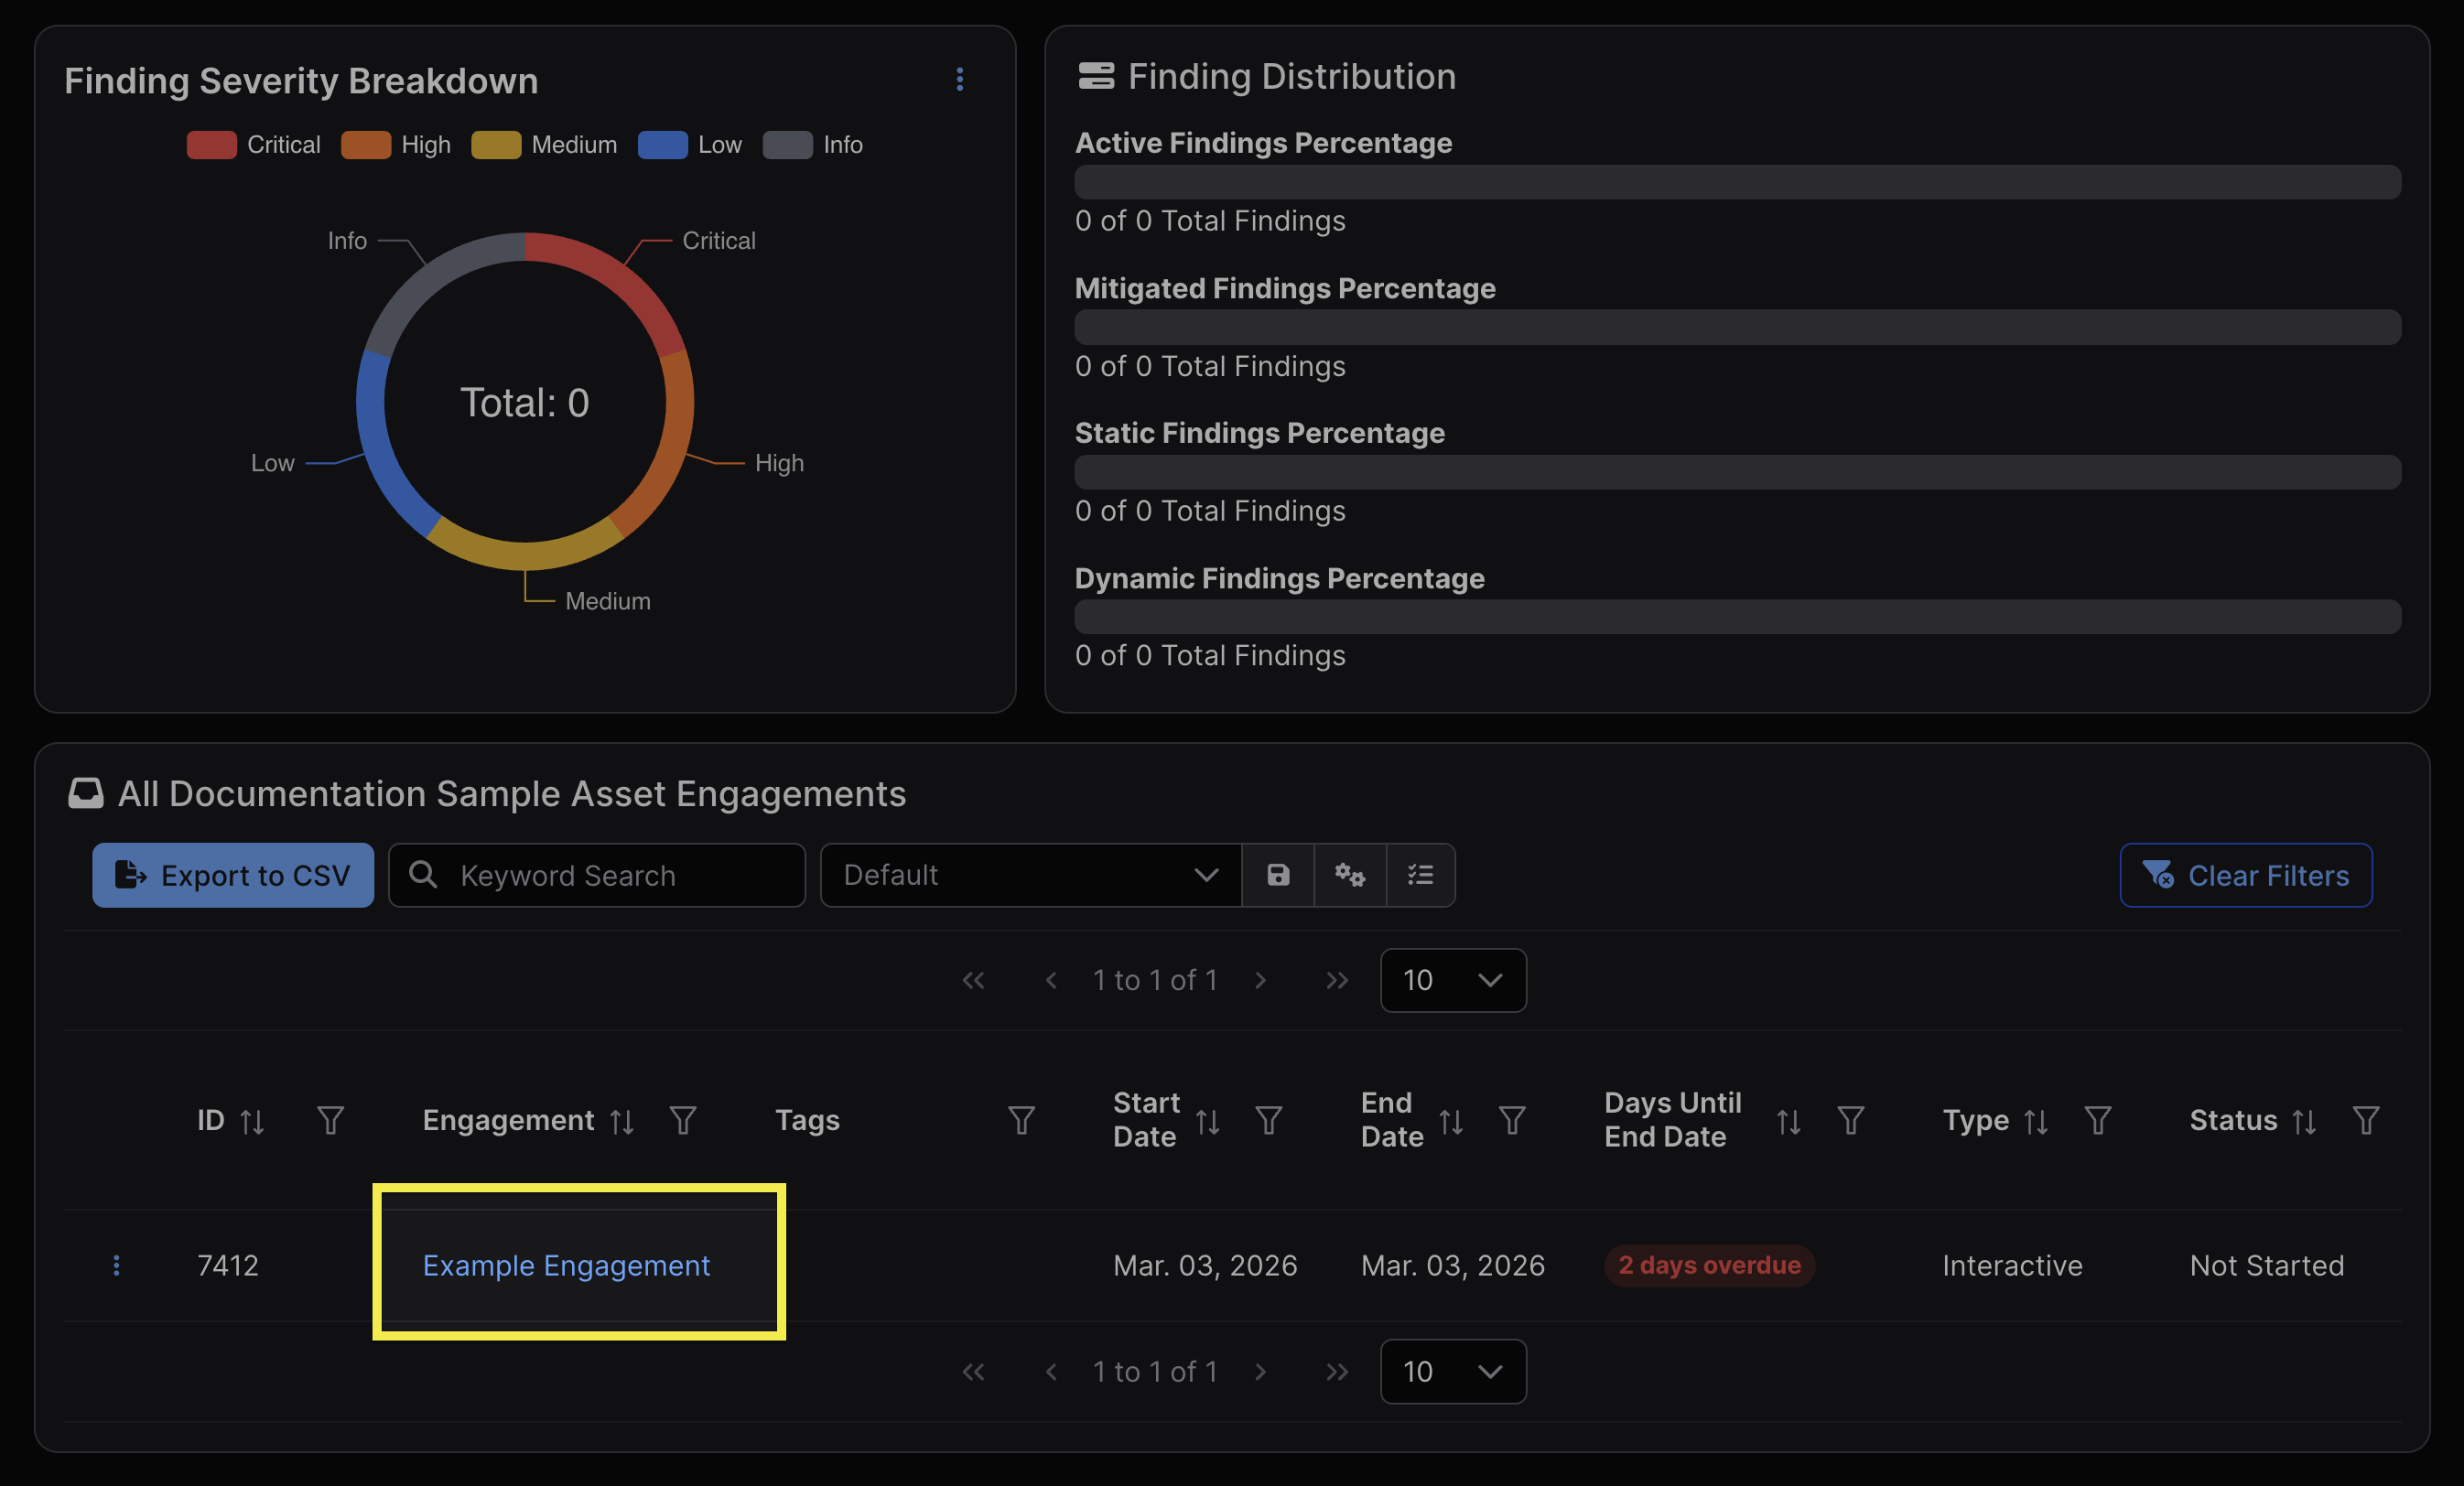
Alternatively, Engagements within an Asset can be accessed in the window at the bottom of the Asset’s view.
Permissions
Engagements sit below Assets and above Tests in the object hierarchy. As such, access to an Asset automatically grants access to all Engagements within that Asset. Engagements do not have independent access control lists.
Working with Engagements
Create Engagements
Before creating an Engagement, you must first have created an Asset to contain it.
There are several ways to create an Engagement:
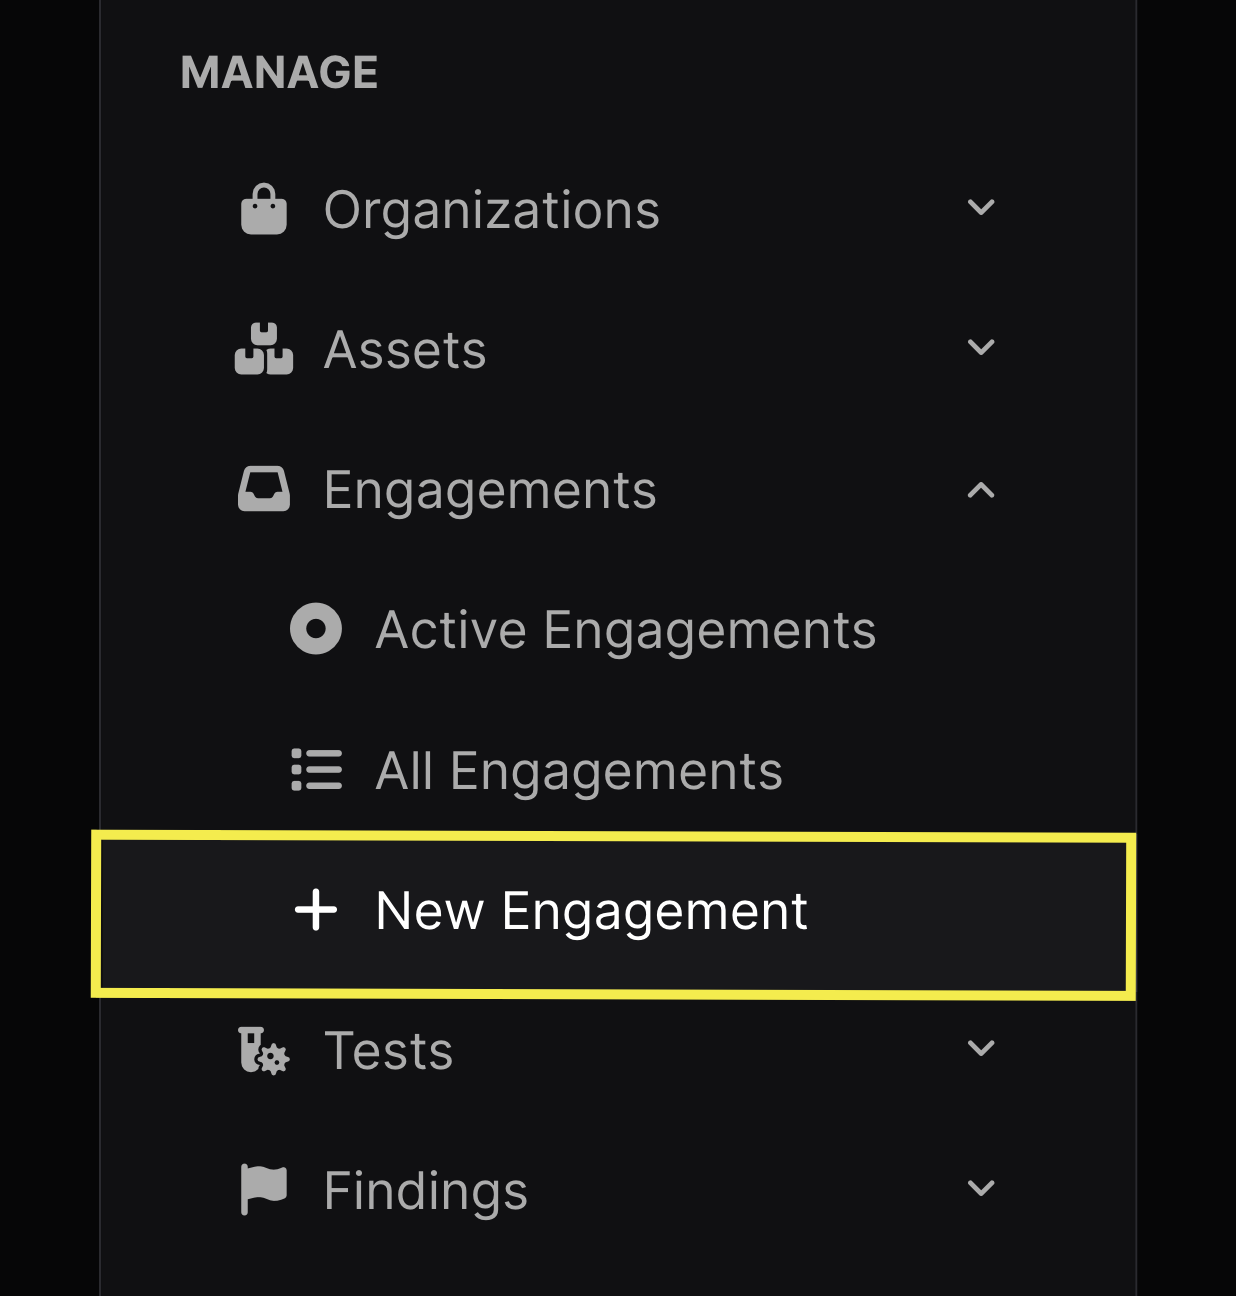
- Within the Engagements dropdown in the Manage section of the sidebar
- You will have to select the Asset to which to attribute the Engagement when completing the New Engagement form
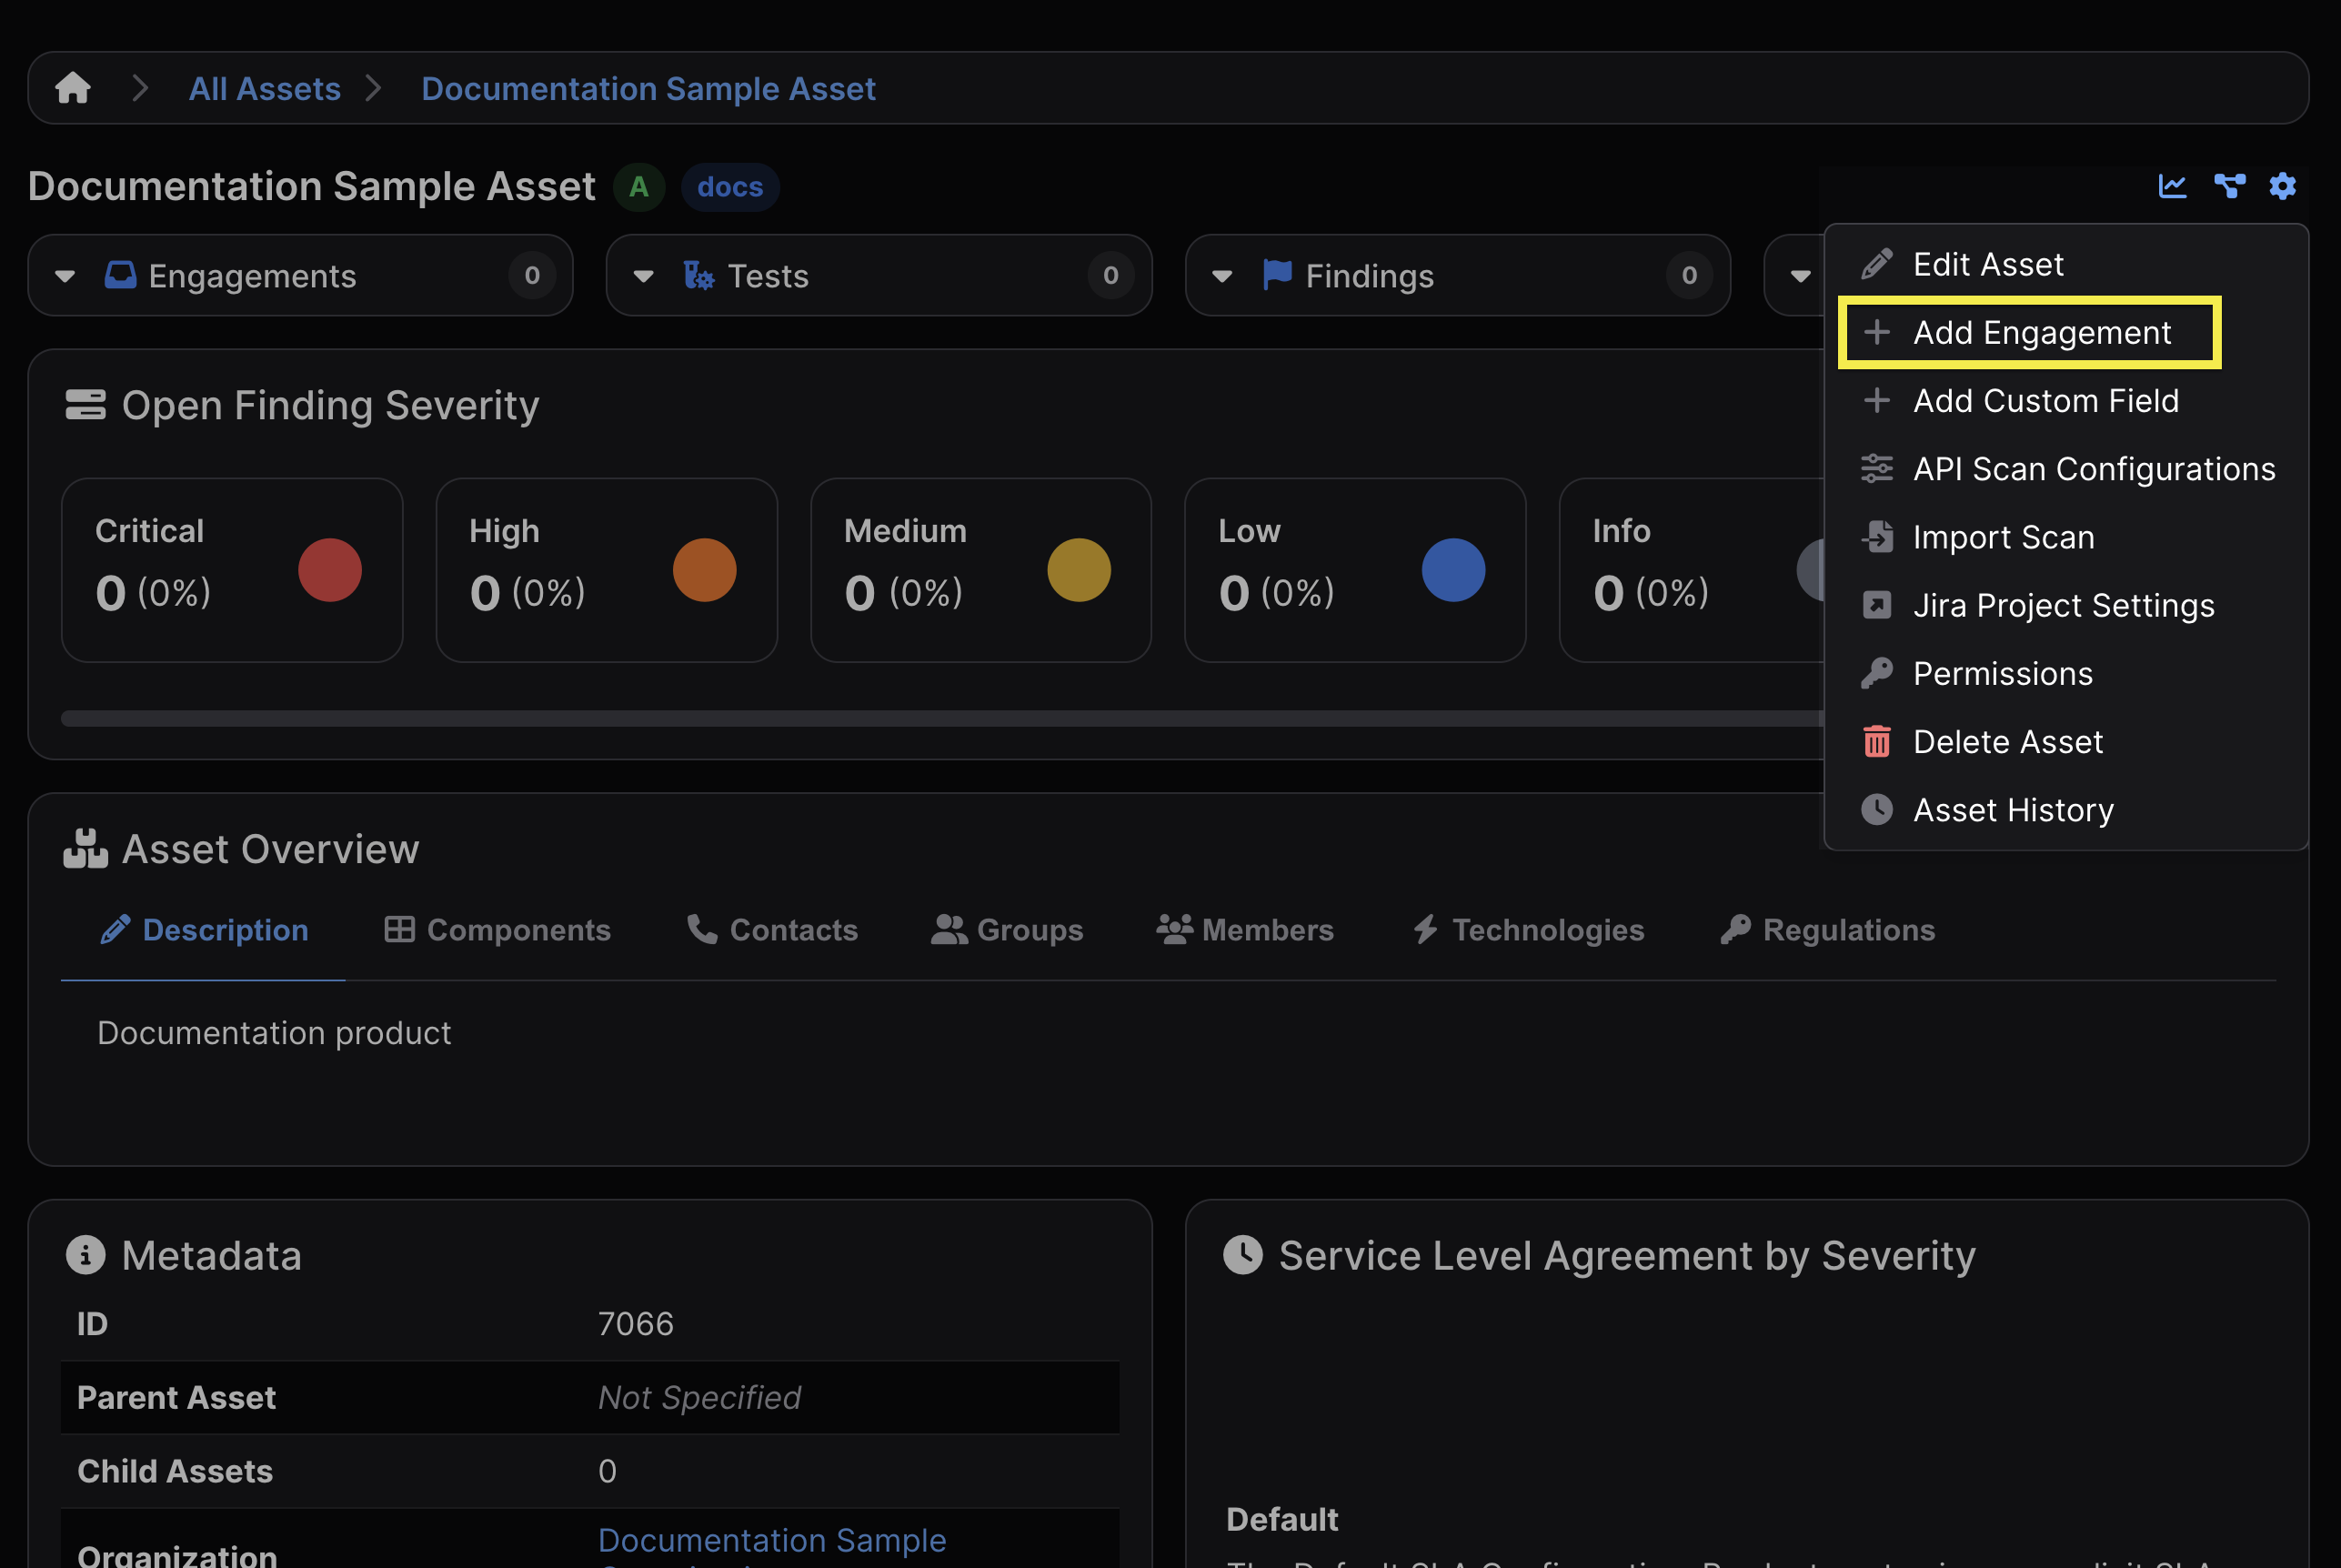
- The gear icon located at the top right corner of an Asset view
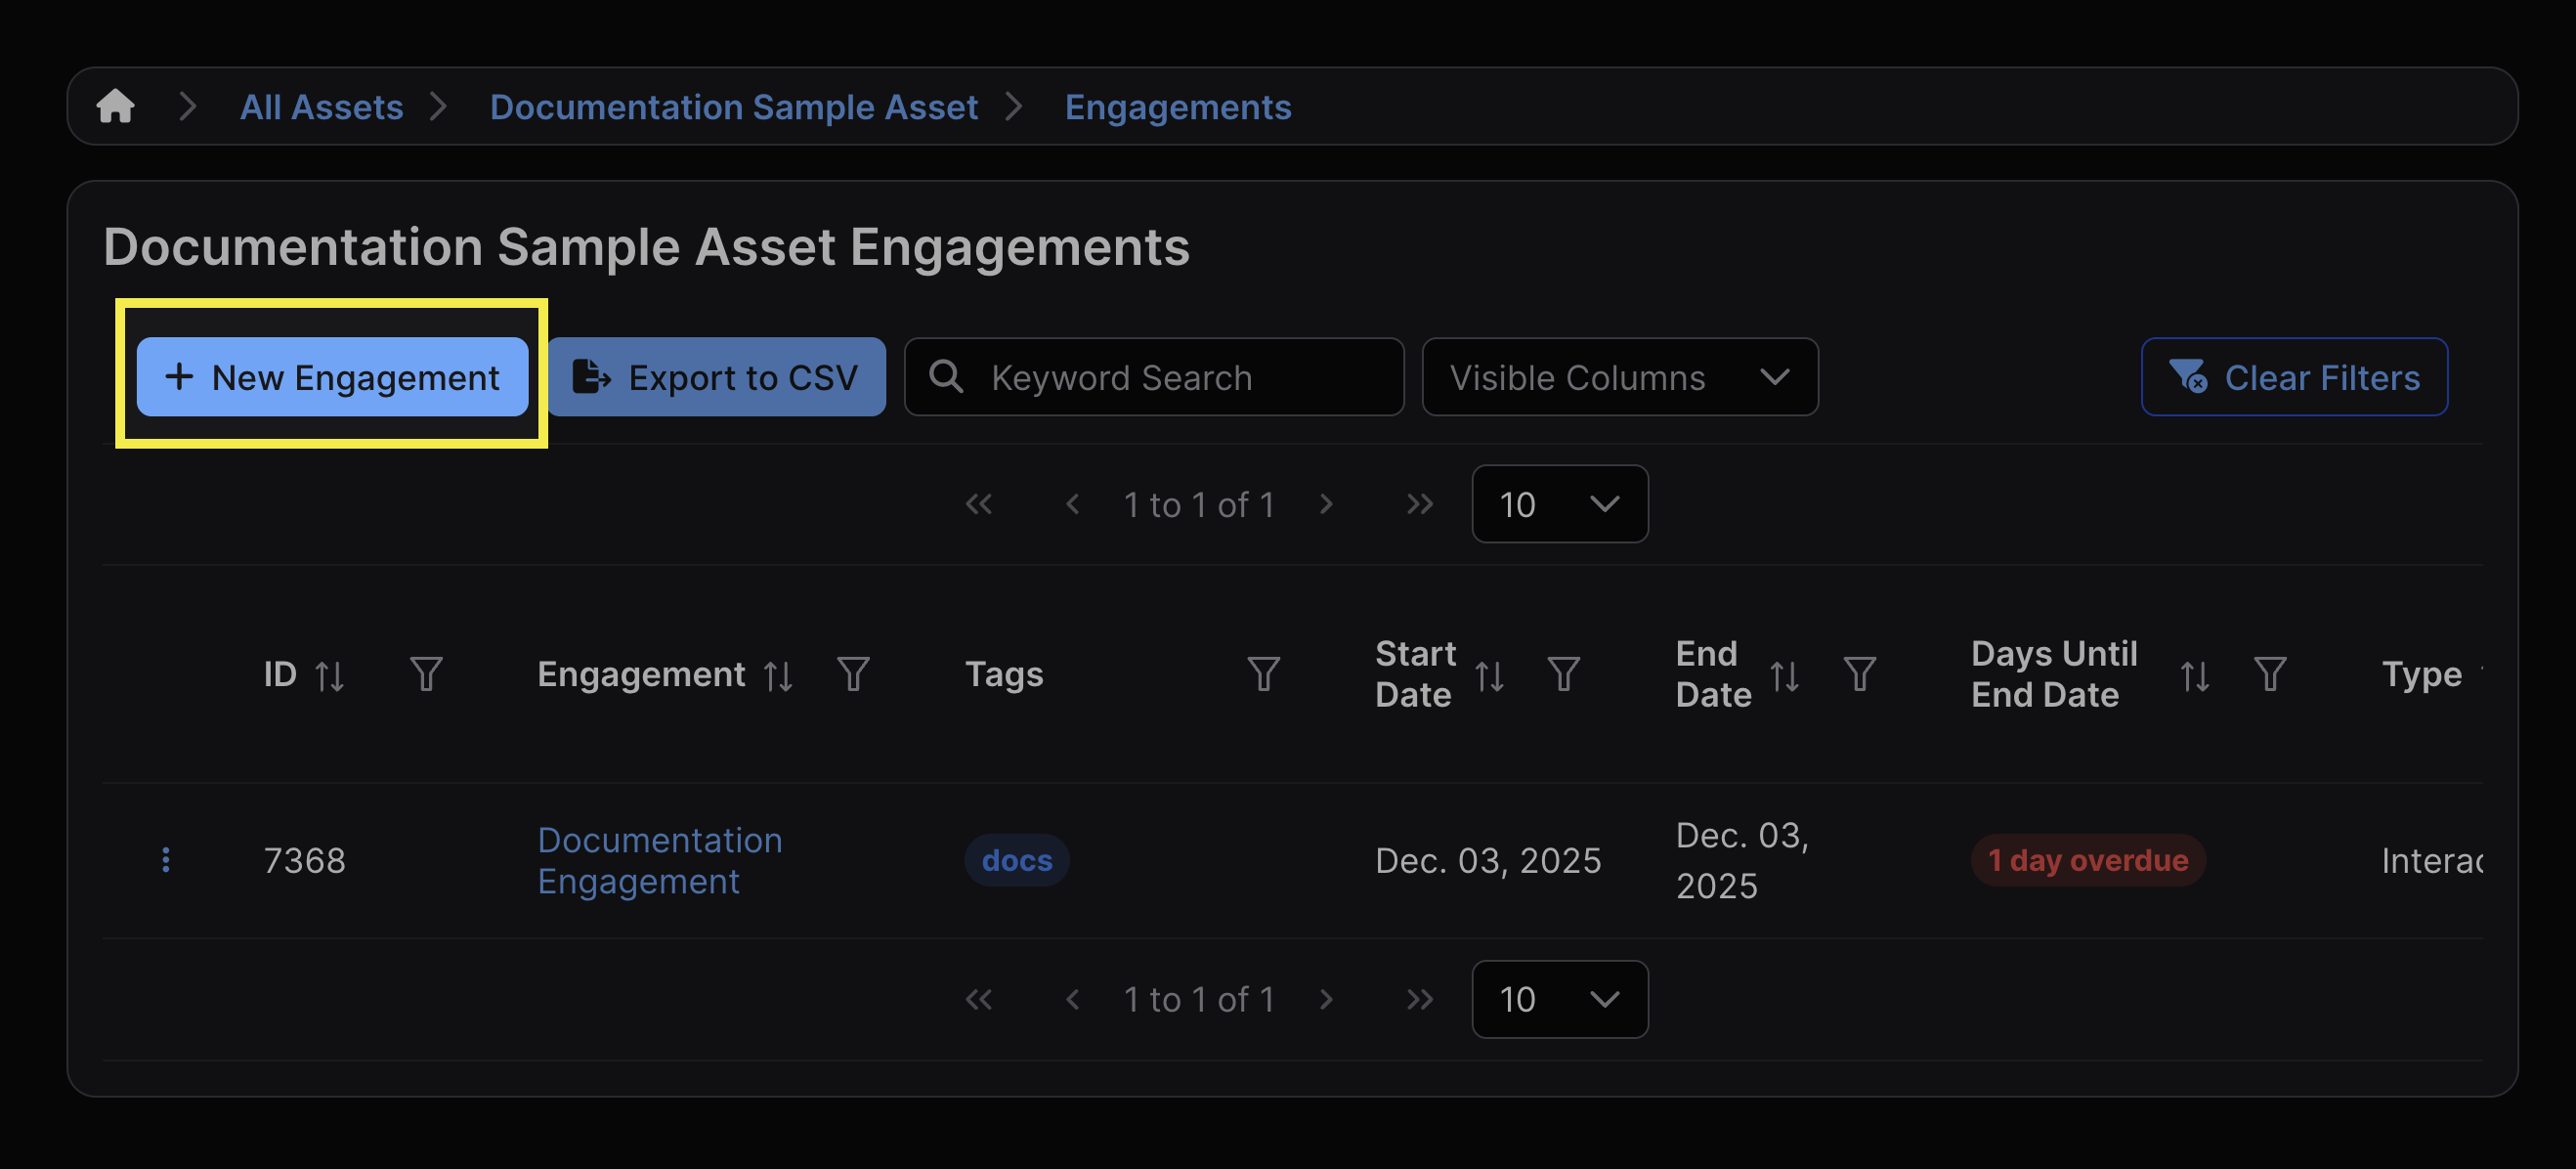
- The “+ New Engagement” button found in the list of Engagements within an Asset
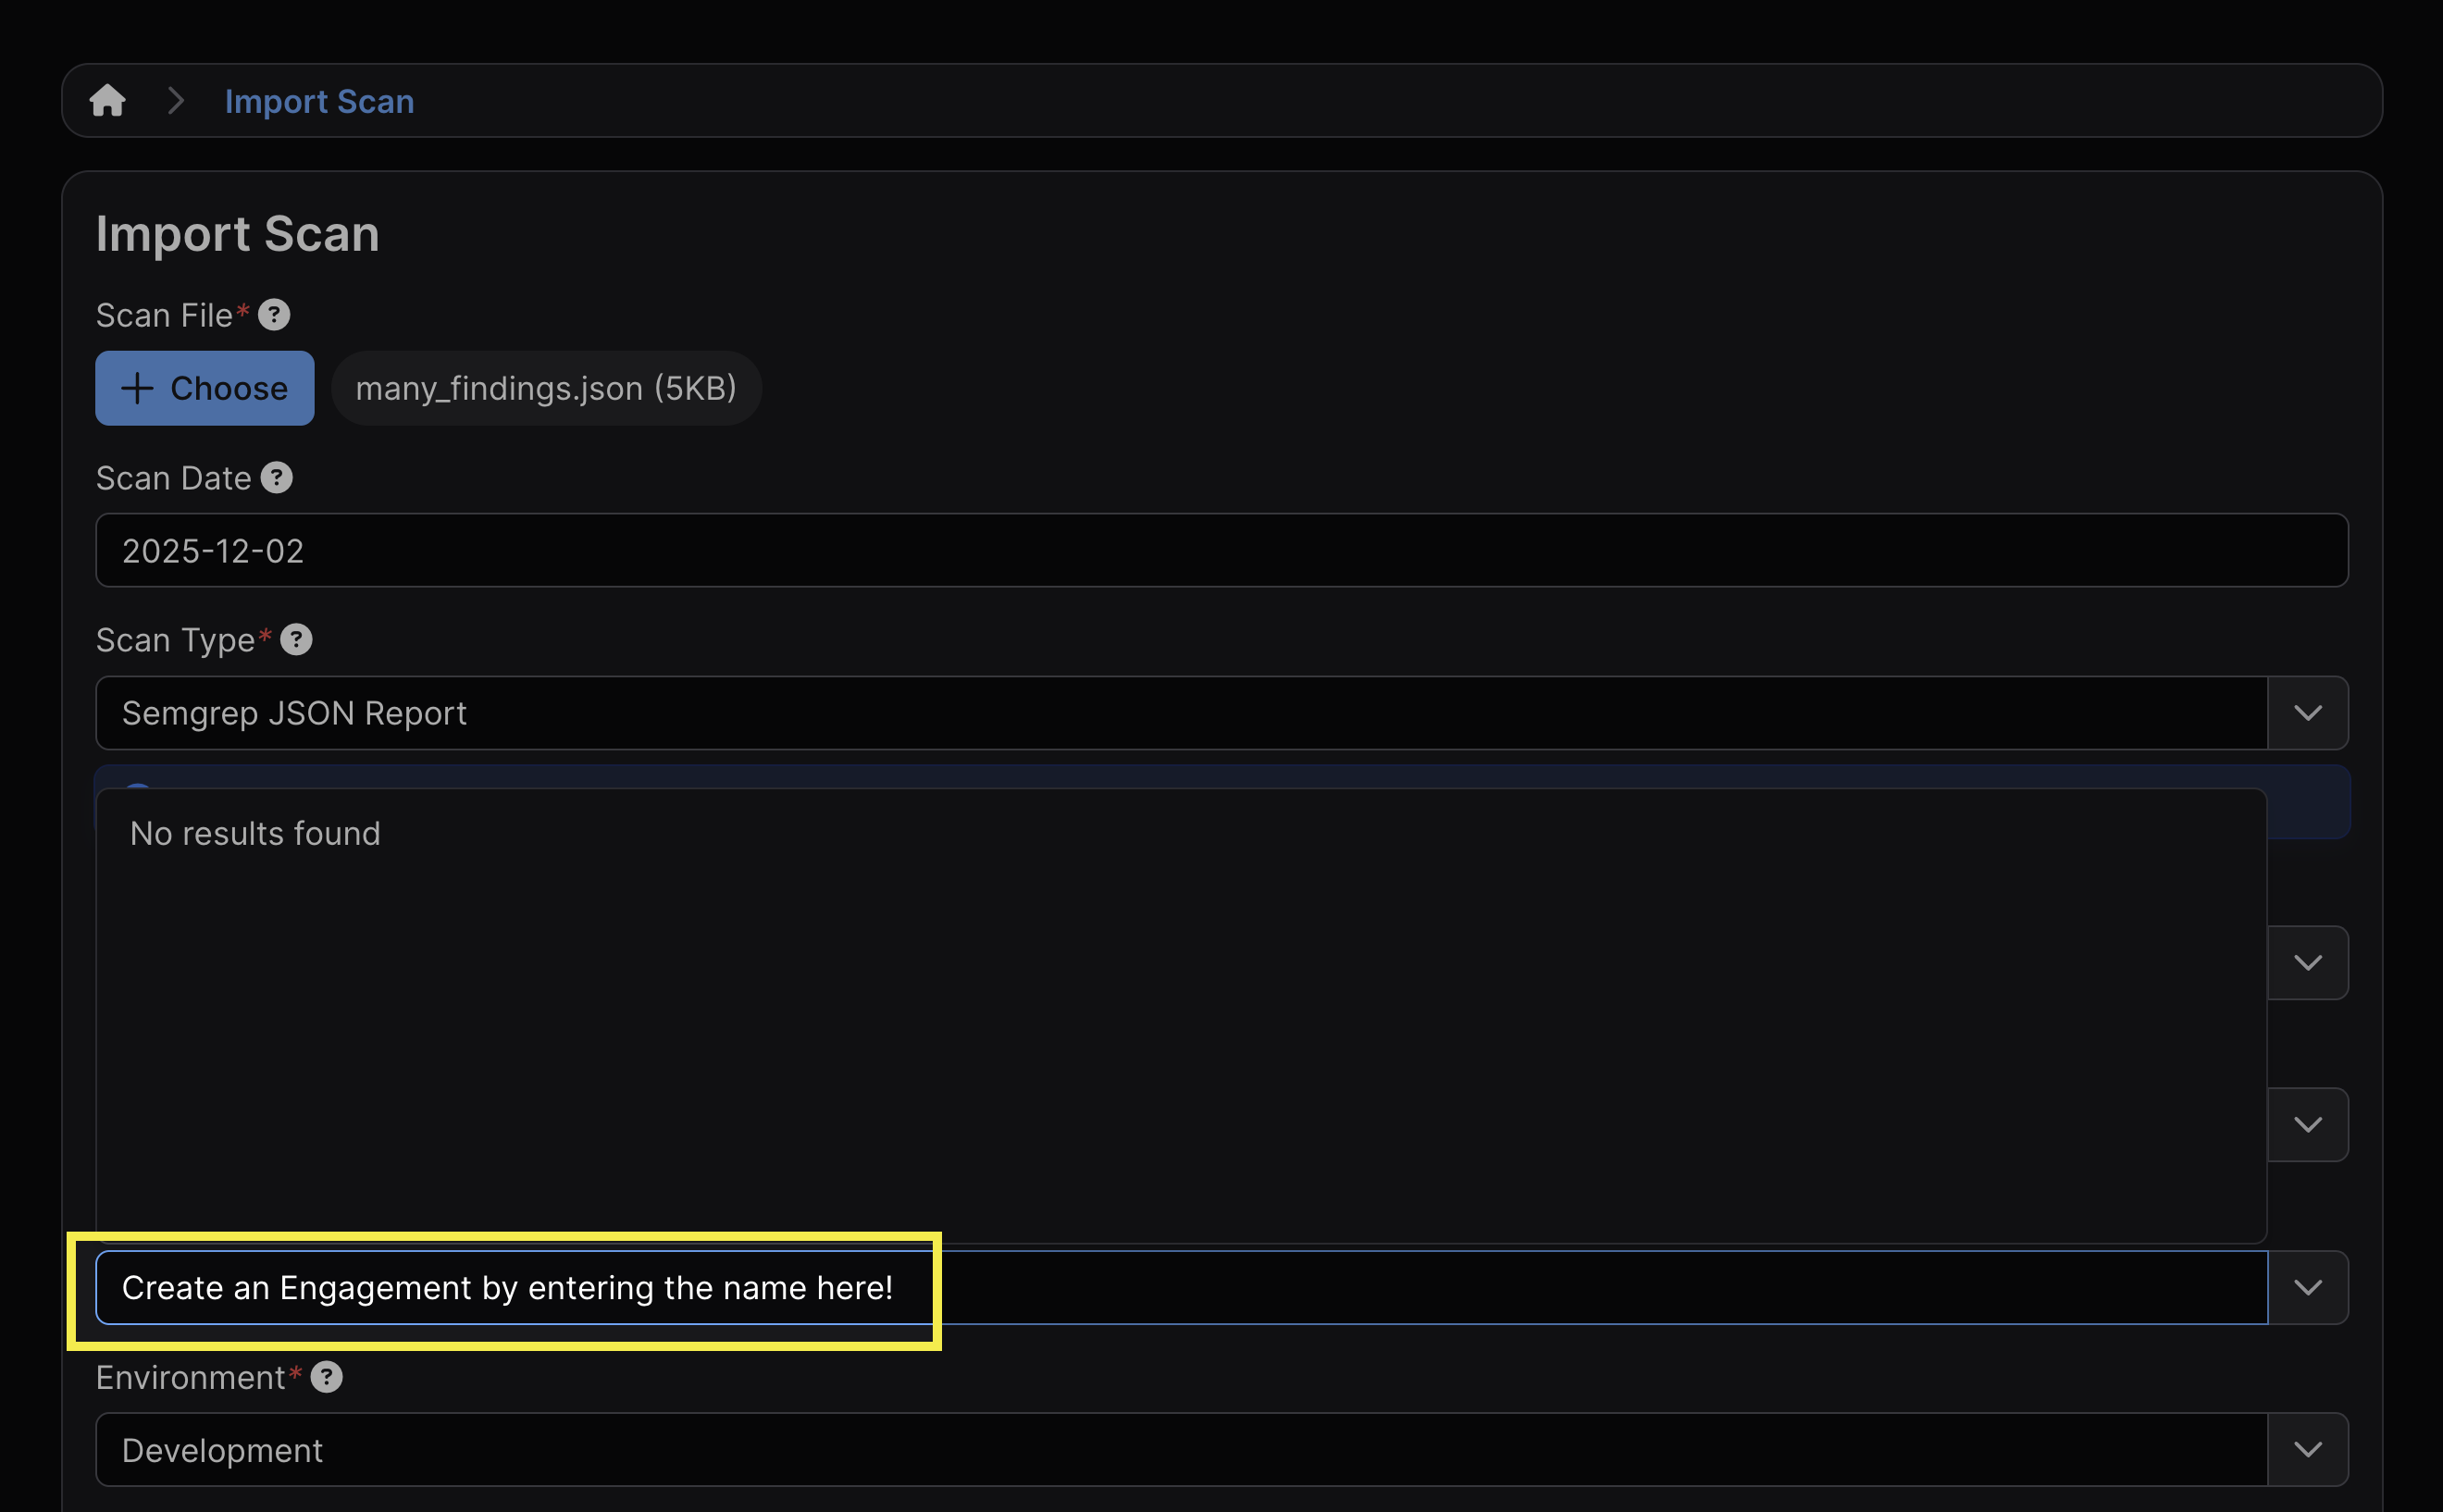
- If you haven’t already created an Engagement within an Asset, you can do so while importing a scan.
Every Engagement must have the following fields defined:
- Type (Interactive or CI/CD)
- A unique name
- Target start and end dates
- This will determine the Engagement’s appearance in the Calendar section
- Asset
- Status
Engagement Statuses
Engagements can be tagged with different statuses upon creation. The status can also be changed afterward in the Engagement’s settings.
An Engagement can have any one of the following statuses:
- Not Started
- Blocked
- Cancelled
- Completed
- In Progress
- On Hold
- Scheduled
- Waiting for Resource
Changing an Engagement’s status to “Completed” will mean that most write operations (e.g., adding tests, importing scans) will become unavailable or hidden. Other statuses will not materially affect the functionality of the Engagement, and are more for filtering/informational purposes only.
Edit Engagements
Engagements can be edited by clicking Edit Engagement from within the gear menu. The same menu can also be accessed by clicking the ⋮ kebab menu to the left of the Asset in the All Assets view.
All ensuing fields that can be edited are also available when the Engagement is being created.
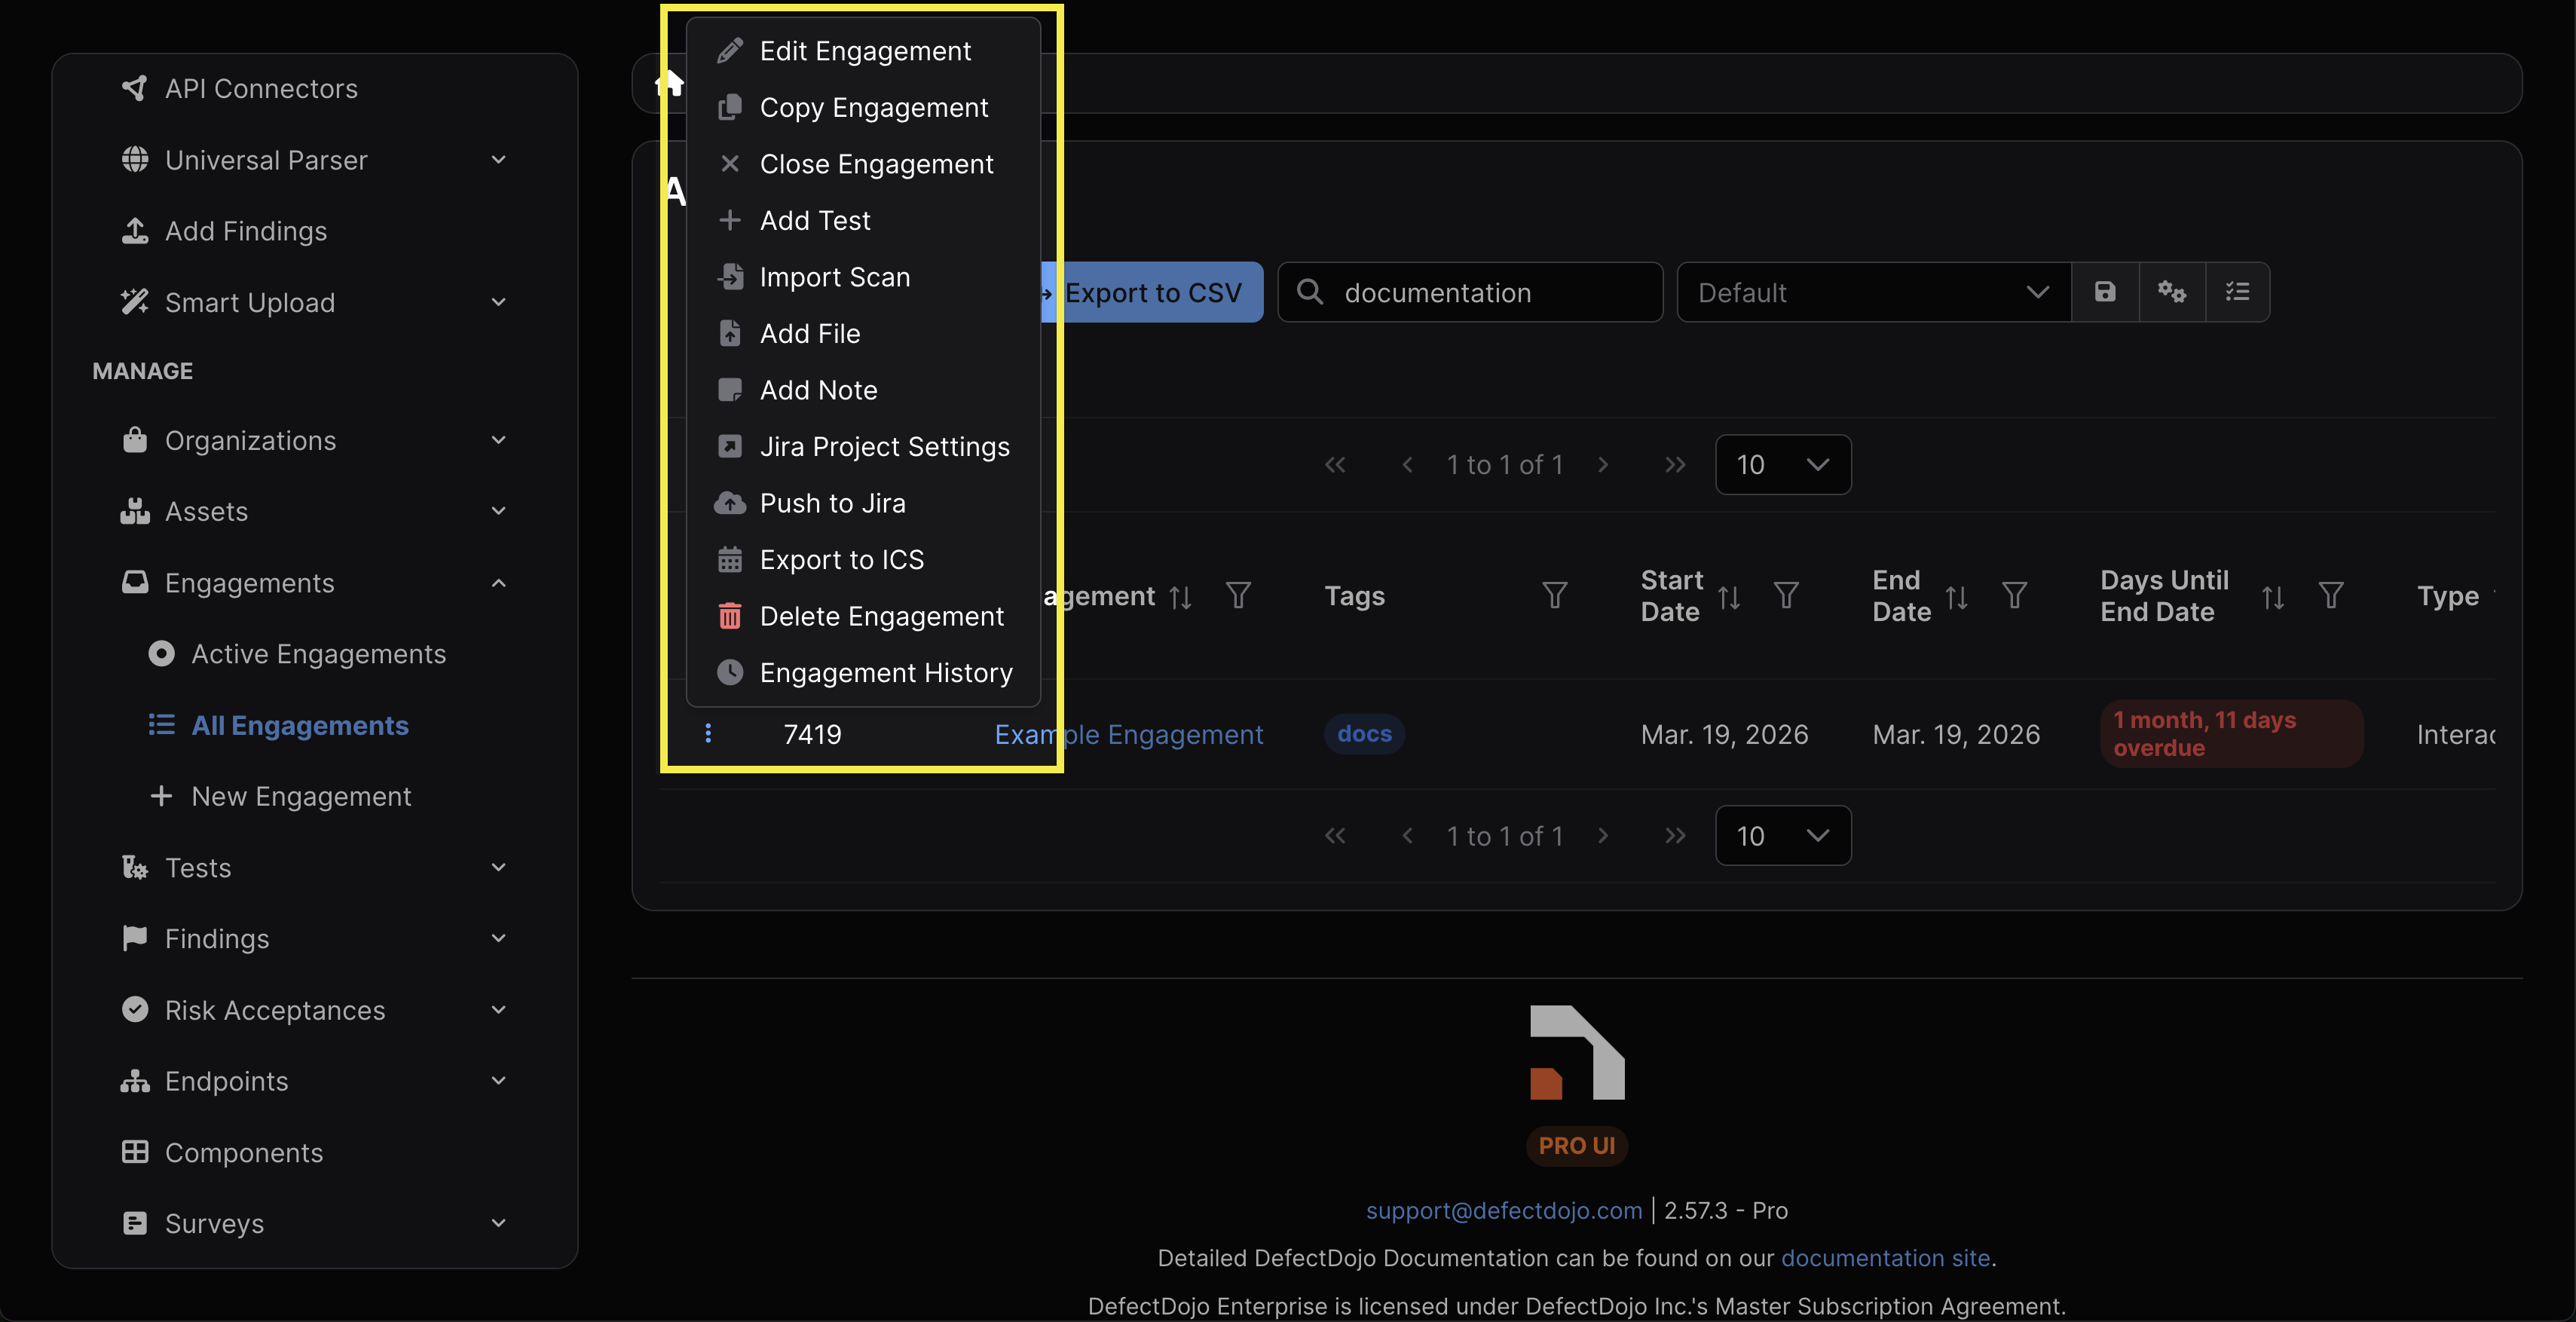
Copy Engagements
You can easily duplicate Engagements by selecting “Copy Engagement” within the Engagement’s settings. This will create an exact copy of the original Engagement within the parent Asset, including the metadata, Tests, and Findings within it.
Close Engagements
Engagements are closed by selecting Close Engagement within the Engagement’s settings. Once closed, the Engagement’s status will be changed to “Completed.” Nevertheless, most write operations (e.g., adding tests, importing scans) will remain available.
Closing an Engagement does not change the status of the Findings within any of the Engagement’s Tests. Findings remain open, mitigated, or risk accepted according to their own lifecycle, and remain accessible for viewing and reporting.
If the Engagement is linked to a Jira Epic (see Jira Integration: Enable Engagement Epic Mapping), closing the Engagement will trigger an asynchronous task that closes the associated Jira Epic in your connected Jira Space.
Reopen Engagements
If an Engagement is closed, it can be reopened by selecting Reopen Engagement within its settings. This will make the Engagement active again and return its status to “In Progress.”
Expired Engagements
An Engagement expires once its target end date passes.
Compared to closing or deleting an Engagement, an Engagement expiring has no direct impact on its functionality, and primarily serves as a monitoring/notification mechanism.
Once expired, an “Overdue” tag will appear next to the Engagement, but it will not restrict any of the Engagement’s functionality. The Engagement’s status will still appear as “In Progress.”
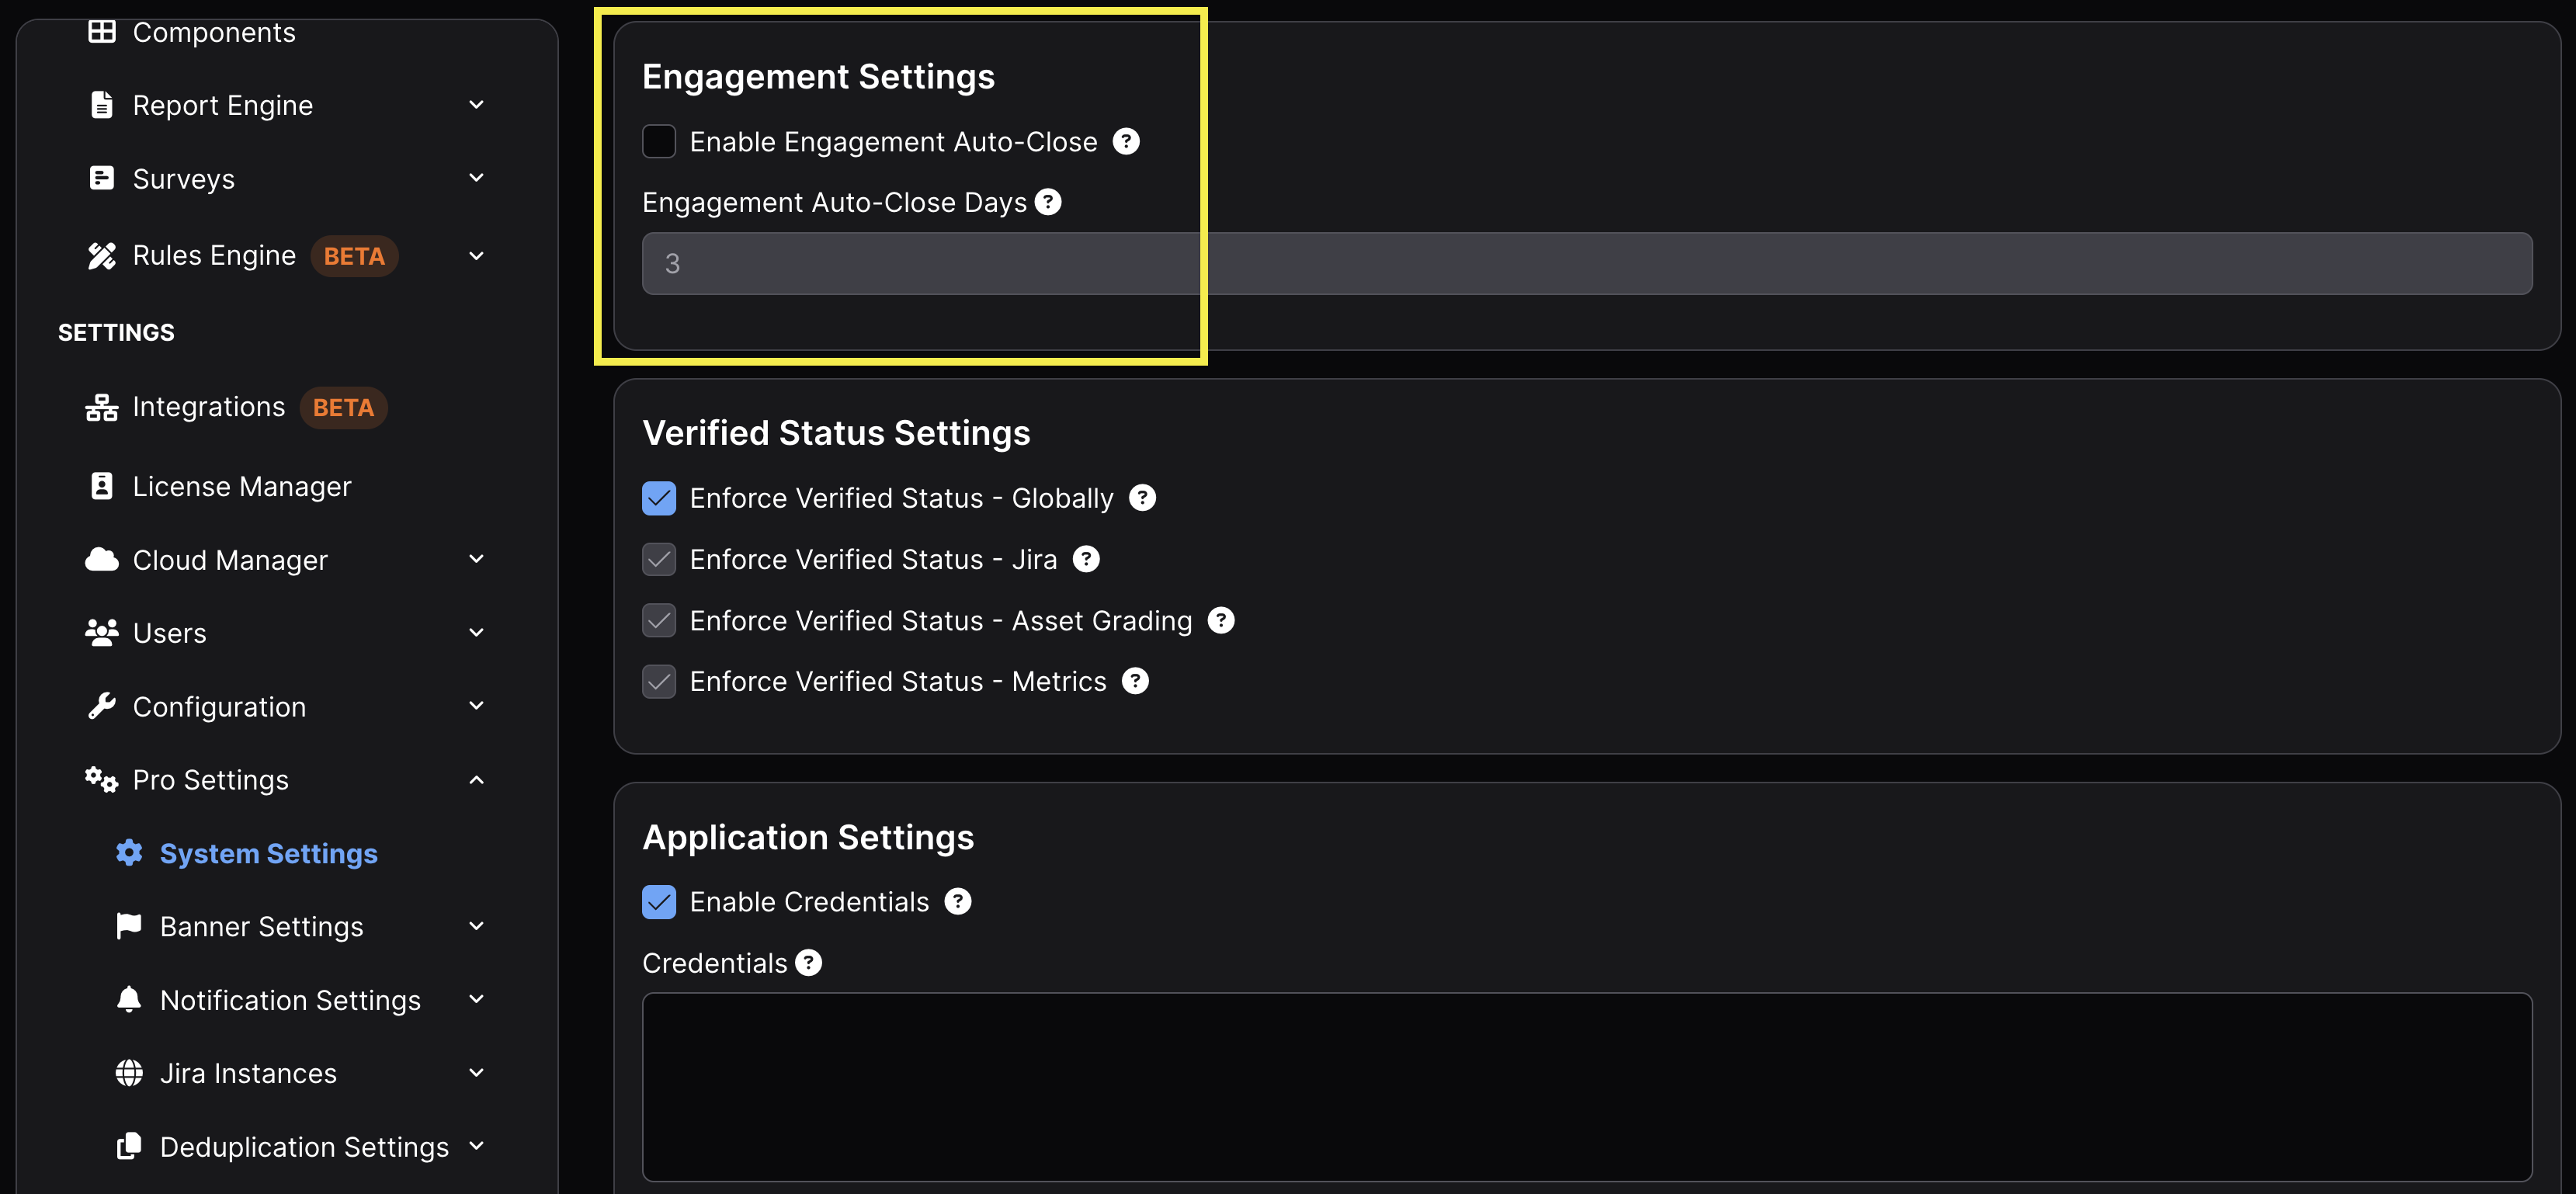
While it is not enabled by default, there is an option within the system settings to auto-close an Engagement once it has been expired for a certain number of days.
Delete Engagements
Deleting an Engagement can be performed by selecting Delete Engagement from the Engagement’s settings. This action can’t be undone.
Deleting an Engagement will also delete the following: Any Tests associated with the Engagement All Findings within those Tests Any linked Jira Epic mappings (the Epic itself will remain in Jira, but the link between DefectDojo and Jira will be removed) All notes and file uploads associated with the Engagement
For auditing purposes, it is recommended to close any completed Engagements, rather than deleting them.
| Operation | Results | Reversible |
|---|---|---|
| Close | Marks as inactive; data remains; can be reopened | Yes (reopen) |
| Expire | Visual warning only; optional auto-close; notifications | N/A |
| Delete | Permanently removes Engagement, Tests, Findings, notes, files, and any Jira Epic mappings (Epics remain in Jira) | No |
Jira Integration
Engagements can be linked to a connected Jira Space, allowing Findings within the Engagement to be pushed to Jira as Issues. For a complete guide to setting up Jira, see Connecting DefectDojo to Jira.
Engagement Epic Mapping
When Enable Engagement Epic Mapping is checked in a Product’s Jira settings, Engagements will be pushed to Jira as Epics. Findings within the Engagement are pushed as child Issues underneath the Epic, mirroring DefectDojo’s Engagement → Findings hierarchy in Jira’s Epic → Issue structure.
For more information on this setting, see Enable Engagement Epic Mapping.
Engagement-Level Jira Settings
By default, Engagements inherit their Jira settings from their parent Asset (Product). However, individual Engagements can override these settings to use different Jira configurations. The following settings can be customized per-Engagement:
- Project Key — route Findings to a different Jira Space
- Issue Template — use a different template for Issues created from this Engagement
- Custom Fields — apply different custom field mappings
- Jira Labels — tag Issues with Engagement-specific labels
- Default Assignee — assign Issues to a different team member
These settings are accessible from the Edit Engagement page. For more details, see Engagement-Level Jira Settings.