

Share permissions: User Groups (Pro)
DefectDojo Pro feature. User Groups and the underlying RBAC system are part of DefectDojo Pro. Open-source DefectDojo uses the Authorized Users model — see that page for open-source access control, and the 3.0 upgrade notes if you’re moving between editions.
If you have a significant number of DefectDojo users, you may want to create one or more Groups, in order to set the same Role-Based Access Control (RBAC) rules for many users simultaneously. Only Superusers can create User Groups.
Groups can work in multiple ways:
- Set one, or many different Asset or Organization level Roles for all Group Members, allowing specific control over which Assets or Organizations can be accessed and edited by the Group.
- Set Global Roles for all Group Members, giving them visibility and access to all Asset or Organizations.
- Give a Group a Global Role that carries Configuration Permissions, beside its other Global Roles, allowing its Members to reach specific settings pages in DefectDojo.
For more information on Roles, please refer to our Introduction To Roles article.
The All Groups page
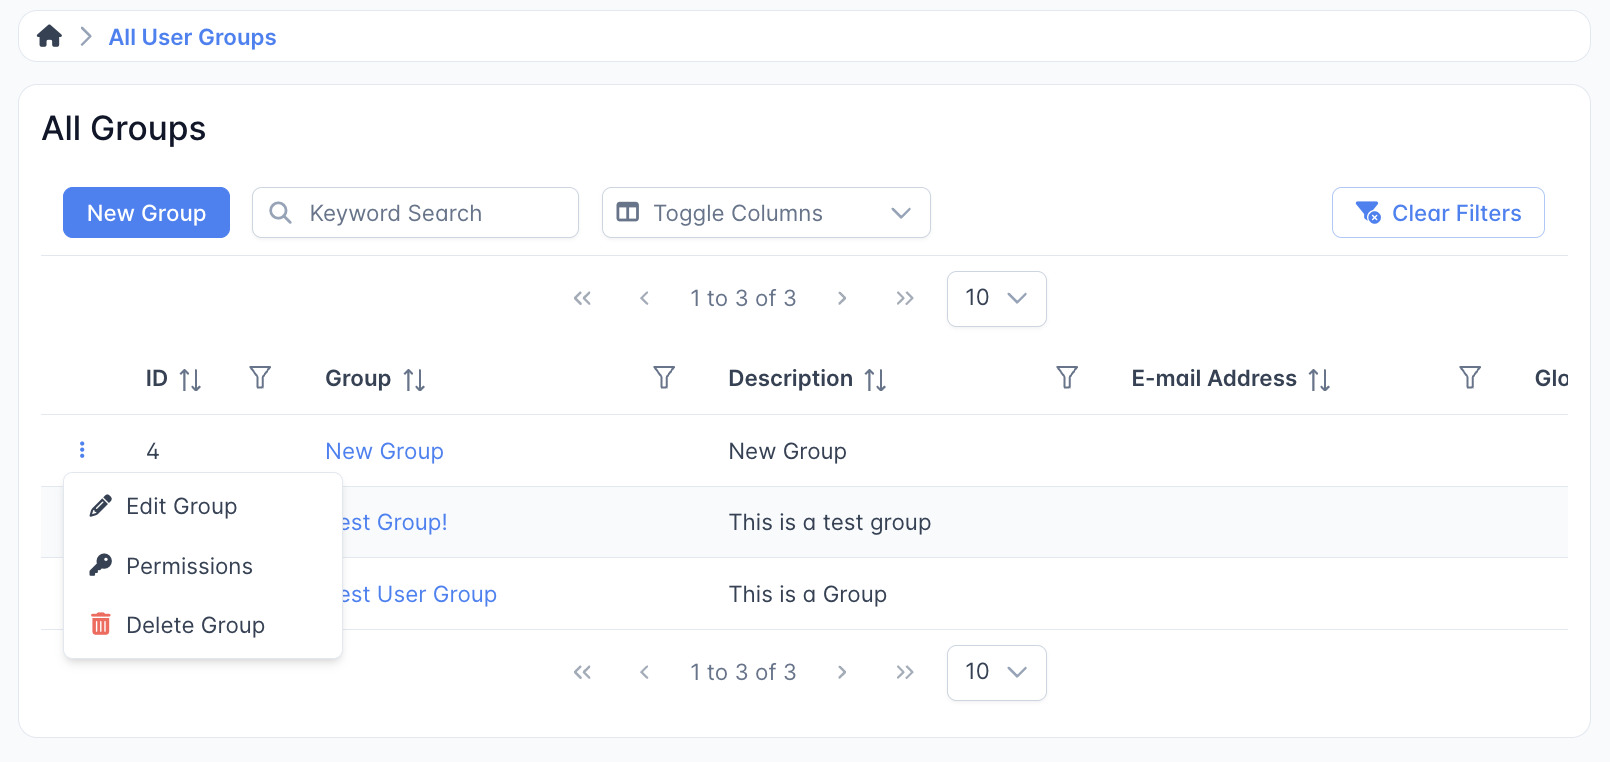
From the sidebar, navigate to Settings > Users & Permissions > Groups to see a list of all active and inactive user groups. From here, you can create, delete or view your individual Group pages.
Users with the View Group configuration permission see every Group. A Member of a Group sees the Groups they belong to and can open those Groups’ pages without that permission; what they can change there depends on their Role in the Group.
- You can filter this table by Group Name, Description, Email Address, Global Role, as well as the total number of Users, Organizations, and Assets associated with the Group.
- You can also adjust a Group’s Permissions or other settings by clicking the “⋮” button next to the Group you wish to edit.
Viewing A Group
With Access Administration on (Pro), a Group’s page has these tabs:
- Overview: the Group’s details, its description, the read-only Configuration Permissions card and, with Group Ownership on, the Automation Identity card (see The group’s automation identity).
- Members: the Group’s members and their Group Roles. When View As User is on, each member’s row has a View As button.
- Access: what the Group reaches in its own right: its Global Roles, its Configuration Permissions, and the Organizations and Assets it holds a Role on, with how each one is reached. Every member of the Group receives this access through it, and a Group that holds a Global Role is marked as having instance-wide access. The Group’s own Roles are changed here, with Add to Organization, Add to Asset, Change Role and Remove. Each change is checked against your permissions on that Organization or Asset, exactly as on its own Members dialog.
- Default Profile: the Default Profile the Group’s Members start from, and what that profile sets. See Set Group Defaults.
With Group Ownership on, the page also has an Owned Content tab: one row for each kind of content a Group can own (Rules, Report Templates, Report Blocks, Report Themes, Generated Reports, Dashboards, Webhook Receivers, Notification Webhooks, Downstream Connectors and Ticket Templates), with how many of the Group’s you can see. A report schedule belongs to its Template, as a rule’s schedule belongs to the rule, so it has no row of its own. A kind’s name opens its list filtered to the Group, and that page’s title and breadcrumb name the Group (for example Report Templates Owned By AppSec, under a link back to the Group).
- The kind’s name opens its usual list filtered to the Group: the Owner filter is set to the Group, and clearing it shows the whole list again.
- The row menu has View (the same filtered list) and, where you can create that kind for the Group, New, which opens the create page with Owned By already set to the Group. See Group ownership of rules and of Report Builder content.
A kind is listed when the Group owns something of that kind that you can see, or when you can create it there (your Role in the Group, or a Global Role, carries its Add permission, or Integration Edit for connectors, ticket templates and notification webhooks; for a rule or a webhook receiver you must also be a member of the Group), and only while the feature it belongs to (Triage Engine, Reporting or Downstream Connectors) is turned on.
The Group’s page shows what it owns. Who owns something is chosen where it is created (Owned By) and changed with Transfer in its row menu.
Viewing a group displays all Group information, such as ID, name, description, global roles, etc. The Group Members, Organizations, and Assets associated with the group are also displayed.
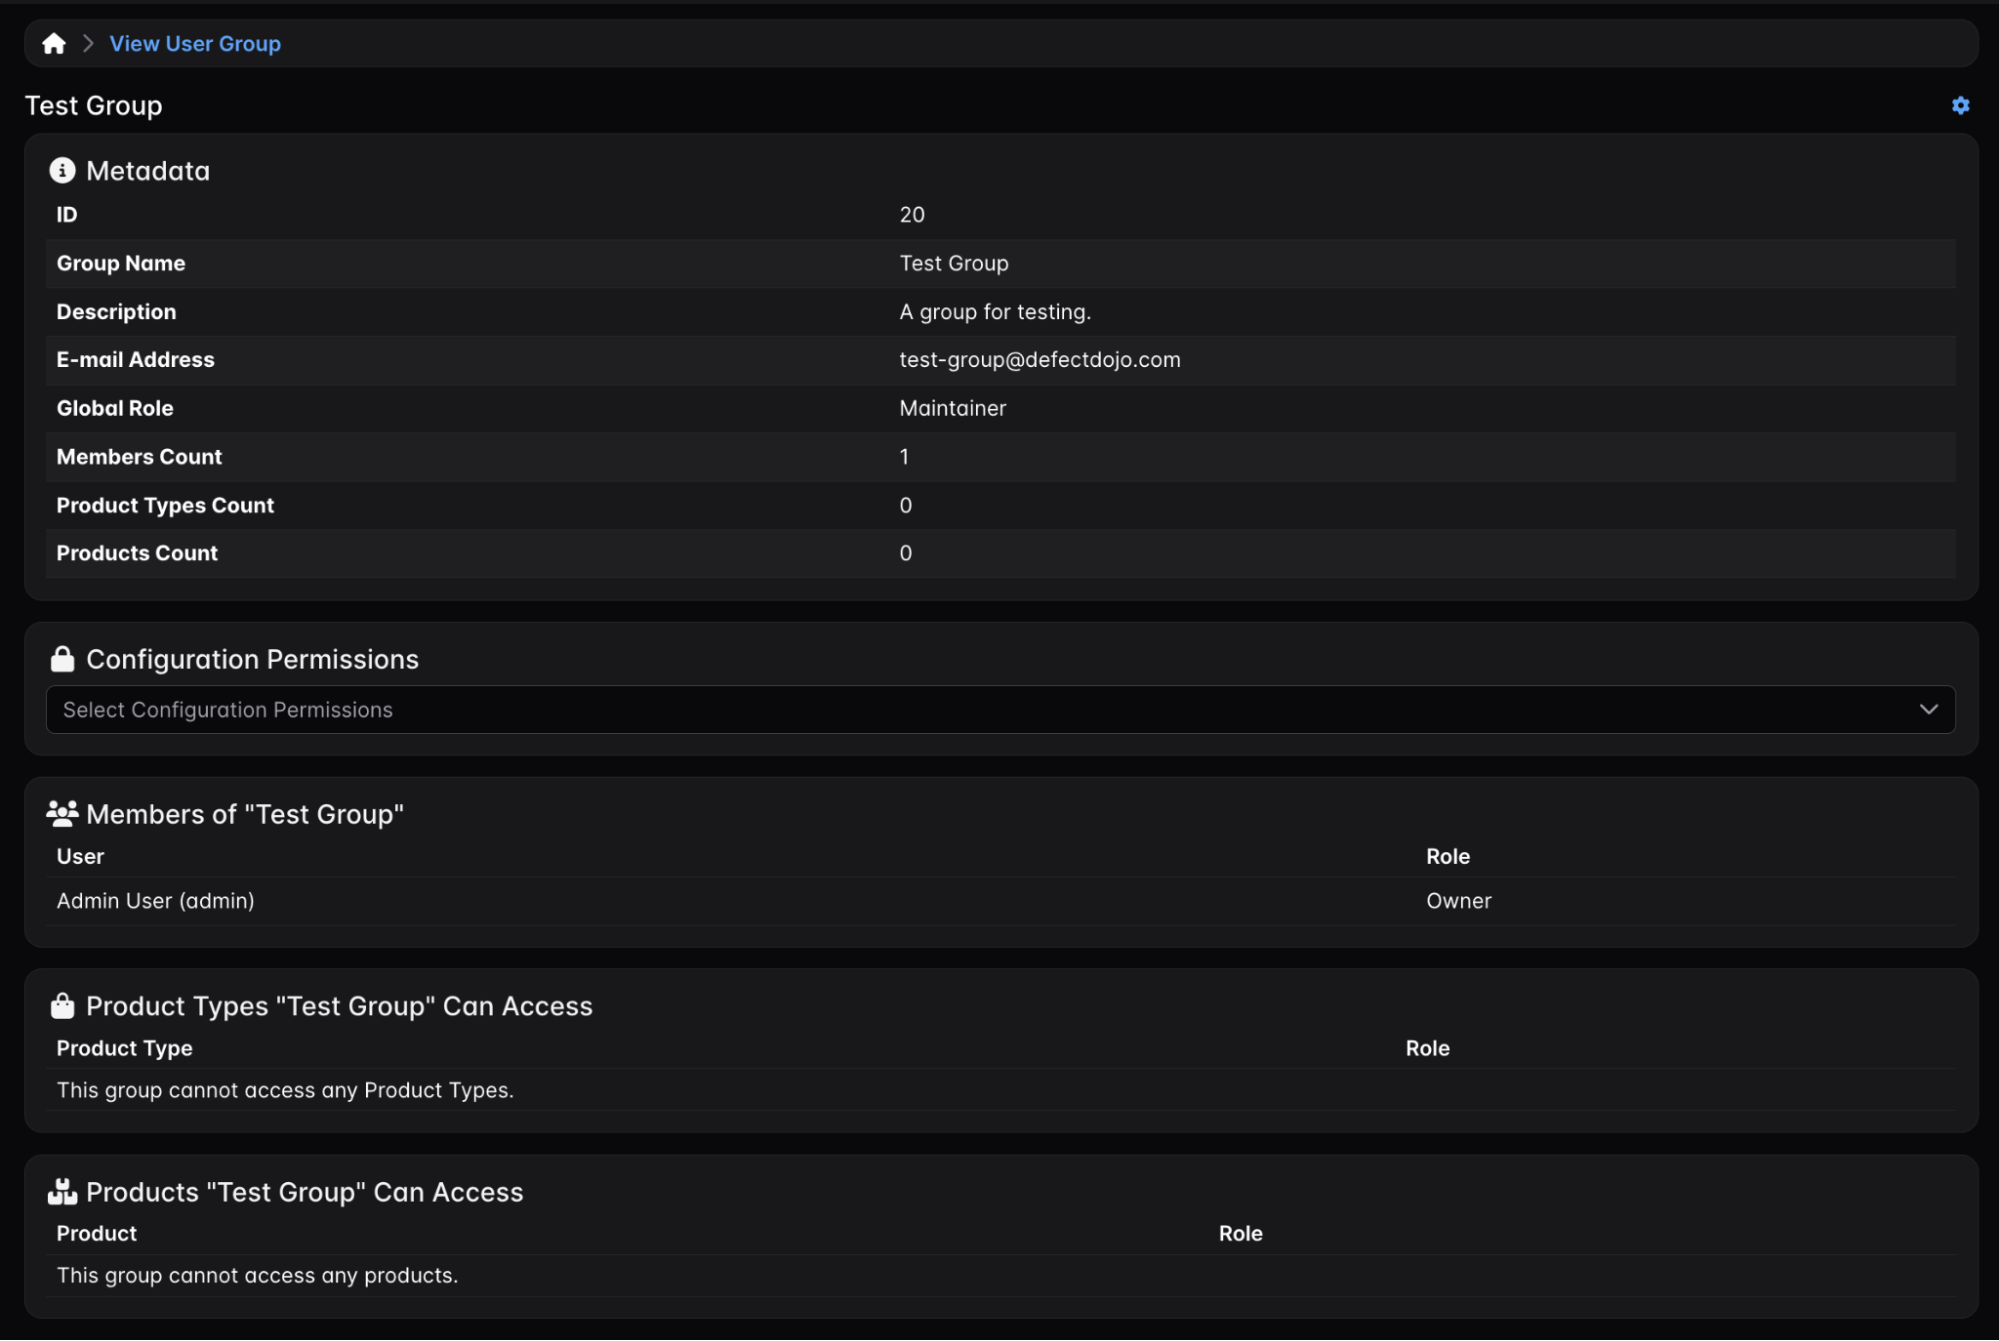
- The Configuration Permissions card lists the Configuration Permissions the Group’s Global Roles carry, grouped by area. It is read-only: to change them, a Superuser edits the Role on the Roles page or changes the Group’s Global Roles.
- A Group’s history, opened from the ⚙️ menu, is shown only to Users with the View Group configuration permission, because it also lists the Group’s past Asset and Organization Roles.
The group’s automation identity
Rules and report schedules a Group owns do not run as the person who created them. They run as the Group’s automation identity: a service user of the Group Automation kind, named svc-group-<group name>. Each Group has at most one, shared by everything it owns. It is created the first time the Group owns a rule or a report schedule, and the Automation Identity card on the Group’s Overview tab shows its username, or says the Group has none yet.
The identity has exactly the Group’s access, and nothing of its own:
- It sees and edits what the Group’s Organization and Asset Roles allow, and what the Group’s Global Roles allow. When the Group gains or loses access, so does the identity, immediately.
- It has no password and cannot sign in. It has no API token unless one is issued for the Group (see The group’s API token).
- It cannot be given a Global Role, a membership or any access of its own. Its access is set on the Group.
- It is removed when the Group is deleted.
Because the identity carries the Group’s access, a Group that holds a Global Role has an identity that reaches the whole instance, and its rules can act on every Finding. The rule editor’s Runs As panel warns about this.
Changing what a Group’s rule or report schedule does needs membership of the Group as well as the permission to edit it, because the change acts with the Group’s access. See Group Content permissions.
The group’s API token
With the Group API Tokens feature flag on, a Group’s automation identity can hold one API token, so the Group’s own automation (a pipeline, a script) calls the API as the Group. The token sees exactly what the Group owns and has been granted, nothing more. It acts as the Group, not as whoever issued it, so it can read Group content (connectors and ticket templates, for example, with their secrets masked) that the issuer’s own Role in the Group does not show them.
The Automation Identity card on the Group’s Overview tab shows the token’s first characters, who issued it and when, and when it expires. A superuser, or a member whose Role in the Group carries Service User Edit, manages it there:
- Issue Token creates the token, with an expiry of 30, 60, 90 or 180 days or none. The token is shown once; DefectDojo keeps only a hash of it. Issuing creates the automation identity if the Group has none yet.
- Replace Token issues a new token; the old one stops working at once. OAuth access tokens already exchanged from it keep working until they expire, within the hour.
- Revoke Token ends the token at once (OAuth access tokens already exchanged from it expire within the hour). Revoking works even while the feature flag is off.
When the Group holds a Global Role, its token reaches everything that Role grants, so only a superuser may issue it; the card still offers its other managers Revoke Token. The token is used like any service user token, in the Authorization header with the Token keyword. Group API Tokens needs Service Users on: a group token is a service user token. Turning the Group API Tokens flag (or Service Users) off refuses every group token, and every OAuth access token exchanged from one, until it is turned on again.
Deleting a Group that owns content
Deleting a Group does not delete its rules, templates, blocks, themes, schedules, webhook receivers, notification webhooks, connectors or ticket templates. Its rules are turned off, its templates, blocks and themes are hidden from everyone except superusers and holders of the matching global permission, and its schedules stop running. Its webhook receivers stop accepting deliveries, and its notification webhooks are made permanently inactive, so nothing is sent through them until they have a new owner. The rules, templates, blocks, themes, receivers, notification webhooks, connectors and ticket templates appear under Settings > Groups > Unowned Content (a schedule waits with its Template and comes back when the Template is transferred), where an administrator holding the matching global Edit permission (Rule Edit, Report Template Edit or Integration Edit) transfers them to another Group or to the instance. Only a superuser moves a notification webhook to the instance, because that makes it a system webhook. The Group’s automation identity, and with it the Group’s API token, is removed with the Group.
Its dashboards, page layouts and saved table views are kept too, hidden from everyone except superusers and holders of the matching share permission (Dashboard Share, Page Layout Share, Table Preference Share) as a Global Role. A dashboard waits in the Group Dashboards section of Manage Layouts, tagged Unowned, until it is transferred. A layout the Group had shared with everyone stays shared.
Create a User Group
Navigate to Settings > Users & Permissions > Groups on the sidebar.
Click + New Group above the table of existing Groups.
In the New Group window, set the Name for this Group, and add a Description if you wish.
You can also select the Global Roles that you wish to apply to this Group. Adding a Global Role to the Group will give all Group Members access to all DefectDojo data, along with a limited amount of edit access depending on the Global Role you choose; several Global Roles add up. See our Introduction To Roles article for more information.
Click Submit.
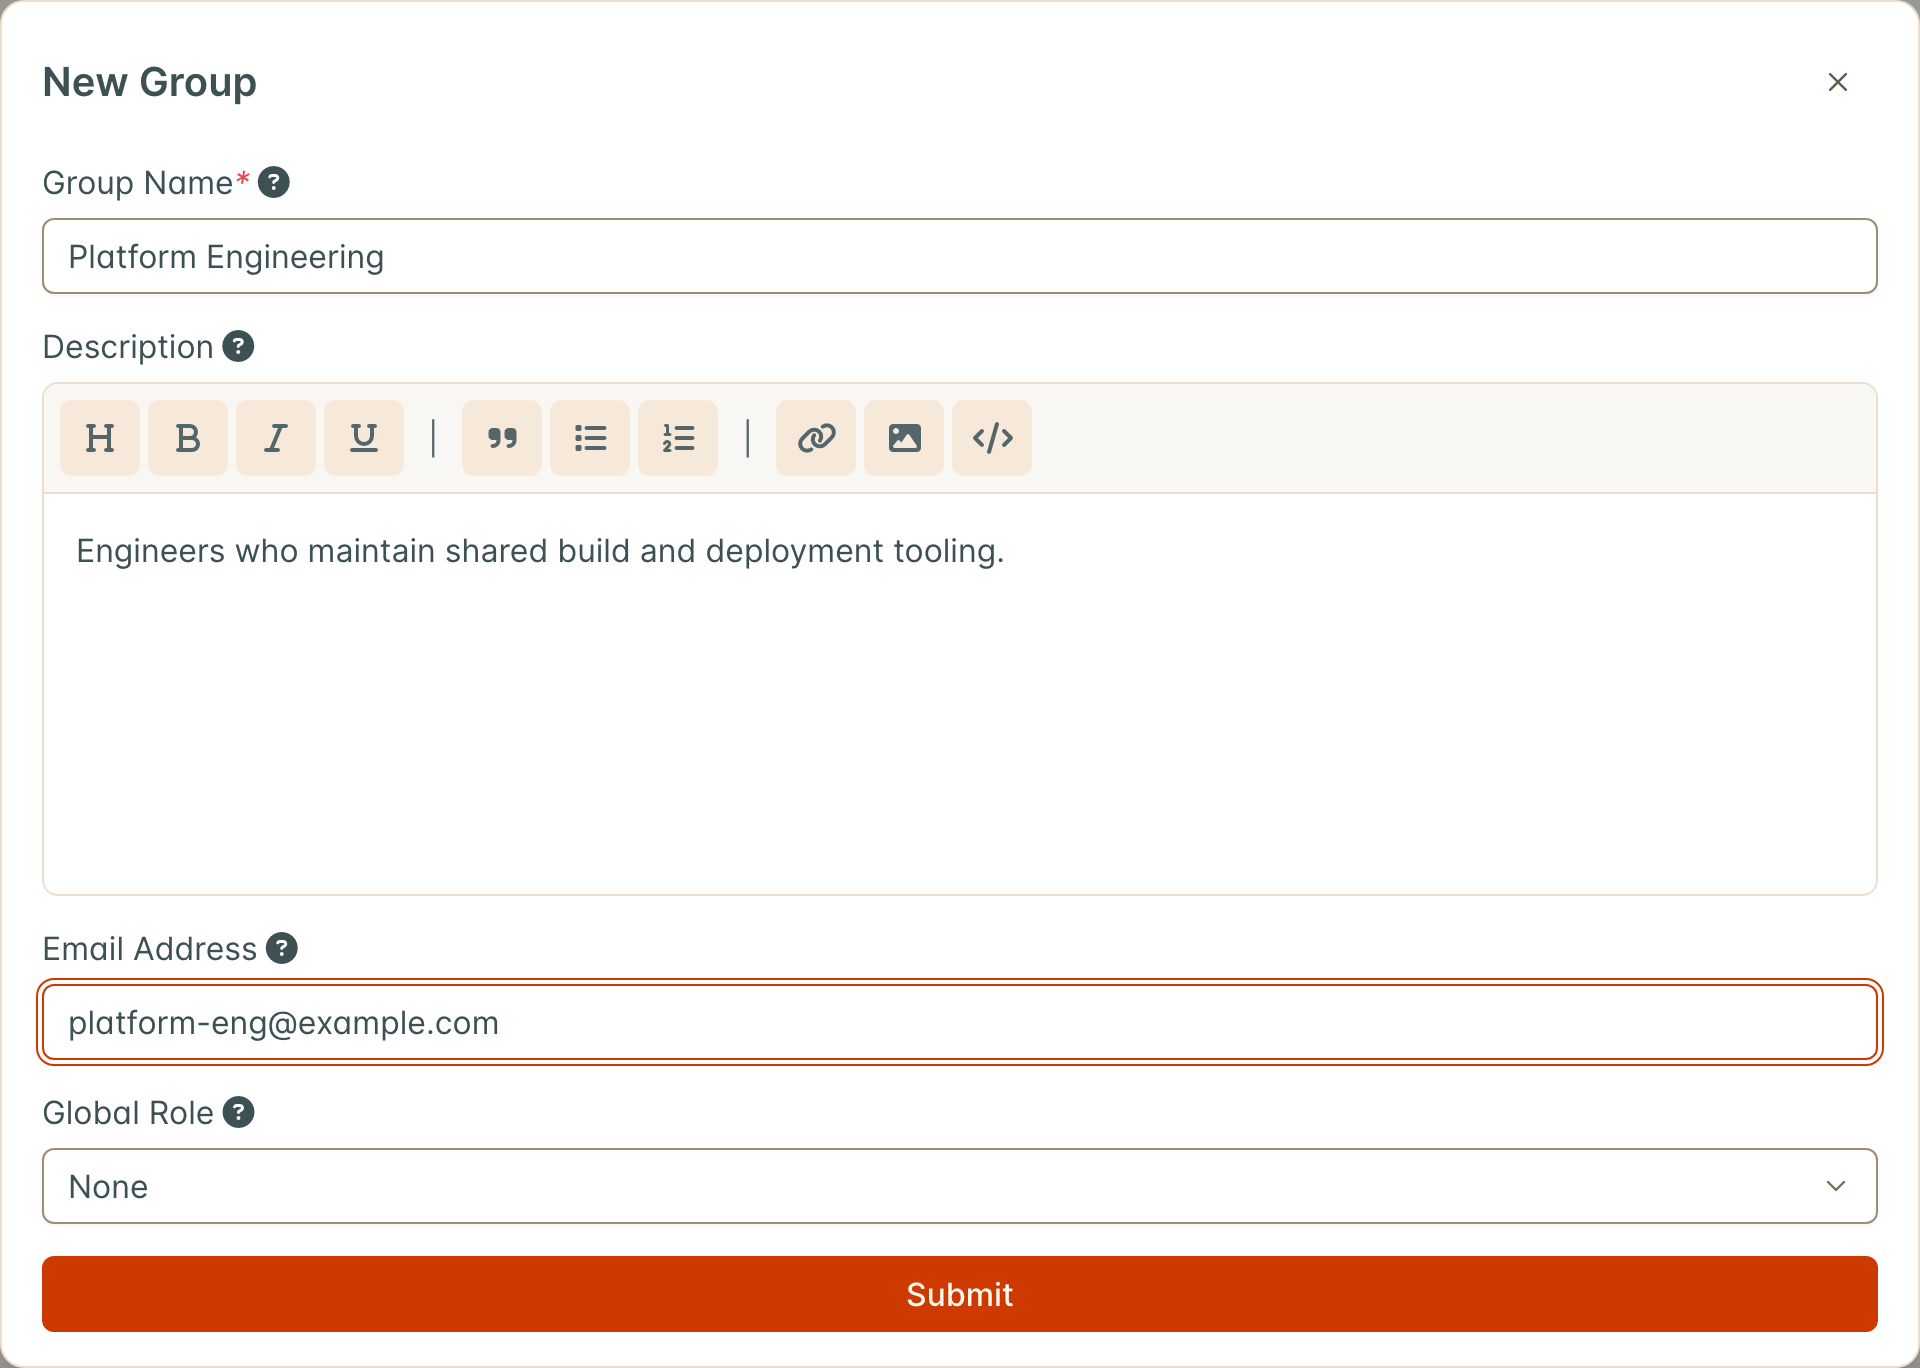
The account that initially creates a Group will have an Owner Role for the Group by Default.
To change a Group’s Name, Description, email address or Global Roles later, open the Group page, click the ⚙️ button in the top right corner, and select Edit Group.
Set an email address to receive reports
The Weekly Digest is a report on all Group-assigned Assets / Organizations. To have a weekly Digest sent out, enter the destination email address you wish to use in the Email Address field when you create or edit the Group. Group members will still receive notifications as usual.
Manage a Group’s Users
Group Membership is managed from the individual Group page, which you can select from the list in the Settings > Users & Permissions > Groups page. Click the highlighted Group Name to access the Group page that you wish to edit.
Any Member of a Group can open its page and see its Members. Adding, changing and removing Members needs a Group Role that allows it, such as Maintainer or Owner (or Superuser status).
Membership is managed from the Group’s Permissions window:
- On the Group page, click the ⚙️ button in the top right corner and select Permissions. This entry is hidden from Users who cannot add or remove Group Members.
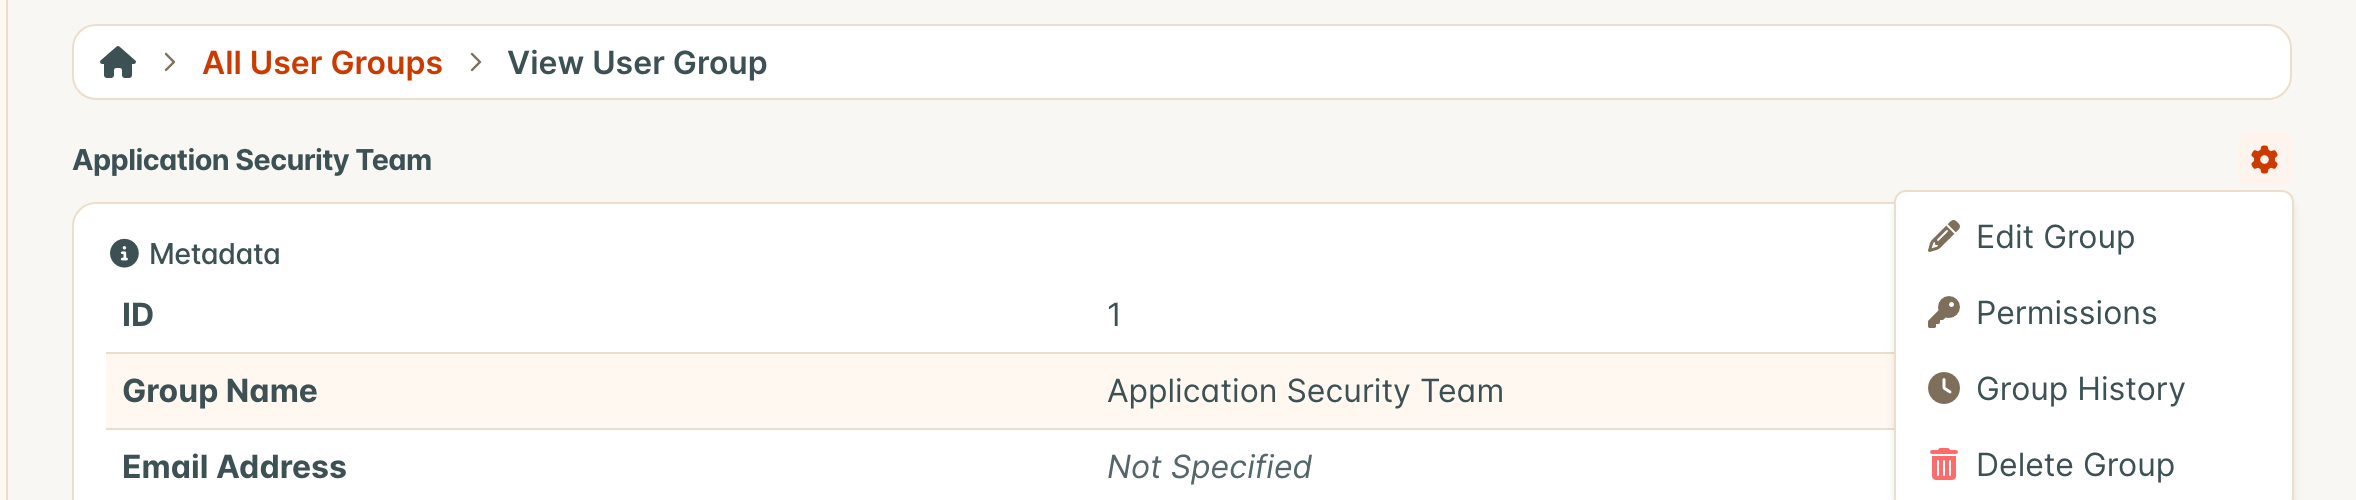
- The Permissions for Group window lists every current Member, along with the Role each one has in the Group.
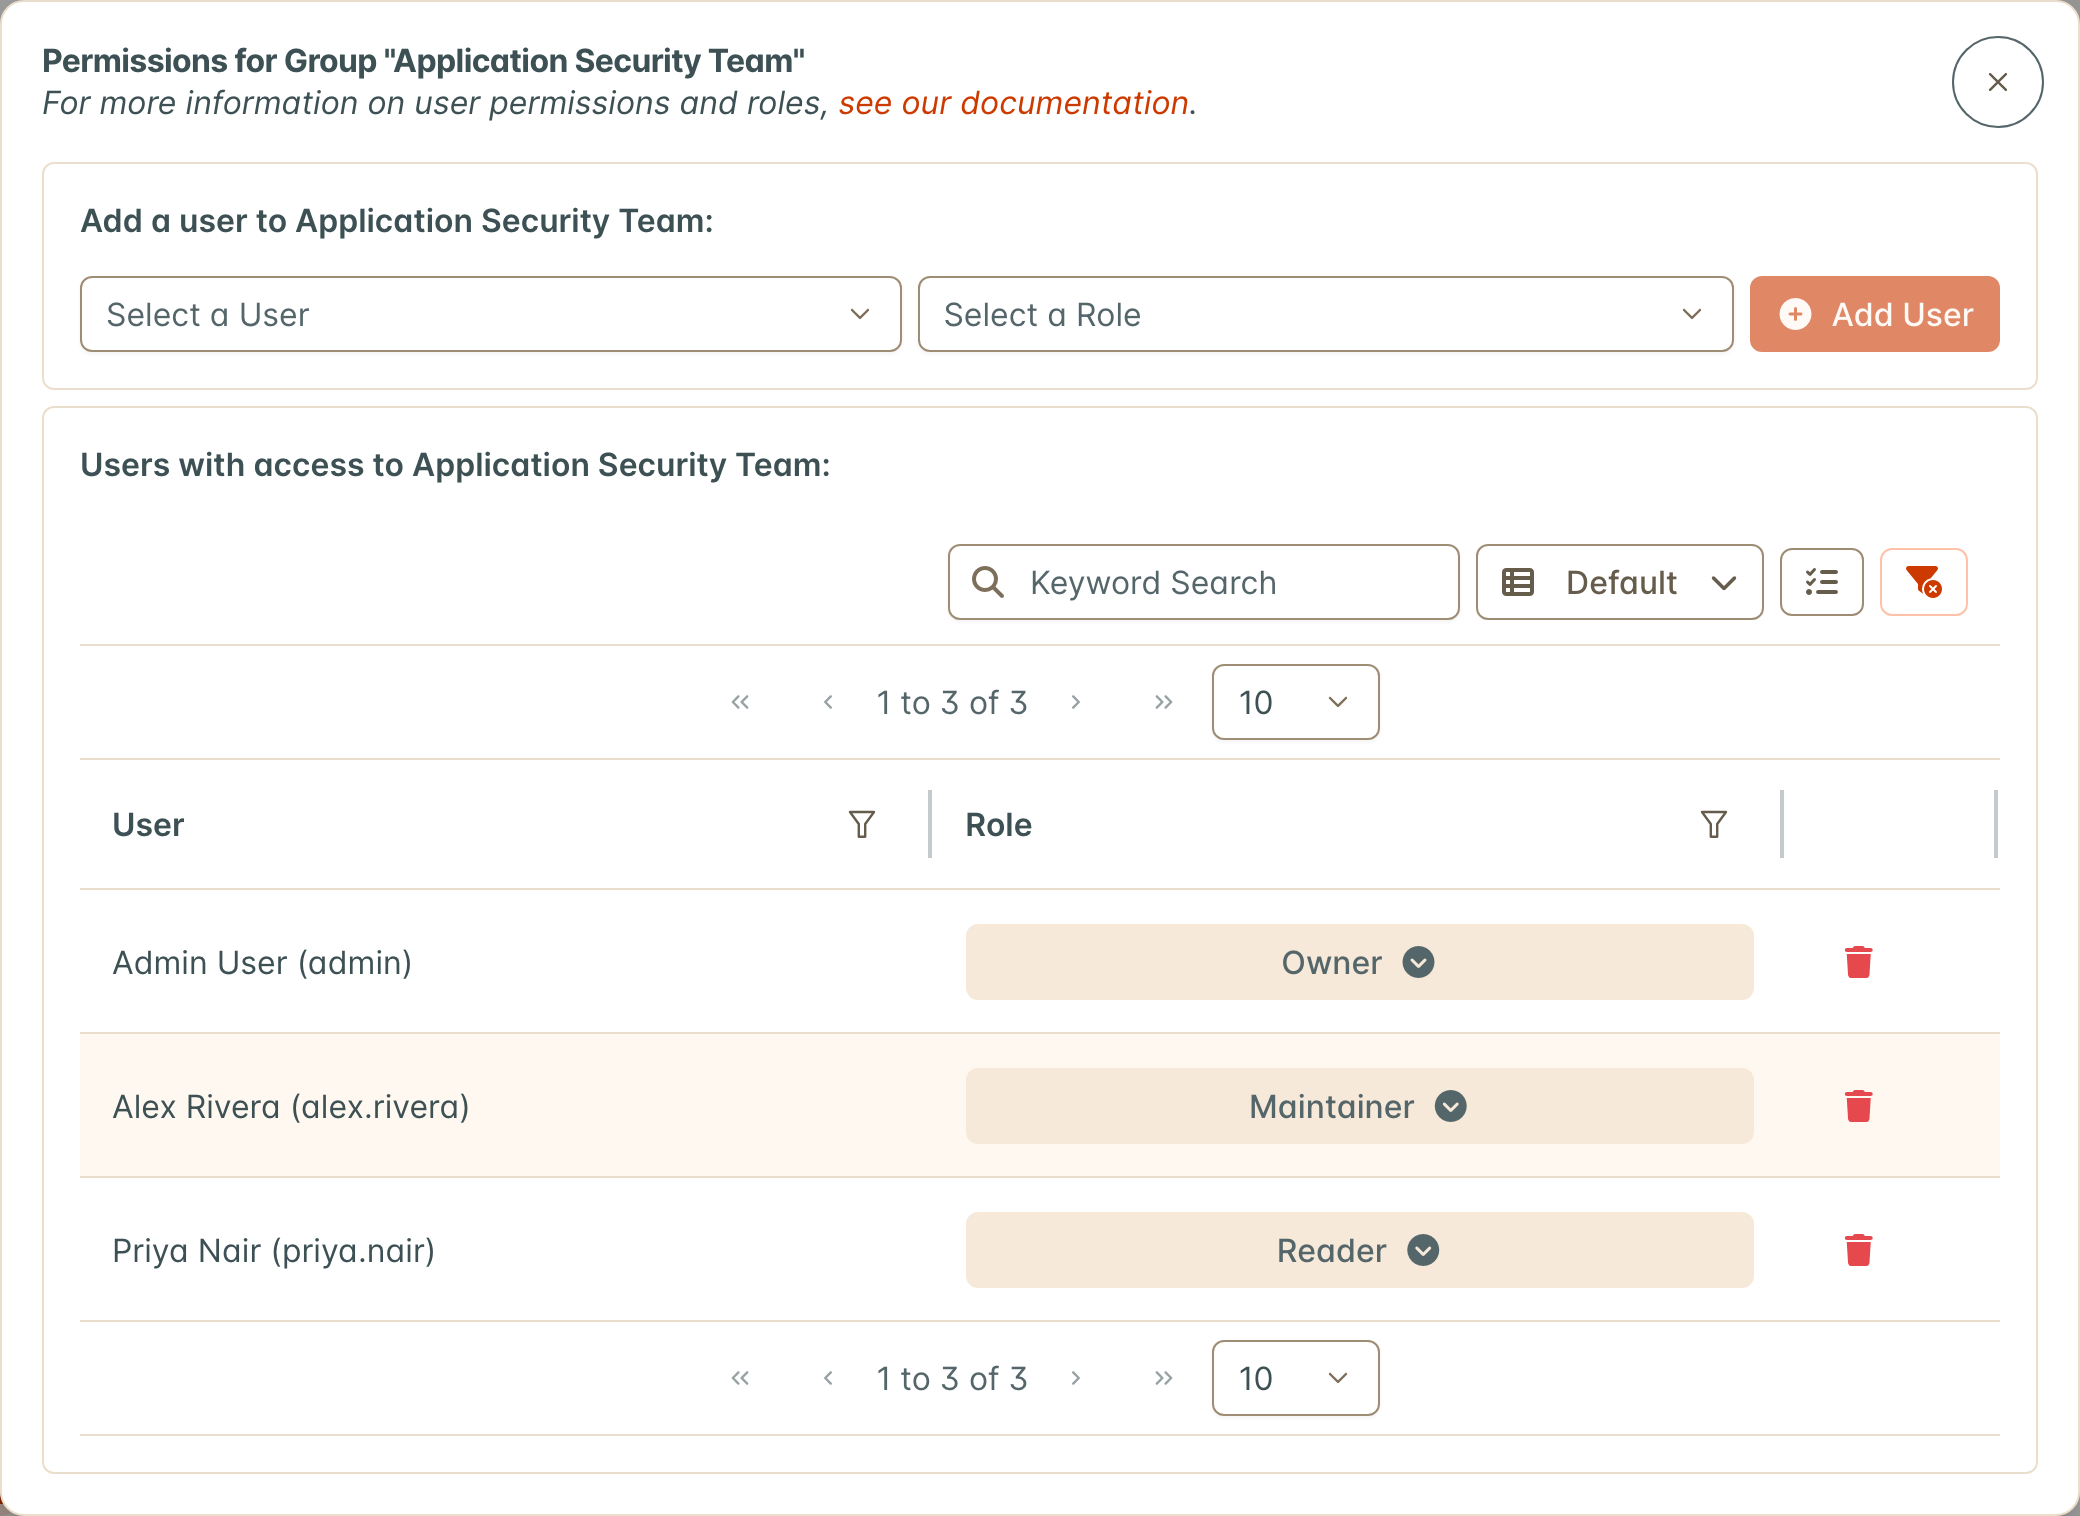
Add a User to a Group
User Groups can have as many Users assigned as you wish. All Users in a Group will be given the associated Role on each Asset or Organization listed, but Users may also have Individual Roles which supersede the Group role.
Users are added to a Group one at a time. To add several Users, repeat the steps below for each of them.
- In the Permissions for Group window, open the Select a User drop-down. Type in the search box to narrow the list, then choose the User you want to add.
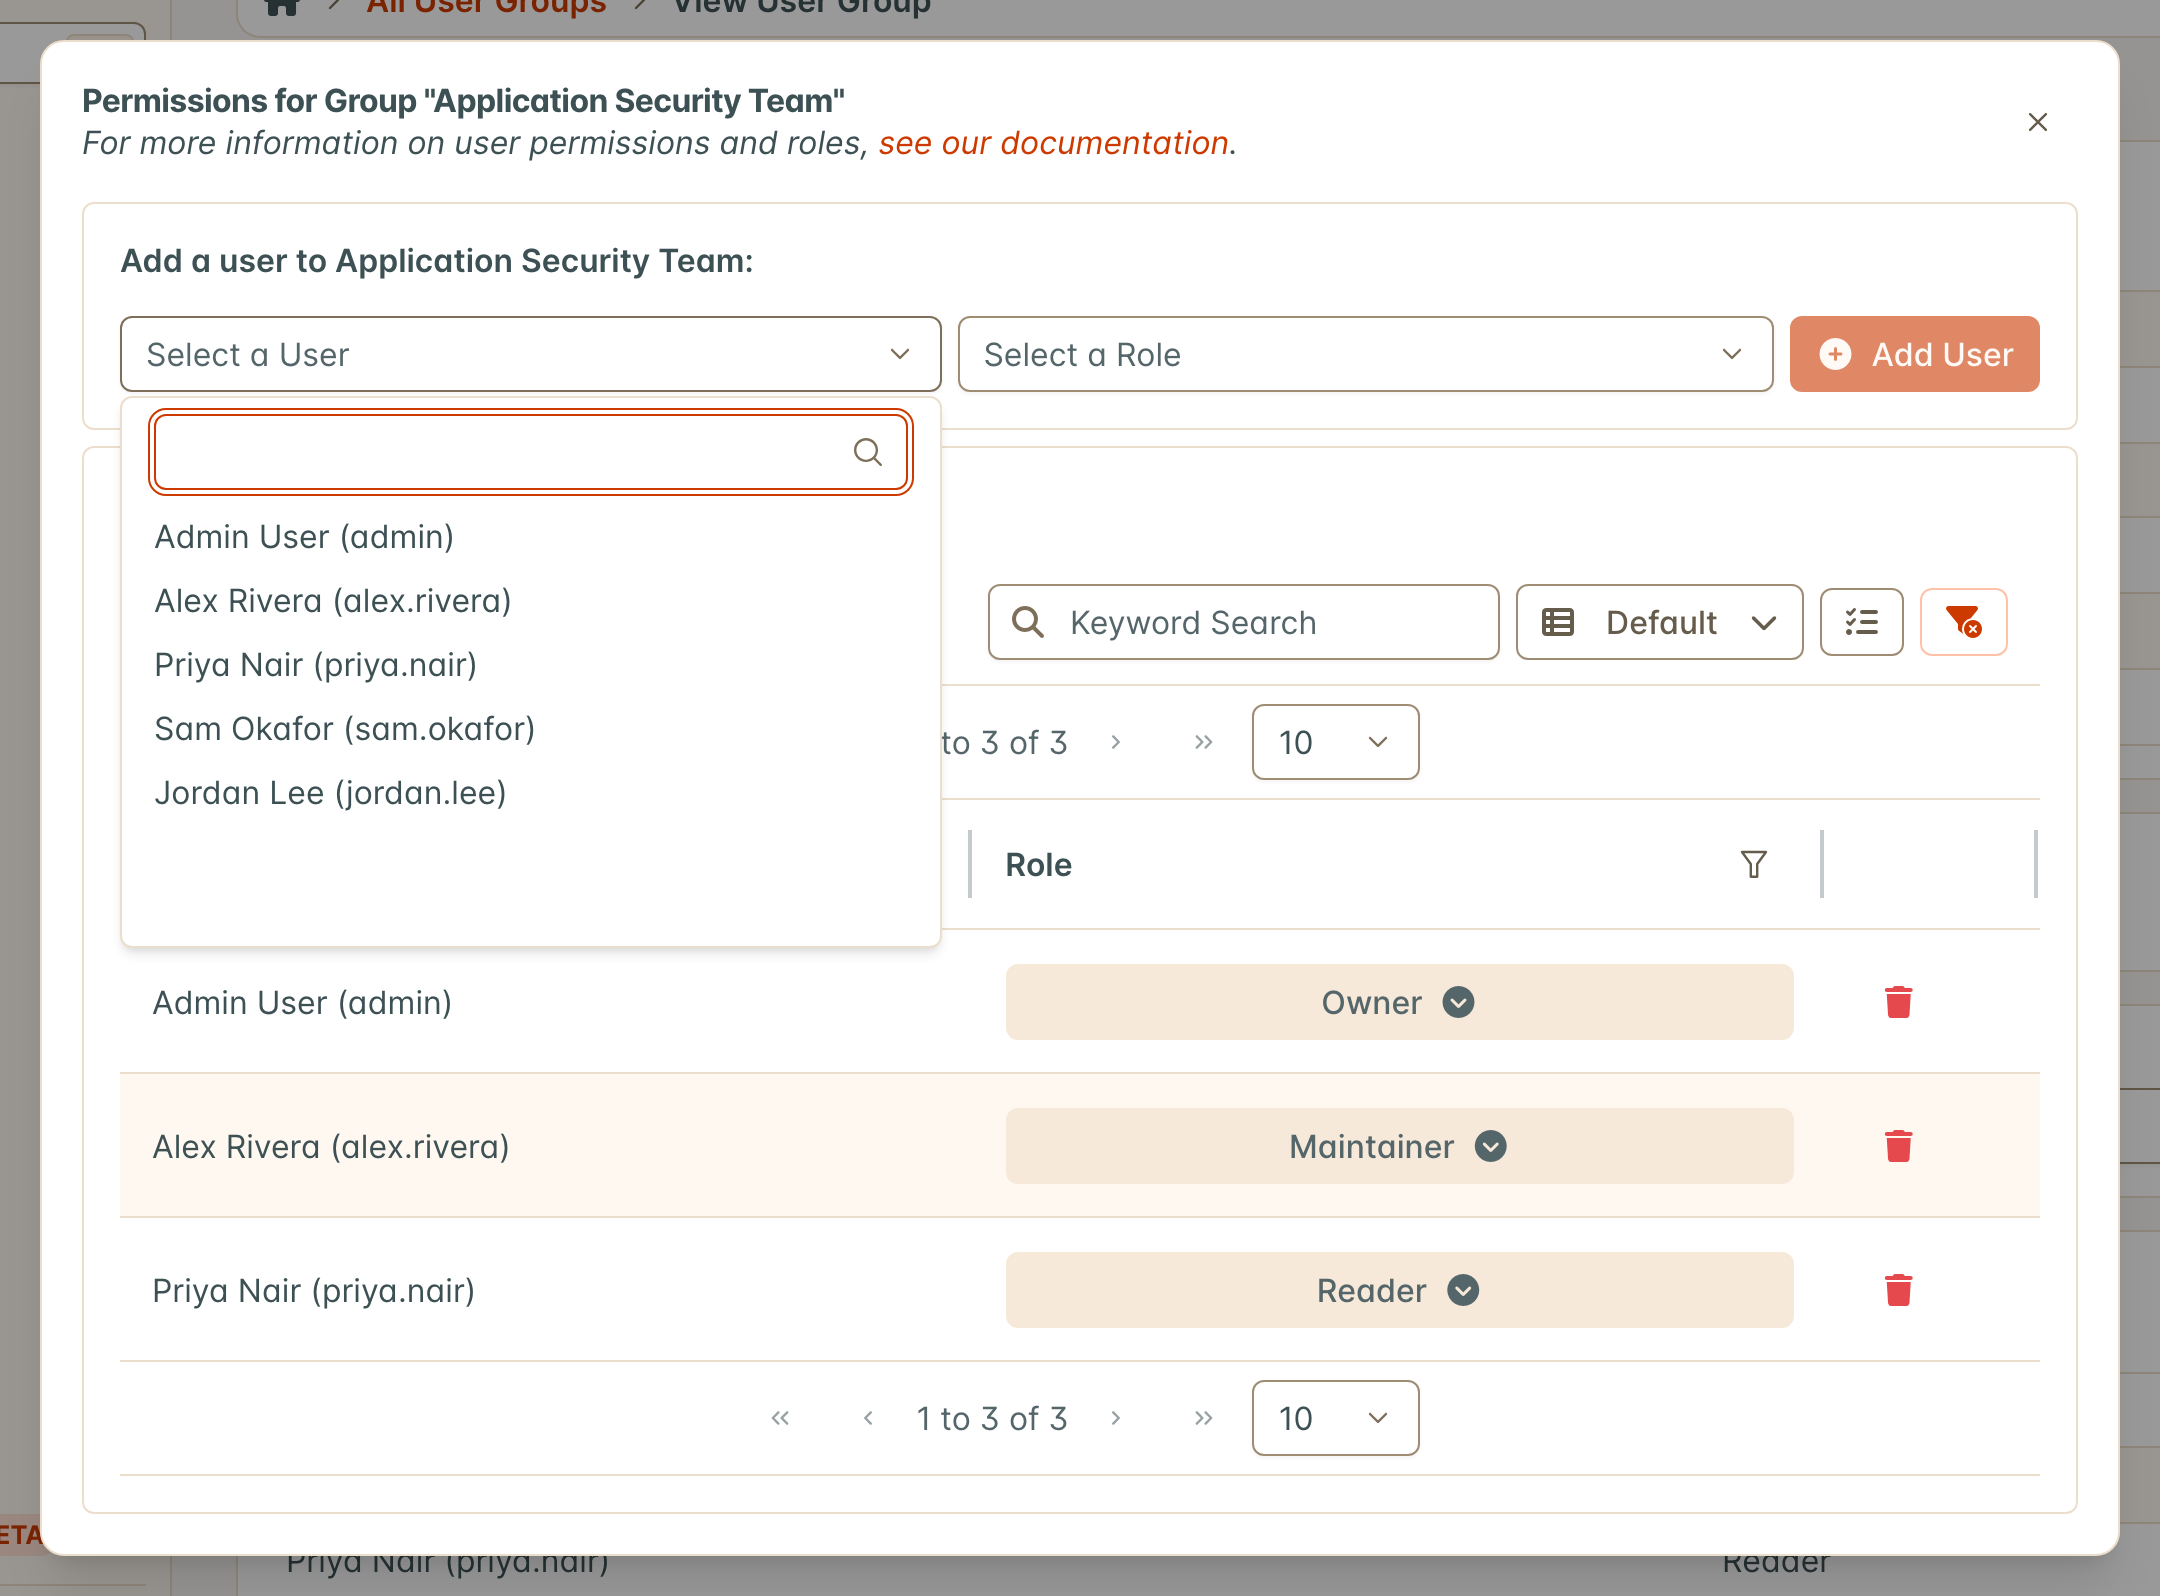
Open the Select a Role drop-down and choose the Group Role to assign to this User. This determines their ability to configure the Group.
Click Add User. The User appears in the Members table straight away, and the form is cleared so you can add the next one.
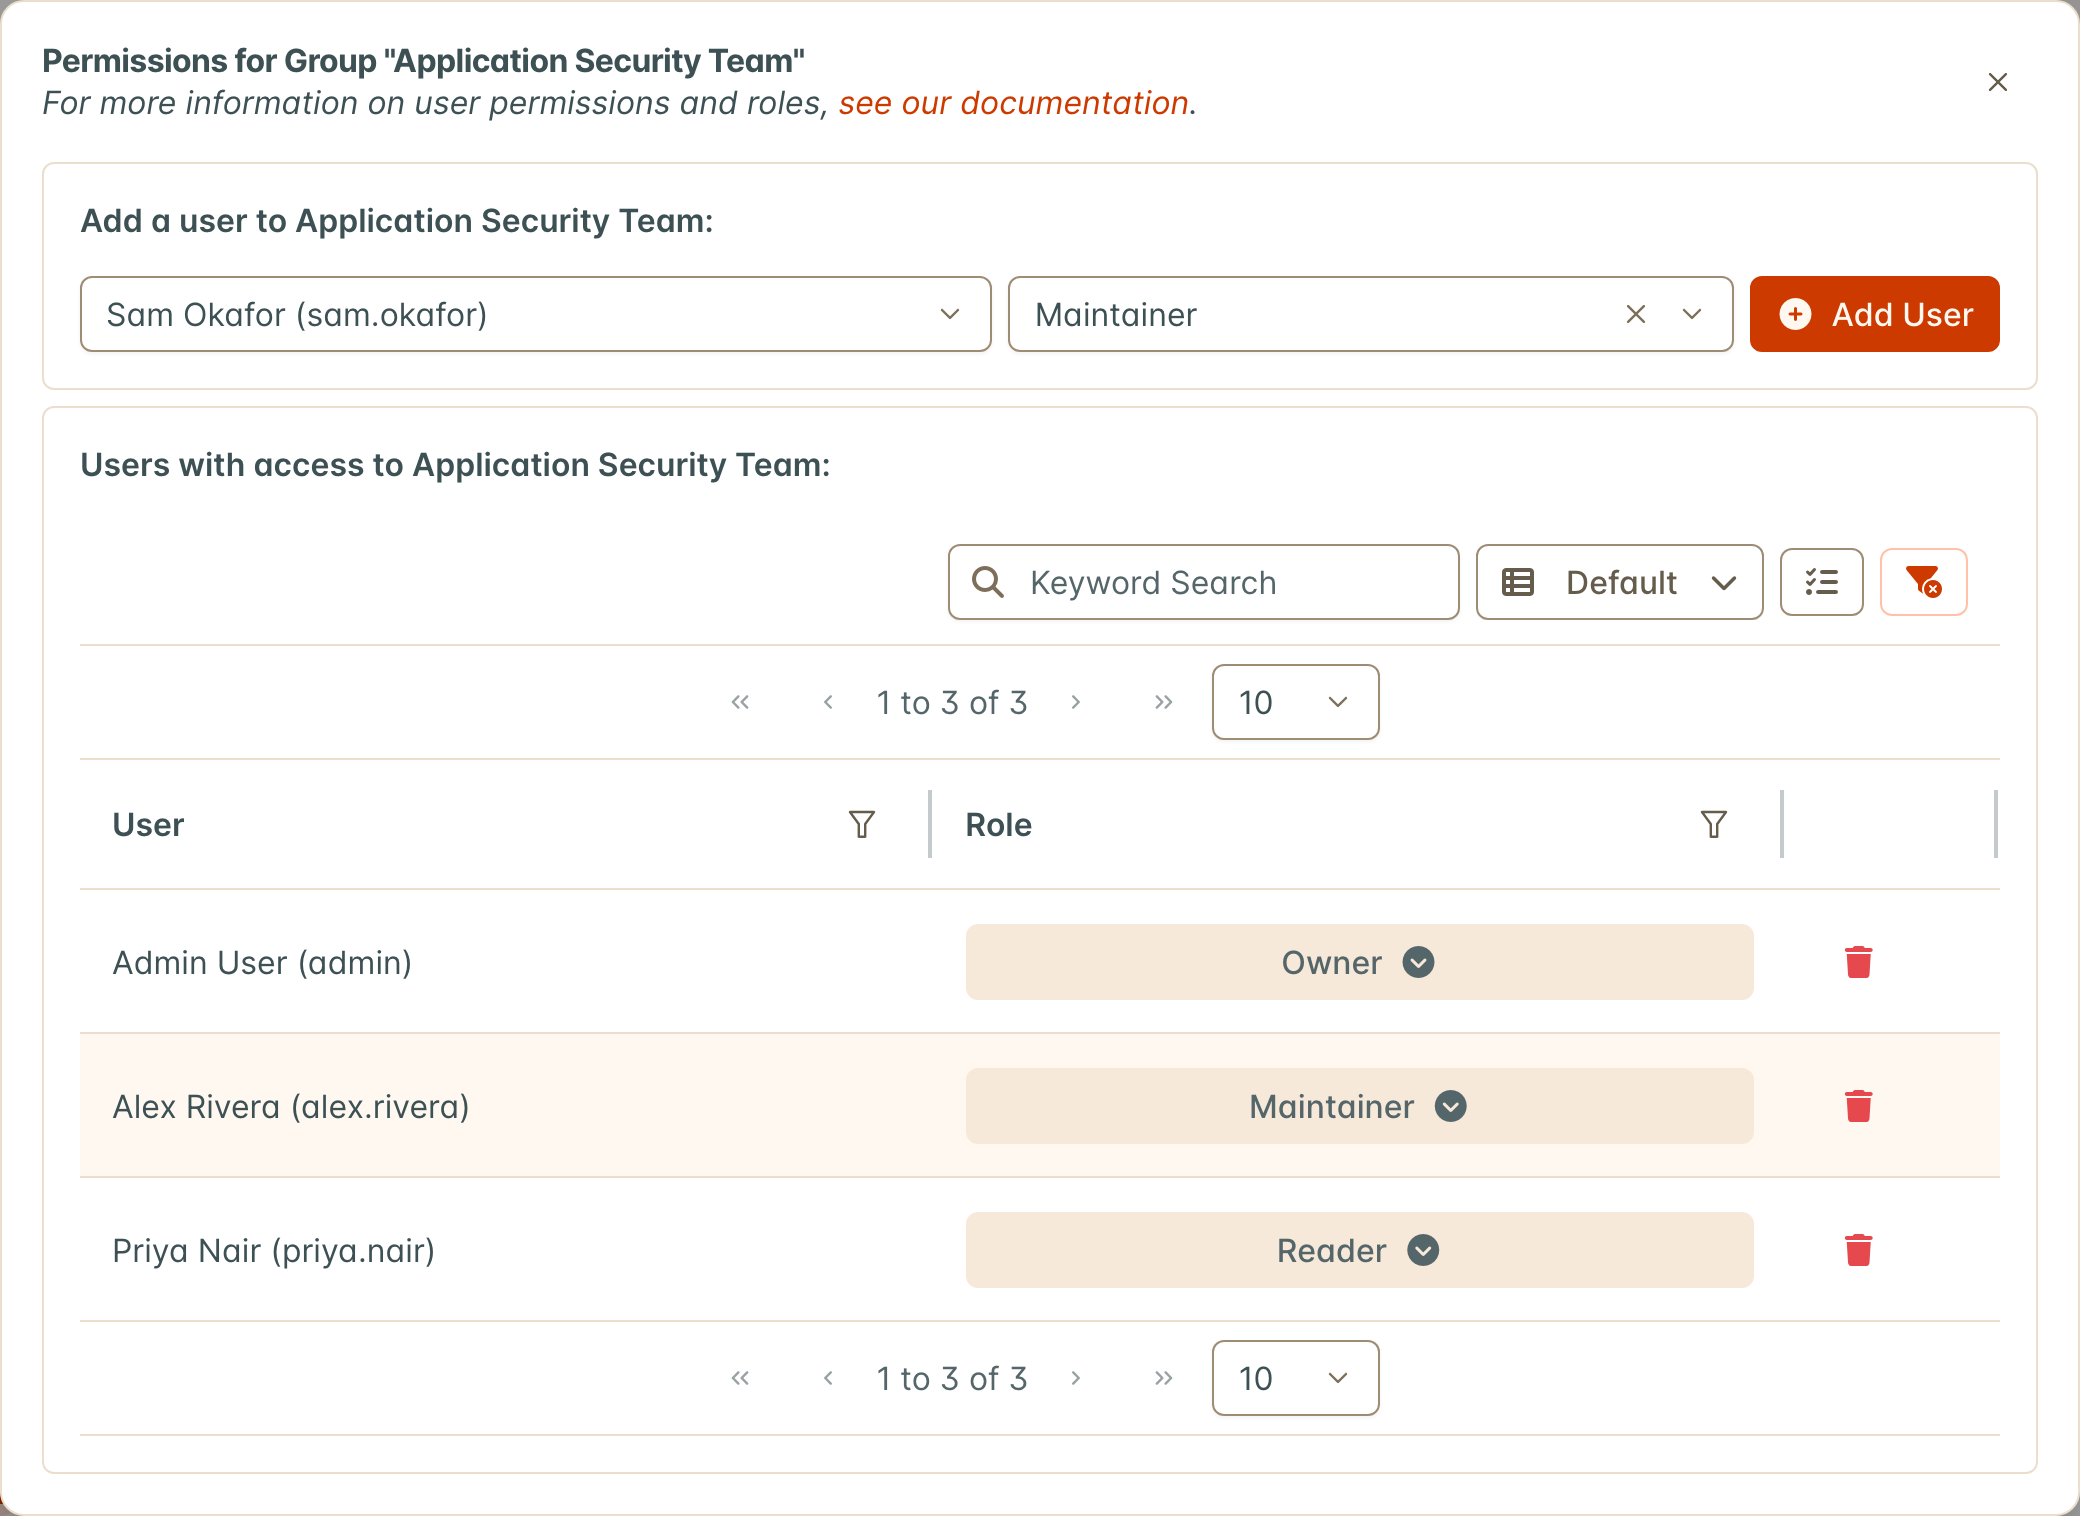
A new Member can open the Group’s page from Settings > Users & Permissions > Groups, which lists the Groups they belong to. Seeing every Group needs the View Group configuration permission.
Add a User to Groups from the User page
You can also add one User to several Groups at once from that User’s page, which is often quicker when onboarding someone.
Navigate to Settings > Users & Permissions > Users and open the User.
In the card listing the Groups the User can access, click Add to Group. The button is shown to Superusers and to Users who can manage the Members of at least one Group.
In the Add to Group window, open the Groups drop-down and choose one or more Groups. Only Groups whose Members you can manage are listed, and Groups the User already belongs to are left out.
Open the Role drop-down and choose the Group Role the User will hold in each selected Group. The Owner Role is offered only when you can grant it in every selected Group.
Click Submit. The new Groups appear in the card straight away.
If some Groups accept the User and others refuse (for example, because your Role in one of them does not allow adding Members), the accepted Memberships are saved, the window stays open, and a message lists each refused Group with the reason. Change the selection or the Role and submit again, or close the window.
To take a User out of a Group from the same card, click the “⋮” button at the start of the Group’s row, select Remove, and confirm. The User’s access through that Group ends immediately. Removing a Membership with the Owner Role takes the same permission as granting it.
Add Users through the API
If you need to add a large number of Users, you can also create Group Members through the API. Send one POST request per User to the dojo_group_members endpoint, with the group, user and role of the new Member. The role is the numeric ID of the Role, which you can look up on the roles endpoint.
Edit or Remove a Member from a User Group
In the Members table of the Permissions for Group window:
- Change a Role: click the Role shown next to the User’s name and select a different Role from the menu (for example, from Reader to Maintainer or Owner). The change is saved as soon as you pick the new Role. Changing or removing a Member who holds the Owner Role takes the same permission as making someone an Owner, which by default only Owners and Superusers hold.
- Remove a Member: click the 🗑️ button at the end of the User’s row. This removes a User’s Membership altogether, and takes effect immediately, without a confirmation prompt. It will not remove any contributions or changes the User has made to the Asset or Organization.
Manage a Group’s Permissions
Note that only Superusers can edit a Group’s permissions (Asset / Organization, or the Global Roles that carry its Configuration Permissions).
Add Asset Roles or Organization Roles for a Group
You can register a Group on as many Assets or Organizations as you wish, with a different Role on each. A Group is added to an Asset or Organization from that Asset or Organization, rather than from the Group page. The Group page lists the result, under the Organizations and Assets the Group can access.
Open the Asset or Organization you want the Group to have access to, click the ⚙️ button in the top right corner, and select Permissions.
In the Permissions window, select the Groups tab at the top. The Users tab beside it is where individual Users are given a Role on the same Asset or Organization.
Open the Select a Group drop-down and choose the Group.
Open the Select a Role drop-down and choose the Role that you want all Group members to have regarding this particular Asset or Organization.
Click Add Group.
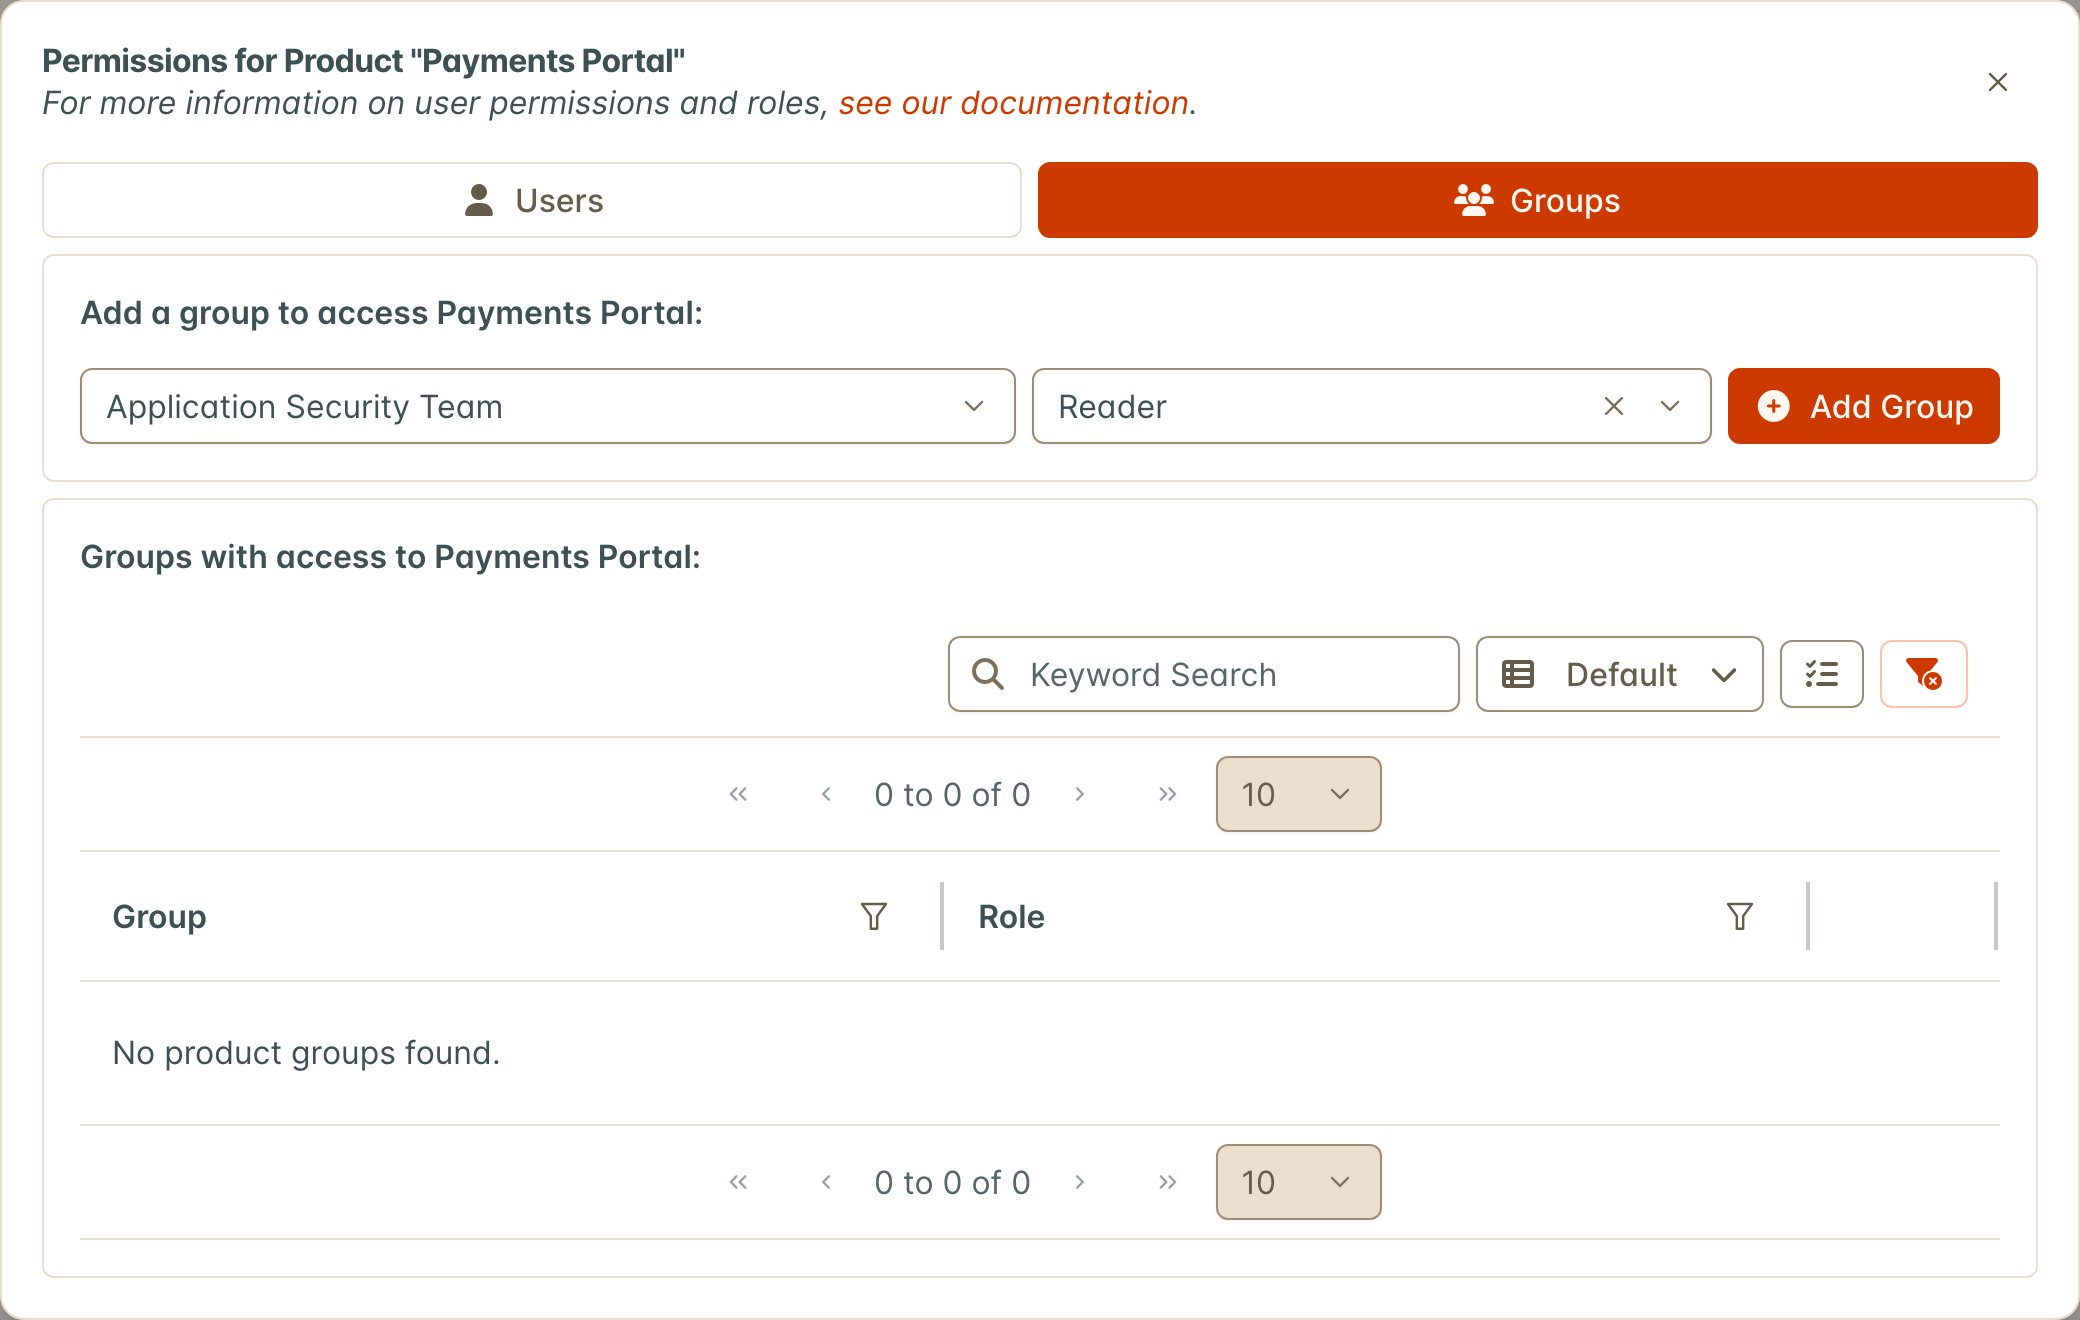
Groups cannot be assigned to Assets or Organizations without a Role. If you’re not sure which Role you want a Group to have, Reader is a good ‘default’ option. This will keep your Asset state secure until you make your final decision about the Group Role.
As with Group Members, a Group’s Role on an Asset or Organization can be changed from the Role shown in its row, and the Group can be removed with the 🗑️ button.
Depending on your instance’s settings, Assets and Organizations may be labelled Products and Product Types in the interface. They are the same objects.
Assign Configuration Permissions to a Group
If you want the Members in your Group to access Configuration functions, and control certain aspects of DefectDojo, give the Group a Global Role that carries those Configuration Permissions. Every Member of the Group then holds them.
- On the Settings > Users & Permissions > Roles page, create a Role for the settings pages (or open one that already carries them) and enable the rows you want in its Configuration Permissions table. See Custom Roles.
- Open the Group, choose Edit Group from the ⚙️ menu, and add that Role under the Group’s Global Roles. The Group’s other Global Roles stay as they are.
The Group page’s Configuration Permissions card shows the result. Only a Superuser can grant Configuration Permissions this way.
Defaults
With Access Administration on (Pro), Settings > Defaults holds the defaults Members start from. It has two tabs: Instance Defaults (the Restrict Layout Customization switch, the Instance Landing Page, and an Instance Default for Dashboards, Page Layouts, Sidebar Presets and Table Views) and Default Profiles.
Default Profiles
A Superuser defines what Members start with as Default Profiles on Settings > Defaults > Default Profiles, and each Group picks one, or a profile is assigned to a user directly (see Assign a profile to a user). Many Groups can share one profile, so a large instance needs only a handful of profiles rather than settings on every Group.
The ranked list
The Default Profiles tab lists every profile in rank order, with how many Groups and how many Users use it (users it is assigned to directly) and its layout setting. Drag a row by its handle to change its rank. The order saves at once.
The list has three filters: Search (name or description), Layout Customization, and Assignment (Assigned to Groups, Assigned to Users, Not Assigned). While a filter is on, rows cannot be dragged to change the rank; clear the filters to rank.
The rank settles conflicts. When a Member belongs to several Groups with different profiles, each default comes from the highest-ranked of those profiles that sets it. Profiles do not combine: for each setting, the first profile in the resolution order that sets it wins, rather than a union of everything the profiles set. There are no numbers to pick, so two profiles can never claim the same rank.
Click New Default Profile to create one, or a profile’s name to edit it. Deleting a profile clears it from every Group and User that uses it, and they fall to their next profile. The delete dialog says how many are affected.
A profile that sets nothing decides nothing: its Members fall through to their next profile. It can still be saved; the form warns above Submit.
The row menu of a profile has Assign to Groups (Superuser only). Pick any number of Groups and click Submit. If any picked Group already uses another profile, the form lists every such Group with its current profile and asks you to check Replace Their Profiles before you submit again.
What a profile sets
A profile’s form is one full-width card per area. Links on the cards go to Instance Defaults.
- Profile: its Name (unique), Layout Customization and Description. Layout Customization is Inherit, Allow or Restrict to Selected Layouts. See Restrict to Selected Layouts.
- Navigation: the Landing Page Members open after signing in (see Landing Page), with Lock Landing Page beside it to make it binding so Members cannot choose their own, and the Default Sidebar Preset (see Sidebar Presets). Lock Landing Page needs a Landing Page and is cleared when the Landing Page is cleared.
- Dashboards: the Default Dashboard Members open the Dashboards page with.
- Table Views: for each list, the saved view it opens with (see Customizing Tables).
- Page Layouts: for each View page, the page layout it opens with.
- Forms: the Form Configuration Members’ create and edit forms follow.
Only dashboards, sidebar presets, page layouts and saved views shared with everyone can be chosen, so every Member of every Group using the profile can open them. Leave a field empty to set nothing for it; Members then fall to their next profile, or to the Instance Default.
Click Submit to save the profile. Members pick up the change on their next page navigation.
Restrict to Selected Layouts
The instance-wide Restrict Layout Customization switch lives on Settings > Defaults > Instance Defaults (the Layout Customization card). A profile can override it for its Members, in either direction:
- Inherit (the default): the profile follows the instance setting.
- Allow: Members create, edit and choose their own dashboards, page layouts, table views and sidebar presets, even when the instance setting is on.
- Restrict to Selected Layouts: Members cannot create, edit, duplicate or delete any of those layouts. They can switch among the layouts the profile lists.
Under Restrict to Selected Layouts, the Navigation, Dashboards, Page Layouts and Table Views cards show an Also Allowed field next to each default. Members may switch between the default and the layouts listed there: the dashboard picker, the page layout switcher, the table Views menu and the sidebar preset on the User Profile page offer only those (picking a preset there also needs the Sidebar Preset View permission). An area with nothing listed pins Members to its default, as the instance switch does.
The same order that resolves every default decides this: the Default Profile assigned to the user directly, then their Groups’ profiles in rank order. The first profile that sets Allow or Restrict to Selected Layouts decides, and the layouts Members may switch among come from that same profile. Profiles set to Inherit are skipped. When none of a Member’s profiles sets either, the instance setting applies. Lock Landing Page resolves the same way. Superusers are never restricted.
Set Group Defaults
The Default Profile tab on a Group’s page shows the Group’s Default Profile. A Superuser picks the profile from the Default Profile list and clicks Submit; clearing it means the Group sets nothing. Below the picker, a card named for the profile lists what it sets, area by area, with Locked beside a locked landing page and an Edit Profile link for a Superuser.
Anyone else who can view the Group sees the tab read-only.
Assign a profile to a user
A Superuser can assign a profile to one user directly. Open the user’s page, go to the Default Profile tab, pick a profile and click Submit. A user has one profile. It comes before the profiles of the user’s Groups. There is no separate per-user lock: the assigned profile’s own Layout Customization and Lock Landing Page apply to that user. Superusers are never restricted.
Which default a Member gets
Every default resolves the same way:
- The Member’s own choice. A restricted Member’s own dashboard, page layouts, table views and sidebar preset are set aside; their landing page is not, since it is not a layout, unless the profile that sets it has Lock Landing Page on.
- Otherwise, the Default Profile assigned to the user directly, if it sets it and they can open it.
- Otherwise, their Groups’ Default Profiles in rank order: the first one that sets it, and that they can open, wins. Profiles do not combine.
- Otherwise, the Instance Default: the Instance Landing Page on Settings > Defaults > Instance Defaults, the Instance Default dashboard, page layouts, sidebar preset and table views, and the default Form Configuration. The Instance Default dashboard, page layouts and table views apply while customization is restricted, as they always have.
- Otherwise, the built-in behavior (Home, the starter dashboard, the full sidebar, the stock forms).
A Member whose own choice is empty can see where a value comes from on their User Profile page, for example “From Security Leads: Findings > All” or “Instance Default: Findings > All”. A value that comes from a profile reads From followed by the profile’s name, or Set by followed by the profile’s name when it is locked.
When a chosen item is deleted
Deleting a dashboard, sidebar preset, page layout, saved view or Form Configuration that a profile lists removes it from the profile, and Members fall to the next default. The delete dialogs for sidebar presets and Form Configurations name the profiles that use them.
Default Profiles through the API
Profiles are read and written at /api/v2/default_profiles/ with a Superuser’s API token, and ranked with POST /api/v2/default_profiles/reorder/ and {"ids": [...]} listing every profile once, highest first. layout_customization takes "inherit", "allow" or "restrict". Each area is a default_* id plus an allowed_* list (table_views and page_layouts hold one entry per list or page, each with default and allowed); the default is always allowed and is not repeated in the list.
A Group’s profile is read at /api/v2/dojo_groups/{id}/defaults/ (permission to view the Group) and set with PUT and {"profile": <id>} or {"profile": null} (Superusers only).